Tag Archives: design

Surface Design, Botanical #1


After taking some general online courses on Surface Design, I came upon this one by Bonnie Christine on Skillshare.  I started this project in late February, and kept a lot of detailed notes on my progress.  Can I tell you how much I've learned in the videos from Bonnie Christine's class?  It's crazy!  I have been using Adobe Illustrator for over 10 years, and I thought I knew my way around, but I learned so many new tricks in this class that I hadn't ever even thought to try!

I was humbled by the class and how much I have left to learn about design and my favorite software.

Also, as you know, I've spent all of March working on MATS projects.  So, in between my projects and the fast-pace of each week, I've been tweaking and applying my new skills to this pattern repeat.

Here's what I did for the class:


And here's the diary of my entire process...
February 23, 2015
Choose a word, short phrase... Bloom?  Blossom?  Botanical?  Not sure yet, but I think I'll go with one of those.
Favorite things in nature... red squirrels, muscari azureum (grape hyacinths, and also bluebonnets and bluebells), new leaves, buds of flowers, dogwood blossoms, peonies and round blossoms, cacti, lithops & succulents, daffodils and narcissus, orchids, etc.  Bright saturated colors.

1 colorful photograph (for palette) & 3-5 photographs (thematically related, to draw from) -- See mood board labeled "Botanical #1".  I love this bouquet I found on Pinterest.  And, I found other beautiful photographs on several photography sites.  I'm personally not that great of a photographer and so I looked on Pinterest, Flickr, and used keywords of my favorite things to find inspirational photographs.  

Mood-board Photo Origins: I searched for the origins of the peonies bouquet, but to no avail.  The leaves, curled seed pod are from photographer Alan MacKenzie a very talented wildlife photographer.  The daffodils and muscari azureum on the top right of the moodboard are from Better Homes and Gardens magazine.  And the red squirrel is from Birds in Berlin blog.


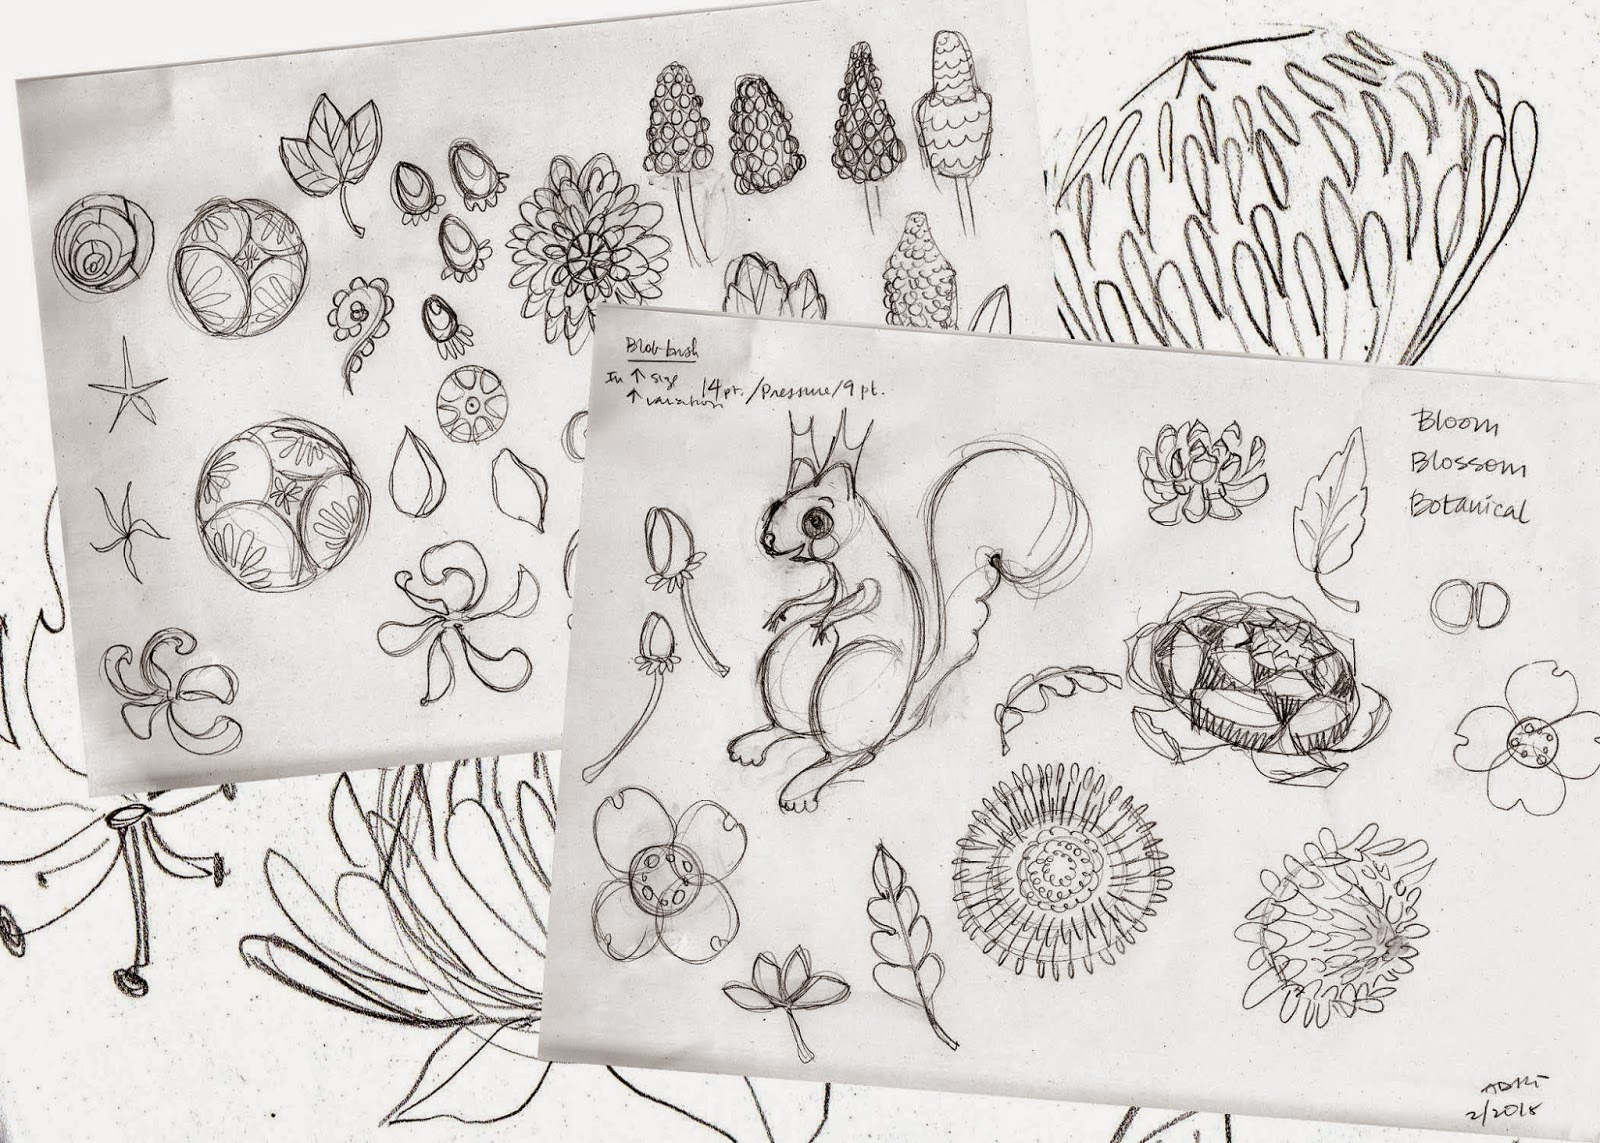
February 24, 2015: Choose 10 - 15 simple/med complex sketches  I'm thinking the squirrel, hyacinths, and the succulents will be my complex elements and perhaps I'll simplify everything else into 1 or 2 colors.  Maybe I'll use just the filled-in outline for some, and/or the line-art.  Time to play!

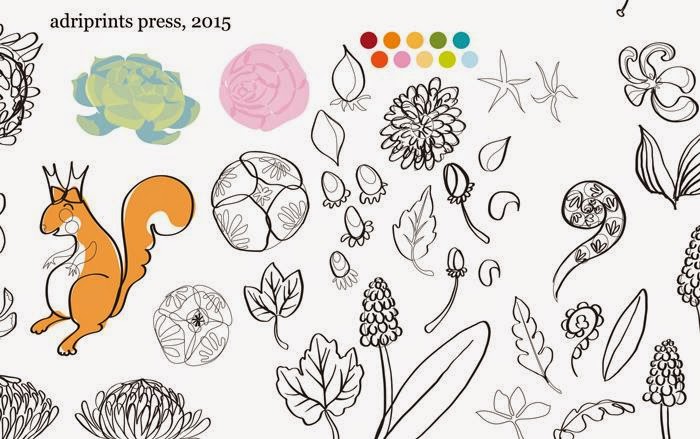
February 25, 2015: Digitizing the sketches
This was somewhat tedious, but in a zen-like way.  It's digital tracing using a bunch of different techniques.  Some I used my own custom brushes in Illustrator, then expanded the stroke.  Others I used the blob brush as instructed in the videos.  Then Others I used a black marker and filled in areas using my tracing table, and then scanned, and did "live trace".
March 1, 2015: Simple Repeat
Alright.  I have to say it.  This class is ROCKING my world!  I just tested my simple pattern repeat, and using my palette, I "recolored" the artwork.  To my amazement and wonder, I now have 3 colorways that I absolutely love.
What do you think?

March 4: Complex Repeat WIP  
Here's where I am with the motif for the complex repeat.  I've struggled a bit to get it where I want because one of my goals was to add texture to my work.  So, I made some textures, scanned them, etc. and got them to be vector-friendly.  Then, I learned that you can't make a pattern repeat from something with a pattern in it... so be sure to expand all your elements before trying to make a pattern from it!  I learned that after a while of trying to drag it into the swatches panel with no success.  Oops!  Lesson learned!
March 18, 2015: Complex Repeat WIP The past few weeks I've learned a few things about repeats.  I bought and read several of the books that Bonnie recommended (mastering the art of fabric printing and design & the field guide to...).  I also learned some new work-flow for Photoshop and back to Illustrator in order to add texture and correct alleys and holes  and too easily recognizable repeated motifs.

Also, I went back and re-inked some of the original motifs that felt a bit lacking, and here are the newly inked icons.

March 30, 2015 And, if you look at the version I submitted, you'll see the versions above were the ones I used.  

The next steps for this project:  
  • add more geometric/abstract patterns
  • refine the color palette
  • find a fabric manufacturer who would like to work with me to print the collection!


MATS A, Week 4 Wall Art

This week was a very freeing experience for me.  Before this year's Bootcamp and MATS class, I hadn't done a proper painting in forever.  I was a scenic artist for half of my 20's and had painted giant scenic backdrops, kitschy scenic flats, furniture, design illustrations, etc.  And, this week felt like I was taking all that experience, plus a distinct perspective as an adult and I was able to just let it flow.

Here is the final mocked up in a frame...


The assignment called on several specific requirements - choose a pair of colors based on our zodiac sign, use collage, include text.  My sign corresponded to the colors pink & yellow. I was really excited about pink & yellow, but truthfully, I would have been excited no matter what the color combo.  I love getting direction and parameters to work within, and I also love color.  Yay color!


Next we had to collect 2-D and smallish 3-D items that were in our colors, a color scavenger hunt!  My studio is lightyears beyond the mess that it was last year.  I've tossed so much, and even then, I managed to have no shortage of things in these colors.

button collection and swatch for gloves WIP
ancient i-pod and lovely silks
And, once I figured out how I was gonna work, I was off to the races.  I didn't have a large enough canvas so I worked on five little canvases that I would seam together digitally.  Dekopatch, gesso, matte medium, acrylics, markers, pens, post-it notes, paper, rice paper, fabric, buttons, tissue paper, cardboard, and stamps... to name some of the things I used to make this piece.  While things were drying, I rotated the canvases and made linocut plates.  I had a really good flow going, and I was listening to my fave tunes on the ancient i-pod.

lino cut and watercolor dots
The next part, the digital seaming, was a bit more tedious, but it allowed for a kind of freedom that I hadn't had before with paint.  The ability to "undo" is an amazing weight lifted off one's shoulders.  The fear of making the next mark is completely gone, and it was great!


This project was tons of fun, y'all.  Tons.

Picante Dirndl

When I was a kid, I loved comics.  I was a big fan of the "what-if" and alternate reality issues that comics would sometimes print.  This idea of "what if's" popped into my head as I posted about this past week's MATS Bolt Fabric Assignment, and it wouldn't let go.

What if... I did make a dirndl out of my own fabric?

I imagine it looking like this!  I used Burda's Dirndl Pattern 8448 as the basis for this visual mock-up.


I think that would be really unique to wear to Oktoberfest 2015!

Please note that I do not have any affiliation with Burda or their patterns, and I do not represent Burda or their parent company in any way.  Just an illustrator and DIY-er here.

MATS A, Week 1: Bolt Fabric

The first week of MATS (Make Art That Sells) Part A went really, really well.  I was so anxious and scared to begin with, but I felt right at home illustrating the mini, and then later the actual assignment.  My fellow classmates were super supportive, and their work is really great!  It's awesome to see what others are doing and it helps me to figure out what to tweak next.  I see how they handle certain elements within a design and it sparks a solution in me.  Lots of zeitgeist, enthusiasm, feedback, and visual inspiration!

I also like that the turnaround times are short in order to force me not to spin my wheels.  I have the tendency to overthink things if given too much time.  The deadlines of the course plus the unpredictability of the baby's toddler's schedule make for a nice sense of urgency that makes me productive!  This past Thursday night I turned in my final, and here's what it looks like...


This was the layout that I turned in, and I'd like to change certain elements moving forward, but I'm happy with the overall direction I chose.  Our mini theme was "pretty peppers and pyrex" and then the big assignment was "vintage kitchen" as the target niche.  I kind of tweaked the theme to "I love Tex Mex please join me in celebrating my love for enchiladas through the lens of 1972."

As many of you who know me already know, I lived in Texas for a few years and my husband is Texan.  His family live in the southwest and we visit nearly every year.  Here in Germany, Tex-Mex can be found, but it's not the same.  When I visit TX and NM, the food is something I enjoy very, very much (I nearly went with vintage + BBQ!).

Interestingly enough, living in Germany for so long seems to have rubbed off on me.  One of the coordinates ended up looking like one of my favorite traditional dirndl fabrics (the green/white one on the lower right).  I think it would be really cool to have a dirndl with chiles on the bodice or apron!!

Process
Mini: peppers n' pyrex
Original Mood-board


Roughs
first linocut in over 10 years!


To give you a breakdown of what I was working with, I scanned in my images and isolated roughly 80 to 90 individual icons. Once the additional category of "vintage kitchen" was given, I shopped among them for the most appropriate ones.  I had already digitized them, but not yet colored them.  Next, I added textures, finessed the little details... but there's always more to do.  If anything, I've already learned that.  The details make or break the illustration.

Thoughts on Week 1 Course Materials
I found the break-down of the assignment to be very helpful.  I love the act of chunking the work into tasty morsels, and so the structure of the class suits me well.  Most days we had a post to read, an interview to watch, skills to learn and/or industry tips and tricks to absorb.

The information given in the class materials is really specific and valuable.  This past week there were even additional workshop materials from the Art & Business of Surface Pattern Design course that I considered taking.  I think I'm in the right place because I already have a pretty good understanding of the technical aspects of making a repeat through my background experience with Illustrator and the Creative Live, Skillshare classes from Bonnie Christine and Elizabeth Olwen, and the books I read on pattern design.

But, the interview with an industry professional was invaluable.  So was the style analysis worksheet and Lilla's advice.  In short, I'm so glad to be taking this course.  It's exactly what I needed!

Review: Pick Your Stitch, Build Your Blanket

Review: Pick Your Stitch, Build Your Blanket post image

pyscover

First, the facts:

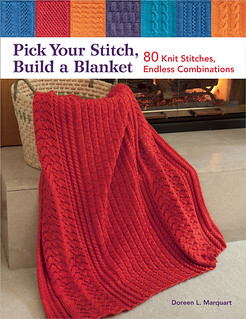
Title: Pick Your Stitch, Build Your Blanket: 80 Knit Stitches, Endless Combinations

Author: Doreen L. Marquart

Published by: Martingale Press, 2015

Pages: 98

Type:

Chapters:

Introduction
Getting Started
The Blocks–80 Stitch Patterns
Sampler-type Afghans
Single-Pattern Afghans
Vertically Patterned Afghans
Horizontally Patterned Afghans
Knitting Basics
Assembly Basics
Useful Information
Stitch Index

KS: Pick Your Stitch, Build Your Blanket

The In-Depth Look:

Tell me, how do you feel about stitch dictionaries?

Personally, I love them, because I not only enjoy browsing the variety of patterns and textures that knitters have created out of knits and purls, but I love finding just the right one to knit into a sweater or a blanket.

Except, not everyone knows how to do that—which is what inspired Doreen L. Marquart to write this book.

She says in her introduction that she often recommends the 365 Knitting Stitches a Year Perpetual Calendar to the customers of her yarn shop, but that, “a vast number of knitters don’t know how to adapt and use these stitch patterns to actually knit an afghan. … I’ve completed the necessary calculations for 80 of the stitch patterns from the calendar so that no matter what yarn or needle size you use, as long as you use the same yarn weight and needle size for each block, your finished blocks will be identical in size after blocking. … Once you discover how easy the entire process is, a whole new world of possible uses for the calendar will be at your fingertips. Let the fun begin!”

She starts by explaining how to figure out how many blocks you’ll need for your afghan, depending on the block size and how big you want the finished project to be. Then she immediately dives into the blocks—80 different stitch patterns adapted into small blocks (30 stitches for 48 rows) or large blocks (46 stitches over 80 rows). Right away, you’ve got full-color visuals of exactly what your own blocks would look like, complete with garter stitch borders all around. The patterns run the gamut from basic texture (like seed stitch) to lace to cables.

The rest of the book is broken down into types of afghans, starting with the sampler type—the kind of afghan made up of different blocks assembled into one blanket. The three afghans that follow vary by color palate, but are leave plenty of choices to the knitter—you don’t have to use the same stitches she used, after all!

The next section is for single-color afghans—afghans made entirely in one color, one stitch pattern, then come the vertically or horizontally-patterned afghans. These are more specific patterns—giving you precise instructions on how to make the afghan you’re looking at. There is some basic explanation on how to combine the different stitches, but it mostly comes down to a paragraph or two at the head of each section. I’m not sure I would find this enough explanation if I were uncertain about how to do this, but the idea is to be creative, right? To guide without too much hand-holding?

The afghans given are lovely, and they come along with notes and hints about construction.

All in all, a good book to help knitters figure out what to do with those stitch dictionaries … and to keep warm at the same time! You can get your copy here at Amazon.com or at your local bookstore.

Want to see bigger pictures? Click here.

This review copy was kindly donated by Martingale Press. Thank you!

My Gush: Practical and helpful!

Fairisle February!

Can't believe it's already started, and it's already February.  Yesterday I taught Day 1 of my fairisle course.  I taught (in German!) the the fundamentals of fairisle knitting.  I was so excited!  They got the basics yesterday:

-how to hold the yarn when knitting two colors
-planning colors
-working with colorwork charts

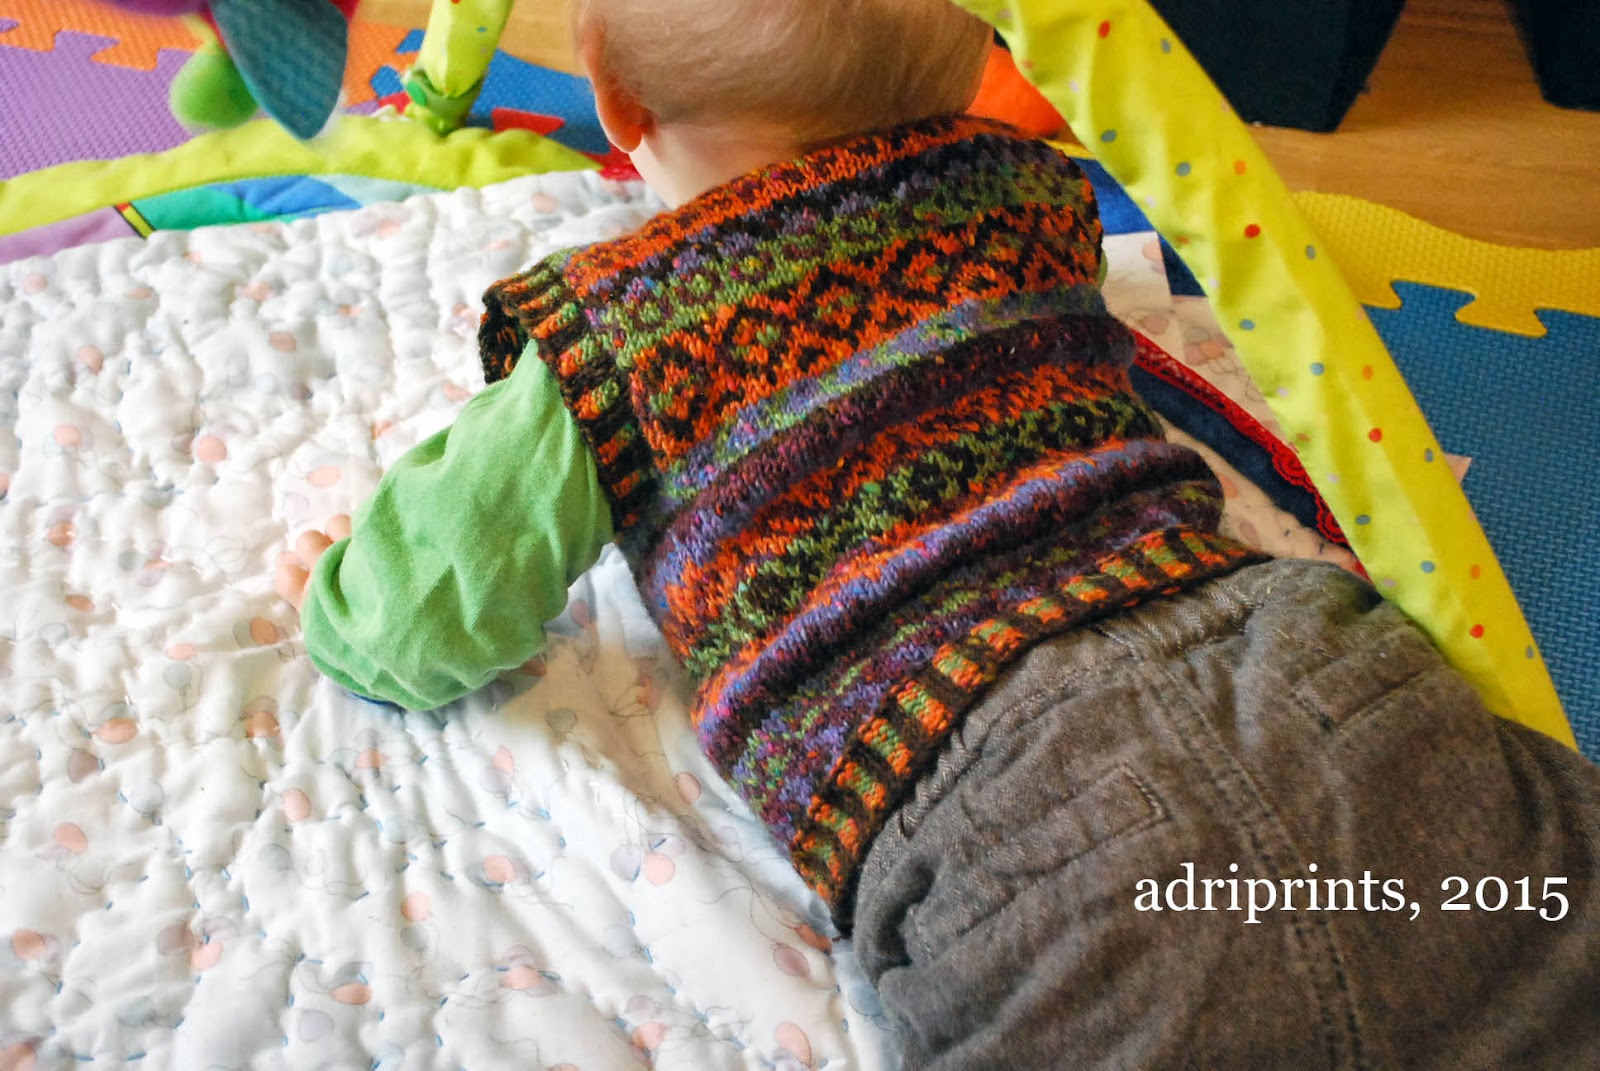
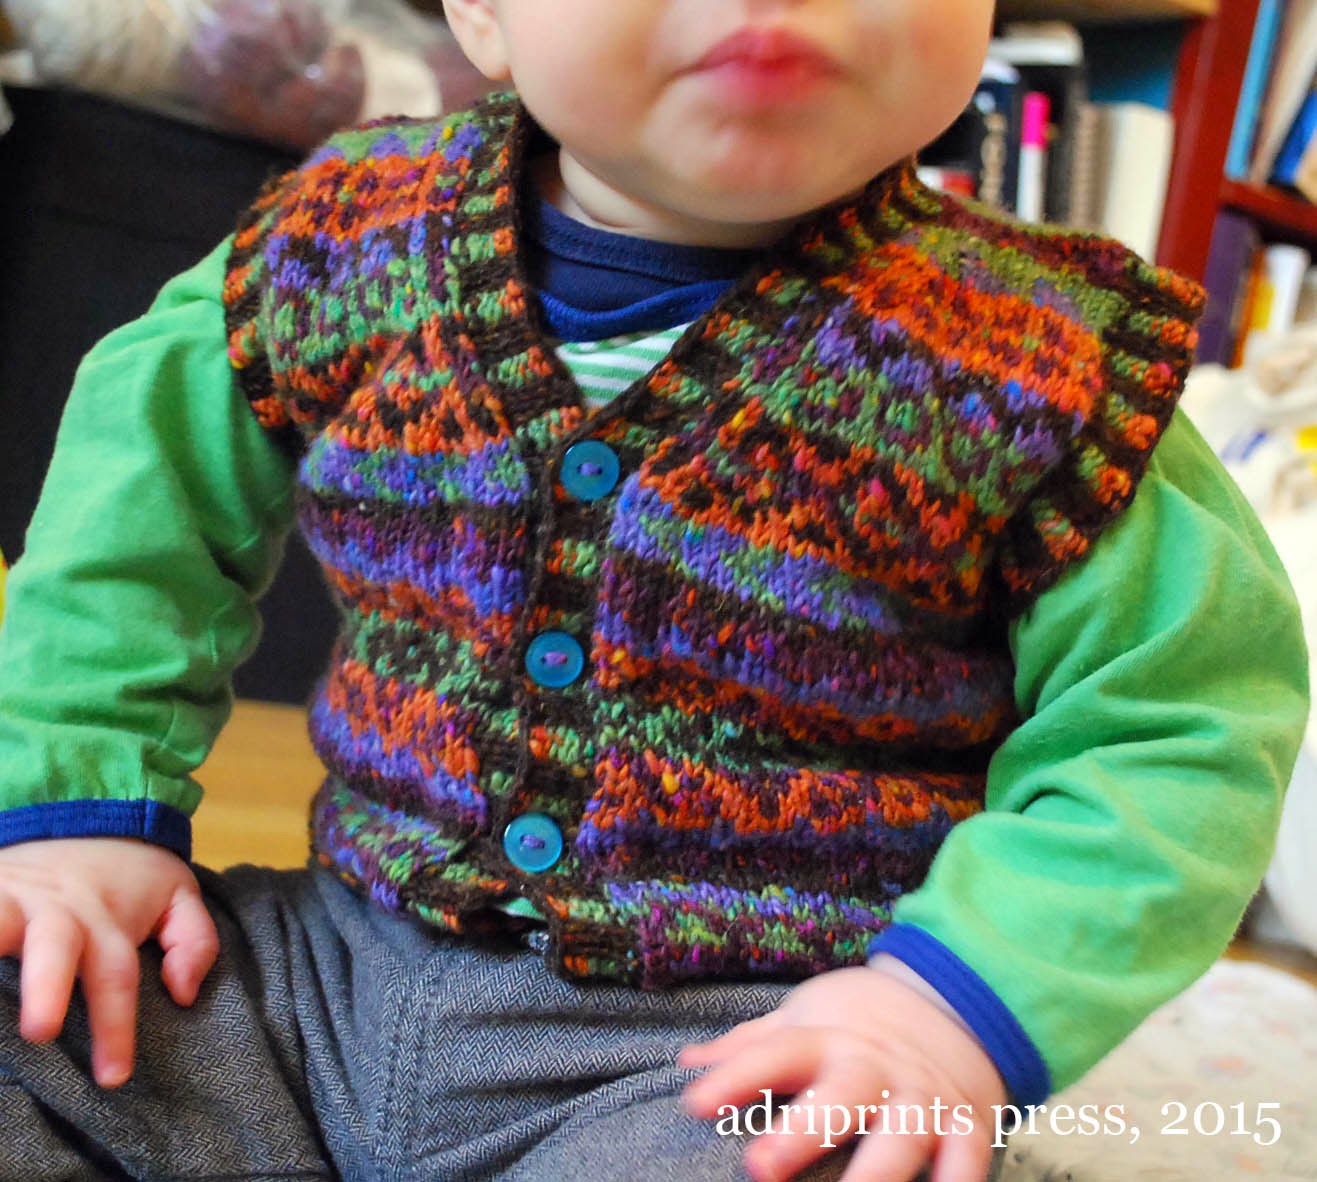
Our table was so messy by the time class was done.  Sadly, I somehow deleted the images from my phone!  GRR!  Oh well.  In the meantime, here's my little guy modeling the sample sweater-vest I made for the course...


Next week I'll back up any photos I take directly.  Speaking of which, next week we'll be facing fears and cutting steeks!


WIP: Prepping for Fairisle February!

This past month, I've been working on a fairisle pattern and accompanying hand-out for a class I'm teaching on traditional fairisle techniques.  I've taught the class twice before, but I was taking over someone else's class after they were too sick to teach.  The orginal instructor had chosen a very thin yarn to do the colorwork, but now that I'm teaching it again I asked to switch to a thicker yarn.  Here is where Rowan Fine Tweed steps in.  It's pre-felted, slubby, thick/thin colorful yarn, and best of all, it's tweedy!!  I love tweedy yarns.

I'm getting back into the knitted swing of things, and warming up by writing a new fairisle pattern replete with oodles of simple motifs and steeks!

So far, here's my progress with this little vest...

First my swatch using the least used colors (two of the contrasting colors)...


Then once I configured my numbers, I designed the schematic for the vest and cast-on.  Since this one is steeked, I cast on in the round with extra steek sts at the center front...


Halfway through, I realized my row gauge had relaxed and I re-configured my numbers to be sure that the lengths would work out.


Then, after washing/blocking, I steeked the center sts! 


 The tweedy felted yarn won't just unravel, so I knew it would be okay to knit from the steeked edges.  I'll post photos when I get the photos onto the computer...

...and if you're in Munich in February, and are interested in learning fairisle techniques, be sure to sign up for my class at die Mercerie!


Want to know more about Stitchin Knit and Stitchin Crochet?

(Image from the Underground Crafter site)
I was interviewed last month for a Hispanic Heritage Month by Marie Segares, the crochet & knitting blogger and designer.  She blogs at the Underground Crafter and is also the host of the podcast the "Creative Yarn Entrepreneur Show".  If you'd like to read her interview of me for her Hispanic Heritage series that happened in September, you can read it here (http://undergroundcrafter.com/blog/2014/09/18/interview-with-adriana-hernandez-hispanic-heritage-month-series/)

And, for the podcast, she asked me some great questions about how I got into the business of making fonts for knit and crochet. So, if you're interested in listening to the podcast interview you can find it here (http://creativeyarnentrepreneur.com/episode-8-affordable-crochet-and-knitting-fonts-with-adriana-hernandez/) or below.

Thanks for asking me to participate, Marie!


And, if you'd like to see the fonts, you can find them here.

Adventures in AIO’s (all-in-ones)

My latest experiments with cloth diapers have been with sewing all-in-ones (AIO's).  The advantage to this style of diaper is that you don't have a separate insert- the cover and insert are actually "all in one".


The disadvantage is that AIO's typically take a long time to dry.  This AIO is based on the TotsBots "BOB" (best of both) Easy Fit model here.  I love their diapers, but the latest version 4.0 only comes with velcro waist adjusters...


Why snaps?  Now that I've been cloth diapering for a few months, I have come to dislike sorting out anything with velcro (hook & loop) in the laundry.  So I went with snaps (poppers).  I've already had two separate incidents where super-strong velcros from baby's bibs snagged onto clothes and diapers. It's very sad to see scuffed and pilled clothing just because of an errant piece of velcro in the wash.  Grr.

After using these for a month I can say they work!  They also dry fairly quickly - not as quick as the TotsBots, but much faster than some of the other AIO's I have.

How these were made...
before sewing the outer/inner together... don't use pins

Pattern:

  • This video from Little Bundas for general techniques.
  • This pattern, 3x3 AIO round tab from Arfy of Prefold2fitted Blog
  • These written instructions from Tutu Mafia/Cloth Revolution's Sewn-In Diaper here.  These instructions plus the video above were crucial for me to get a good end result.  I also had the TotsBots diaper to look at for help.

Improvements for next time...
I need to fold over the edge where the suede cloth and the PUL edge overlap.  I left the PUL edge raw and it's stretching a bit thin.  I also think I'm just gonna do suede cloth and the insert inside (instead of PUL on the inside).  And, lastly, I've got to better reinforce the sizing snaps at the front center with more PUL.


Materials:

  • outer is Eco-PUL from Diaper Sewing Supplies this pack here.
  • Alova suede cloth for the back flap also from Diaper Sewing Supplies
  • the built-in insert is 1 layer velour (closest to the baby butt), 1 layer bamboo terry, 1 layer hemp with PUL at the front

chalk markings for centering snaps