Tag Archives: design

3 Hours Past’s Blank Canvas Tee: Maternity Hack

During Me-Made-May 2014 I'd like to share some of the me-mades I've made in more detail.  In order to see if I could replicate a maternity/breastfeeding top that I love, I tried my hand at drafting and here are the results!


If you're just starting out sewing with knits, a great place to start is a simple dolman sleeved t-shirt like the Blank Canvas Tee from 3 Hours Past the Edge of the World's Blog.  If you're past that, are ready to try some drafting, and would like to make yourself a breastfeeding or maternity top, then this is the mod for you!

Start with the Blank Canvas Tee from 3 Hours Past...

Added Materials

  • additional fabric because the length of the T-shirt is extended.
  • 1 piece of elastic - soft baby elastic or elastic about 1/4" wide that suits your fancy in the width of your t-shirt + 2" or so.

Extra Skills

  • sewing with elastic

Special Tools

  • twin needle
  • stretch needle 75/11  (a whaah?  Here's a needle guide from Schmetz)
  • pencil and ruler
  • maybe tracing paper if you don't want to write on your pattern
Inspiration: From boob design, this short sleeve maternity/nursing top is one of my faves.  It fits really well and the split top allows for belly room.


Okay.  Ready to make your own?
First print and assemble your pattern pieces from 3 Hours Past... Then, here's our goal: we want to create two pieces for the front that overlap by around 5" / 13cm for the smaller sizes.  You'll likely need a bit more overlap for the larger sizes or if you usually find yourself doing large bust adjustments.

The goals.
Measure from just below the armpit curve to your goal overlap length, then add 1" / 2.5 cm so you have enough to turn up a hem.  Trace what you have onto your fabric, or onto tracing paper to make pattern pieces.  I've highlighted what I did to the pattern in the photo below.


See the red highlight?  That's the top front piece.  The blue highlight shows where the the bottom front piece would be.  For the bottom, I took the design line straight up and did not taper in like the pattern - it's housing a big belly at the moment, and I thought it would be advantageous to have a little leeway.

The other change I made here was adding length.  Add what you will.  My goal was to have a t-shirt around 28" so I added a few inches to the bottom of both the back and front bottom pieces to achieve that.  I just followed the design lines to my goal length. To calculate length, I measured from the peak of the shoulder, parallel to the fold line.

Alright, you've traced and cut your 3 pattern pieces.  Do you have your edging pieces (no change from pattern) cut, too?  And those two strips of interfacing for the shoulders?  What interfacing? I used Vlieseline G785 since it's stretchy, lightweight, and works with knits. Everything cut? Great! Let's get these pieces ready to put together.

Assembly:

  1. Step 2 from pattern: Iron on interfacing to WS of back piece shoulder edges
  2. Front top piece - finish bottom edge with zig zag stitch or serge, turn up and twin needle the hem from the right side
  3. Front bottom piece - add elastic to top RS edge using a triple zig-zag stitch.  How?  I simultaneously slightly stretch the elastic while guiding the main fabric under the presser foot.  I do not stretch the main fabric.  Right hand for elastic, left hand for guiding fabric.  I do this 2" at a time so I don't lose my nerve.  Then, I fold over the elastic so I only see the final fabric, and straight stitch the bottom edge of the elastic.
  4. Overlap the two front pieces- With RS facing you, make sure the front top is on top, and the front bottom is behind it.  Make sure the overlap is what you desire and pin.  Stay stitch within the seam allowances (so ~1/8" from the edge) to secure the overlap.
  5. Step 3 to 9 are the same as the original pattern.
And there you have it!  You've made a maternity/breastfeeding t-shirt!  Feel free to change the neckline and make it a scoop neck like in the inspiration photo.  I like crew necks so I kept the pattern as is.  But, I think I'm going to try and make a tank or sleeveless v-neck.  We shall see!

Another FO: Red Rosita Mittens

Finally, I finished this long unfinished object!  This red version of the Rosita Mittens, a knitting design pattern originally published in Knitscene Accessories 2013, was a prototype.


I had finished the first mitten in red and white to conserve the yarn that was for the planned colors.  You can see in the magazine photo below that the green and white yarn was planned for the final design.


A bit about knitwear design...
When you receive yarn for a project, you don't know how many prototypes it will take to get the design right, so you conserve yarn as best you can.  In this case, I swatched and conducted all tests with the red and white, then went onto create the deliverables in green and white with red and pink details.

I'm so glad these are finally done!  The design rights to this pattern return to me this summer, but if you'd like to knit them in the meantime, I think the digital download of the magazine is still available here:  http://www.knittingdaily.com/media/p/109384.aspx

MK Tutorial: Mitered Detail with Short Rows


This tutorial is a machine knitting tutorial that leads up to the publishing of my pattern, "Mitered Detail Cardigan."  The mitered detail in the pattern can be accomplished in two ways.  The first way described in the pattern, is with short rows (also known as partial knitting) and by wrapping each stitch as they are put on hold.  In order to best show what I mean, I made a video tutorial for this one...


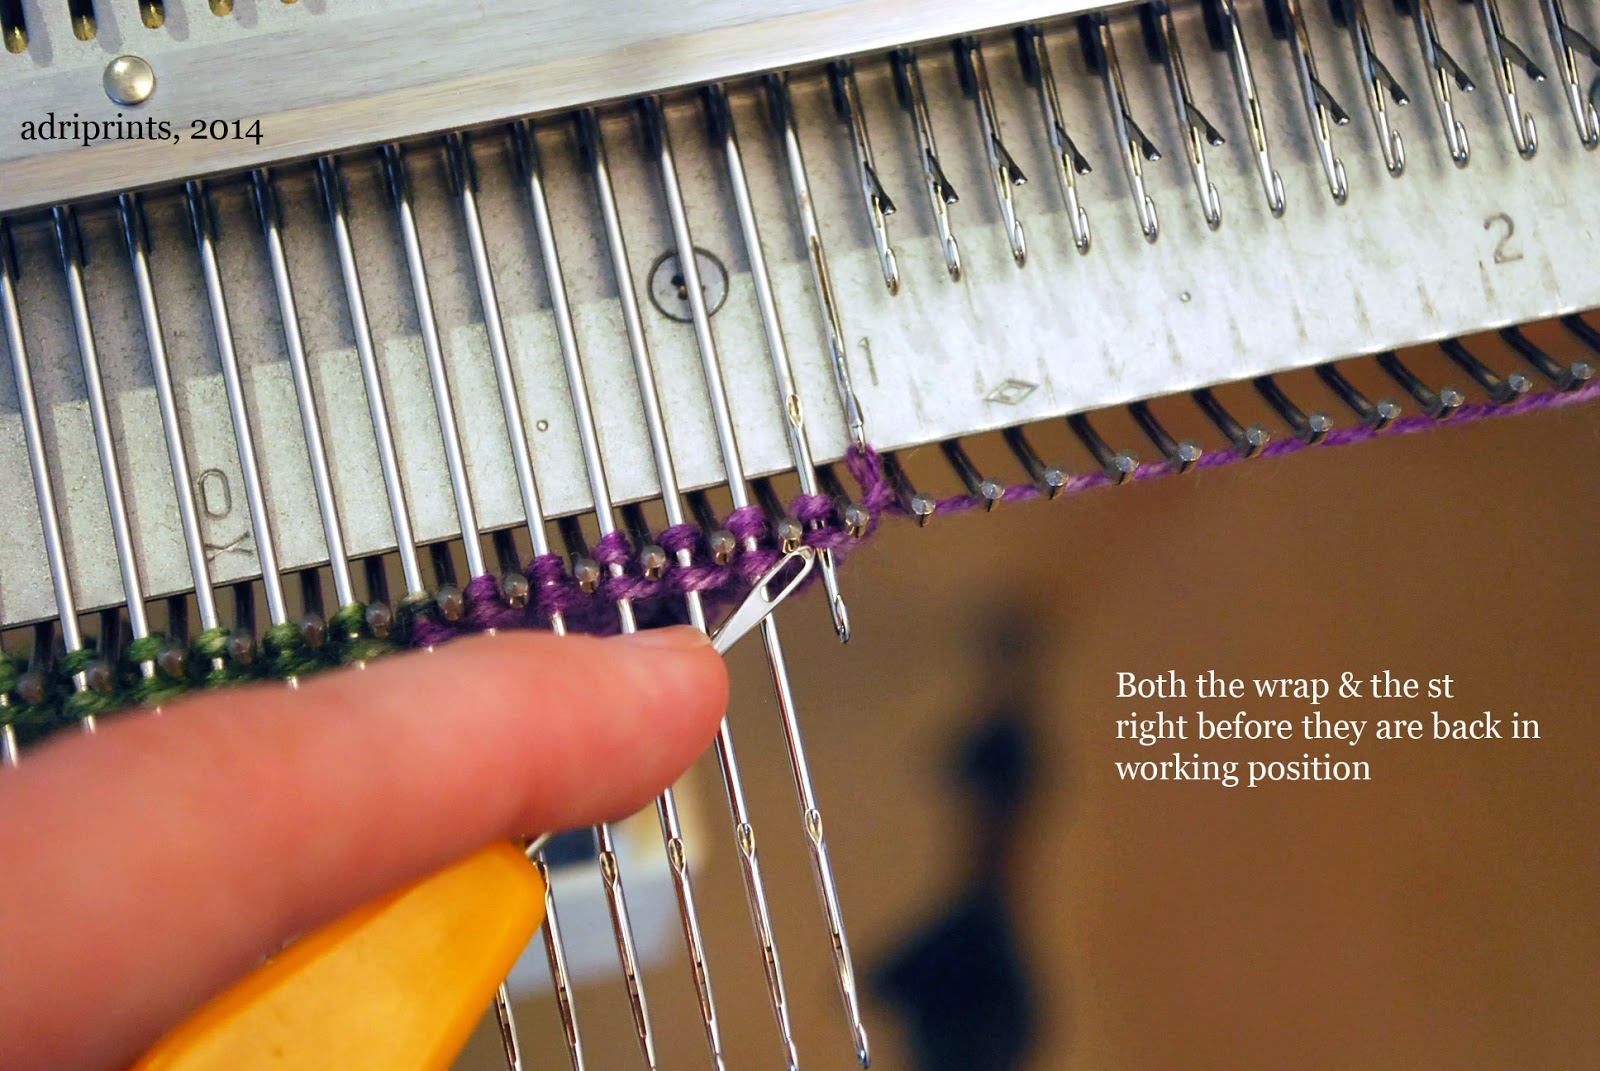
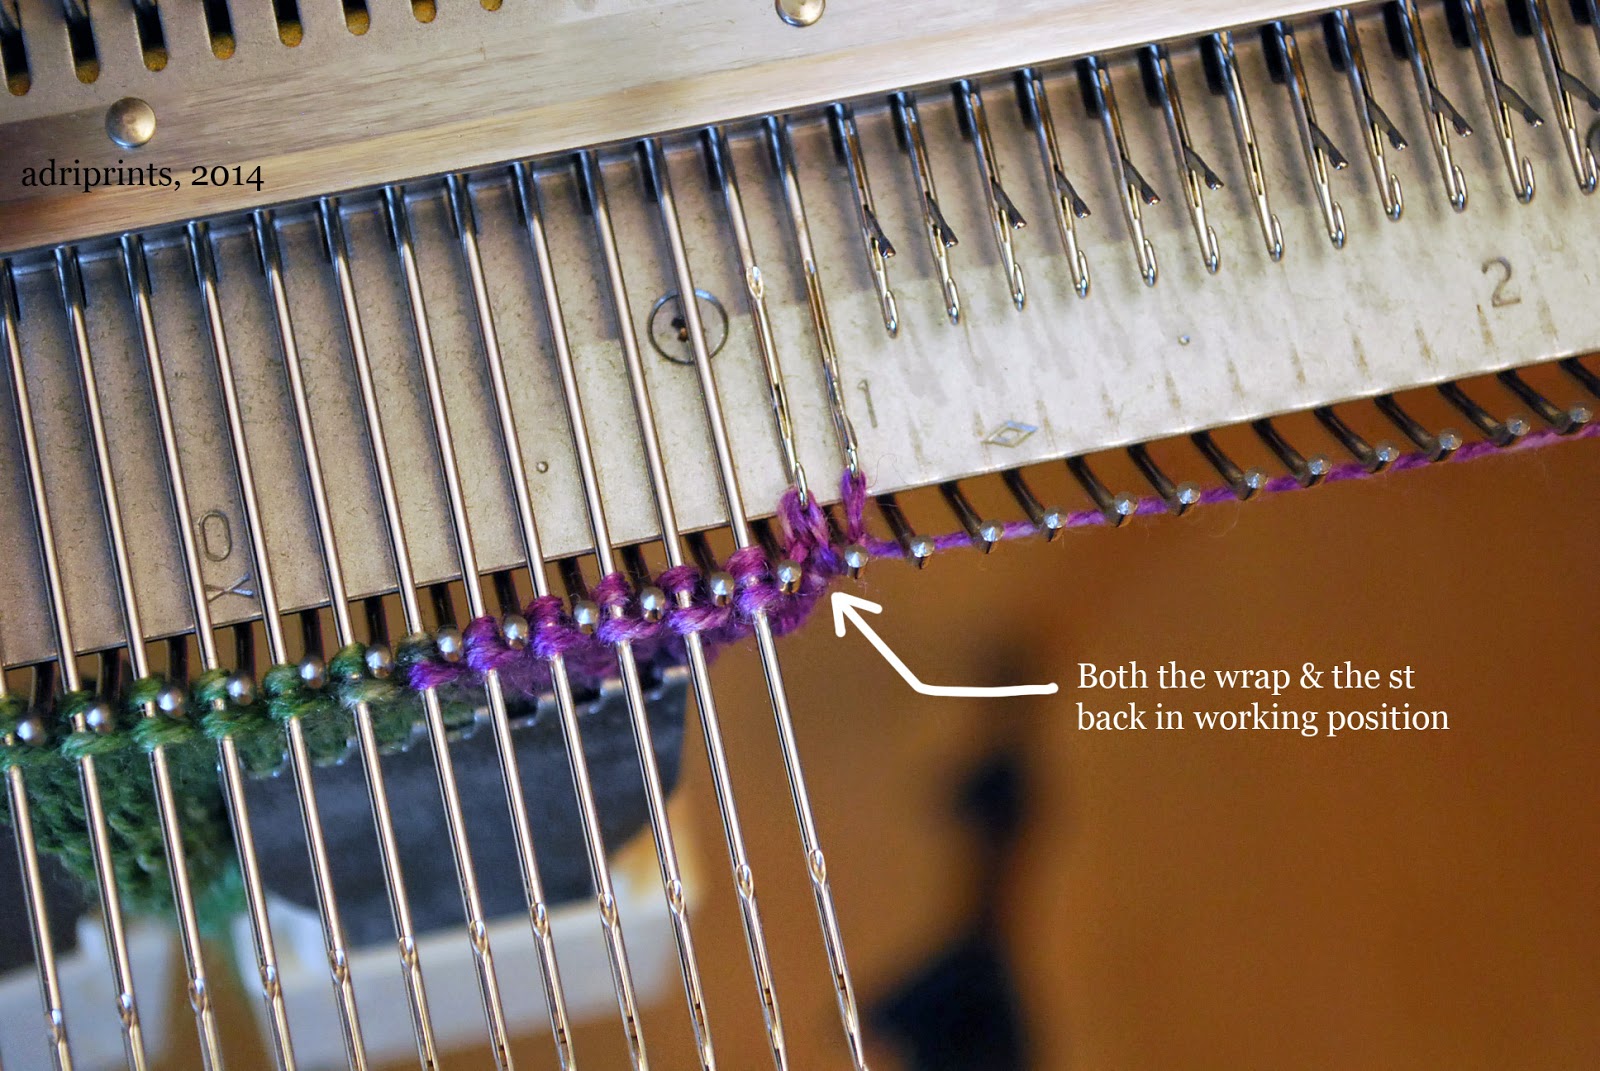
Just in case it's too blurry in the video, here are detailed photos of what it looks like to "reactivate" a stitch into working position.

Wrap & stitch back in the hook part of the needle.

Wrap & stitch ready in working position ready to knit.

Here's a mini sample showing the detail on the front and back.  I think the color pooling of the yarn helps show the order in which things were knit.  The green section happened first, then the purple.  With WS (wrong side - in this case the purl side) facing, this block was worked from left to right.


FO: Mitered Detail Cardigan II

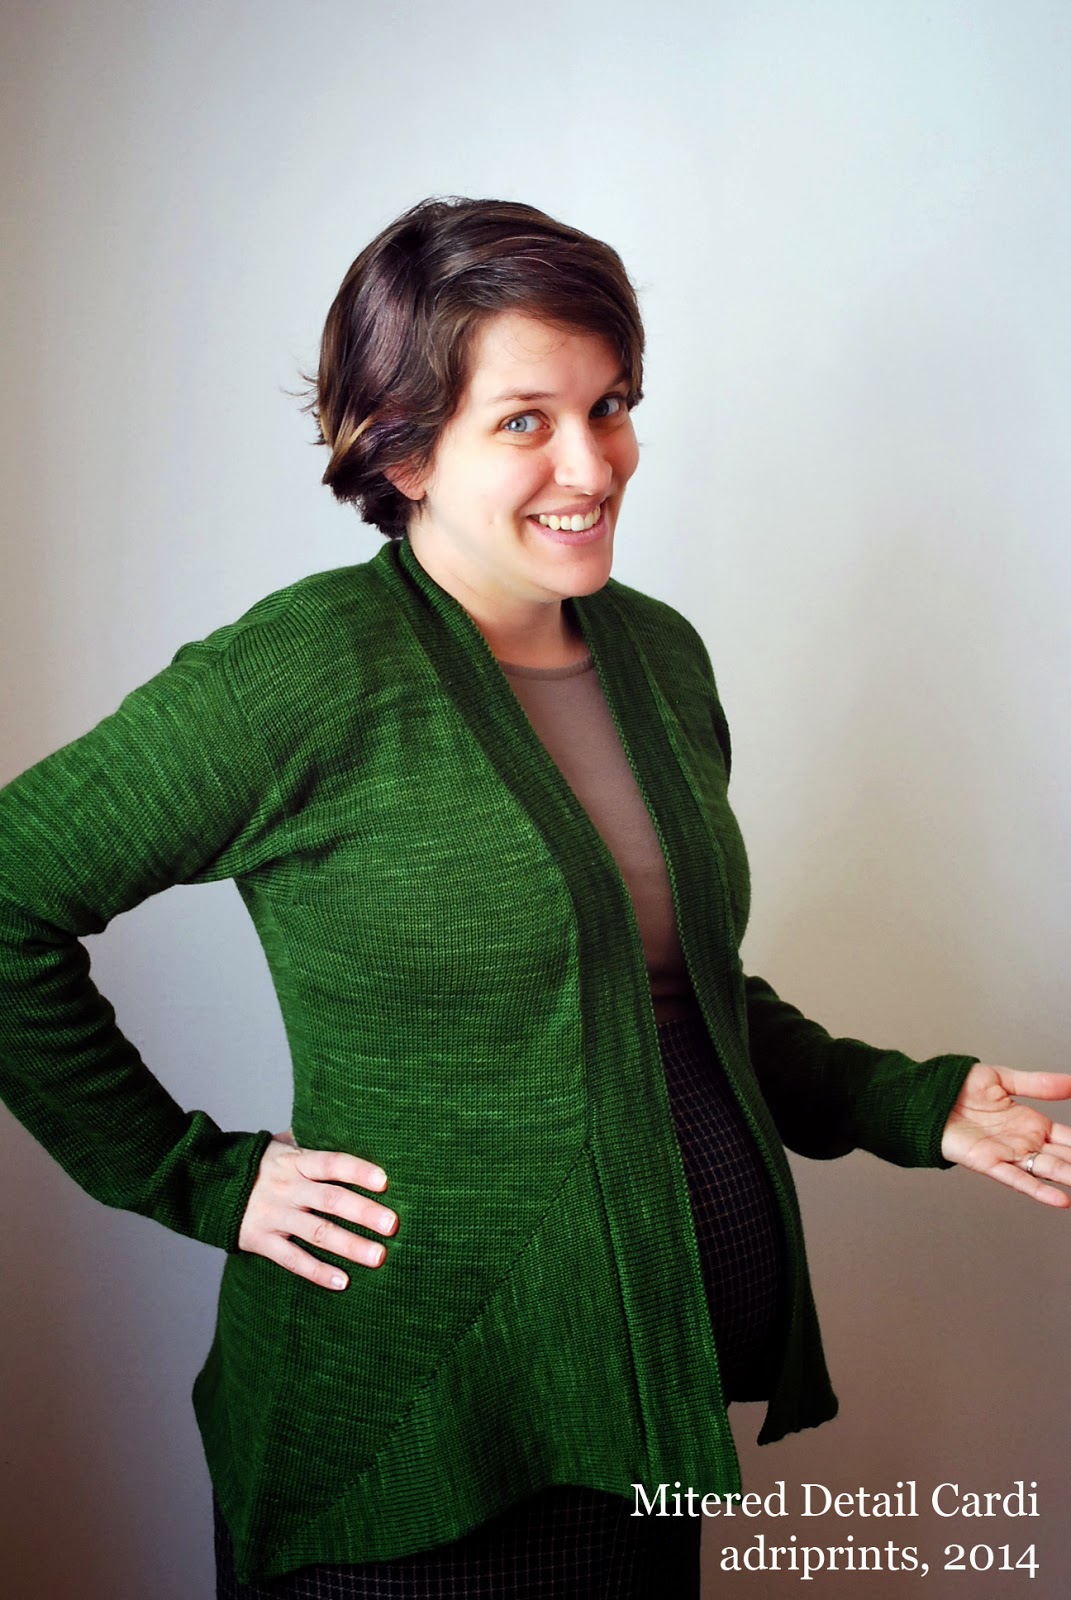
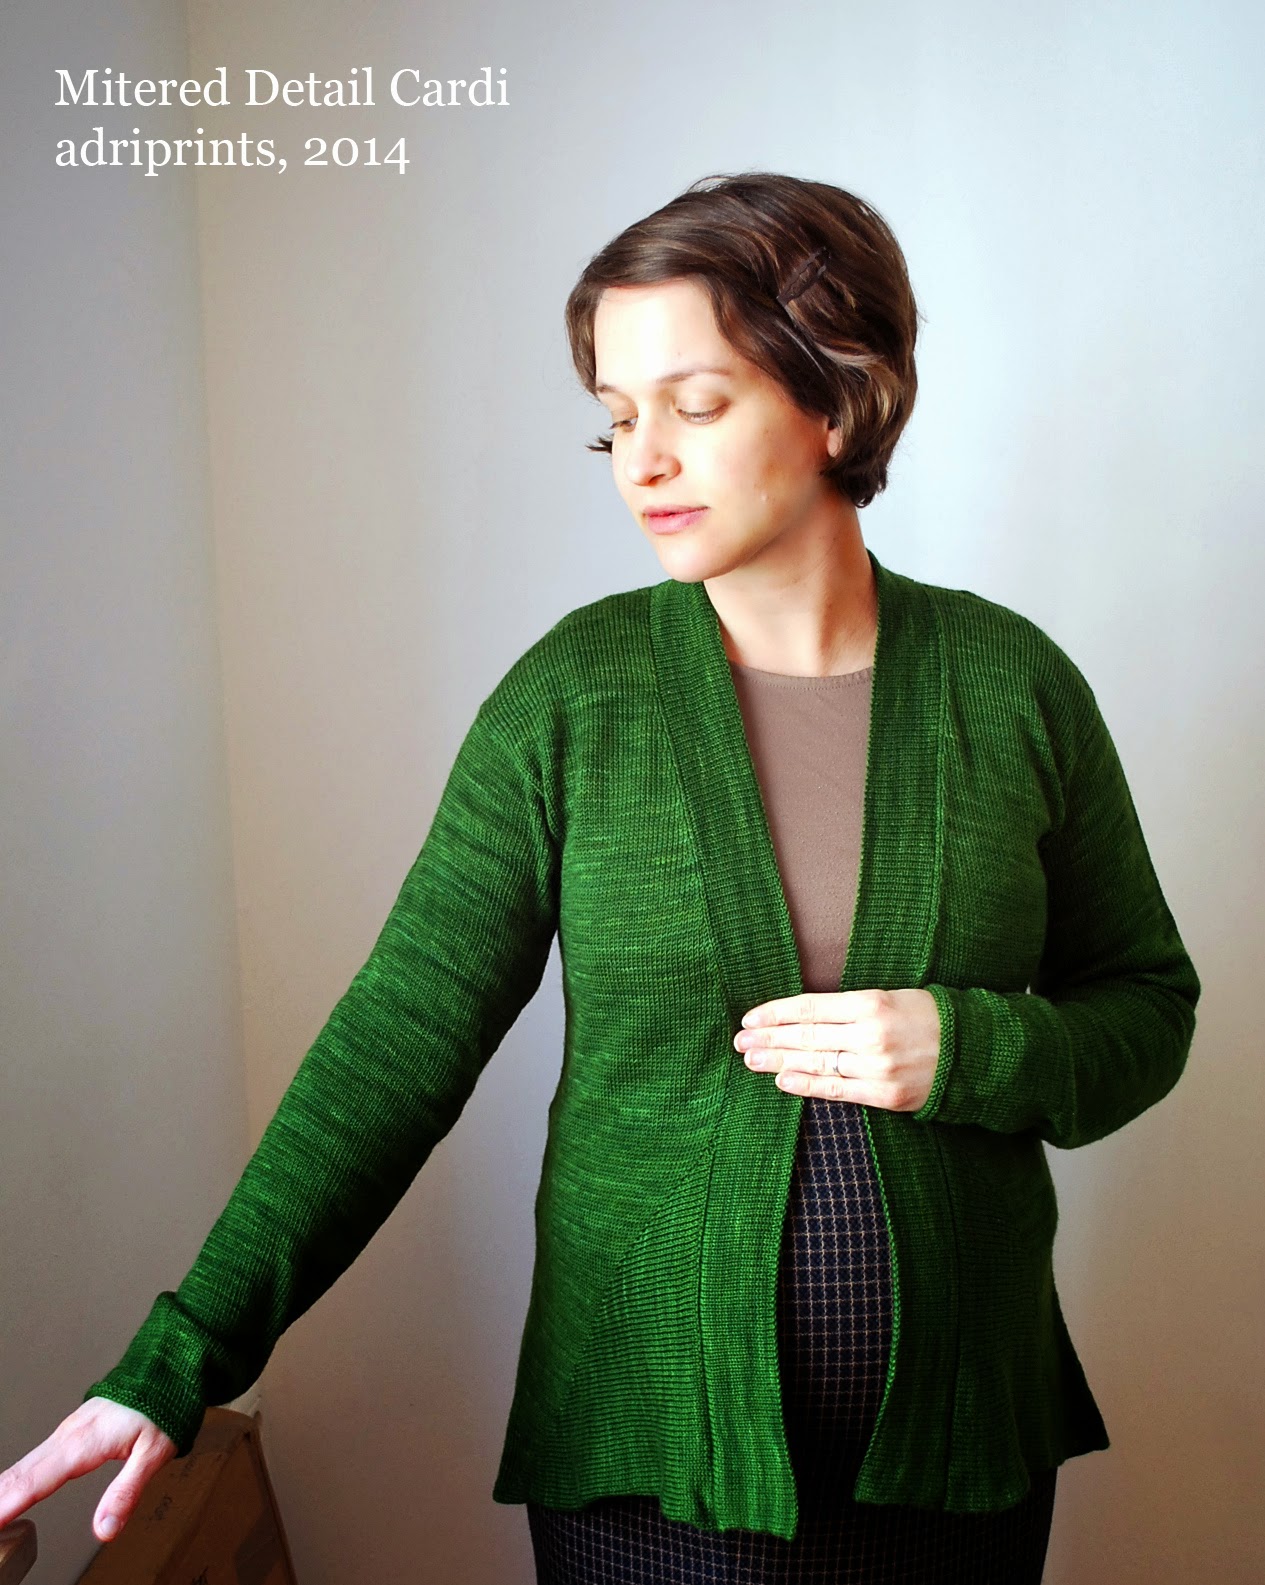
Finished the second prototype!  I really like this version - I made one size larger, which extended the sleeves and front a bit, and that's made a huge difference in fit.  I should be releasing the pattern soon since the MKAL (machine knit-along) is almost done.


The pattern writing is nearly complete, and now that the sample is done, I can weigh it and make further yardage and yarn requirement estimates.  I can't wait to get it published!  I'm wondering, though, if I should get someone else to model the back... it's... well, it's a bit of an insecurity at the moment.  I'm feeling very large, and that's something I've never felt before.  It's taking some mental readjustment, but I'll come to terms with it soon enough.  I've just got this one body to inhabit, you know?


In the meantime, I'm so excited to have this very spring green, very wearable cardigan for the season!


WIP: Zig Zag Quilt & Mitered Cardi

This past weekend, I made so much progress, but alas, I did not finish the quilt.

I do have the quilt sandwich ready to go, and am strongly considering a straightforward quilt-job instead of FMQ'ing.  See, the sewing machine shop sold me a FMQ'ing foot for my new machine (more on that later), but I could not for the life of me figure out how to install it.  I don't think it actually fits my machine.  So, I'll go check on that sometime this week.  In the meantime, here's my progress!

I finished piecing the top...


Added a border and pin-basted it to the batting and back...


All I need to do now is quilt!

As for the second Mitered Detail Cardi, here's where I'm at...


I've got to sew the side seams, knit one more sleeve, and add the edging!  So close!

P.S. If you haven't already entered, there's a giveaway in the previous post!  Feel free to enter and win a quilted fabric pouch.

FO: Mitered Detail Cardigan


Success!  At least one of last week's WIPs is complete!
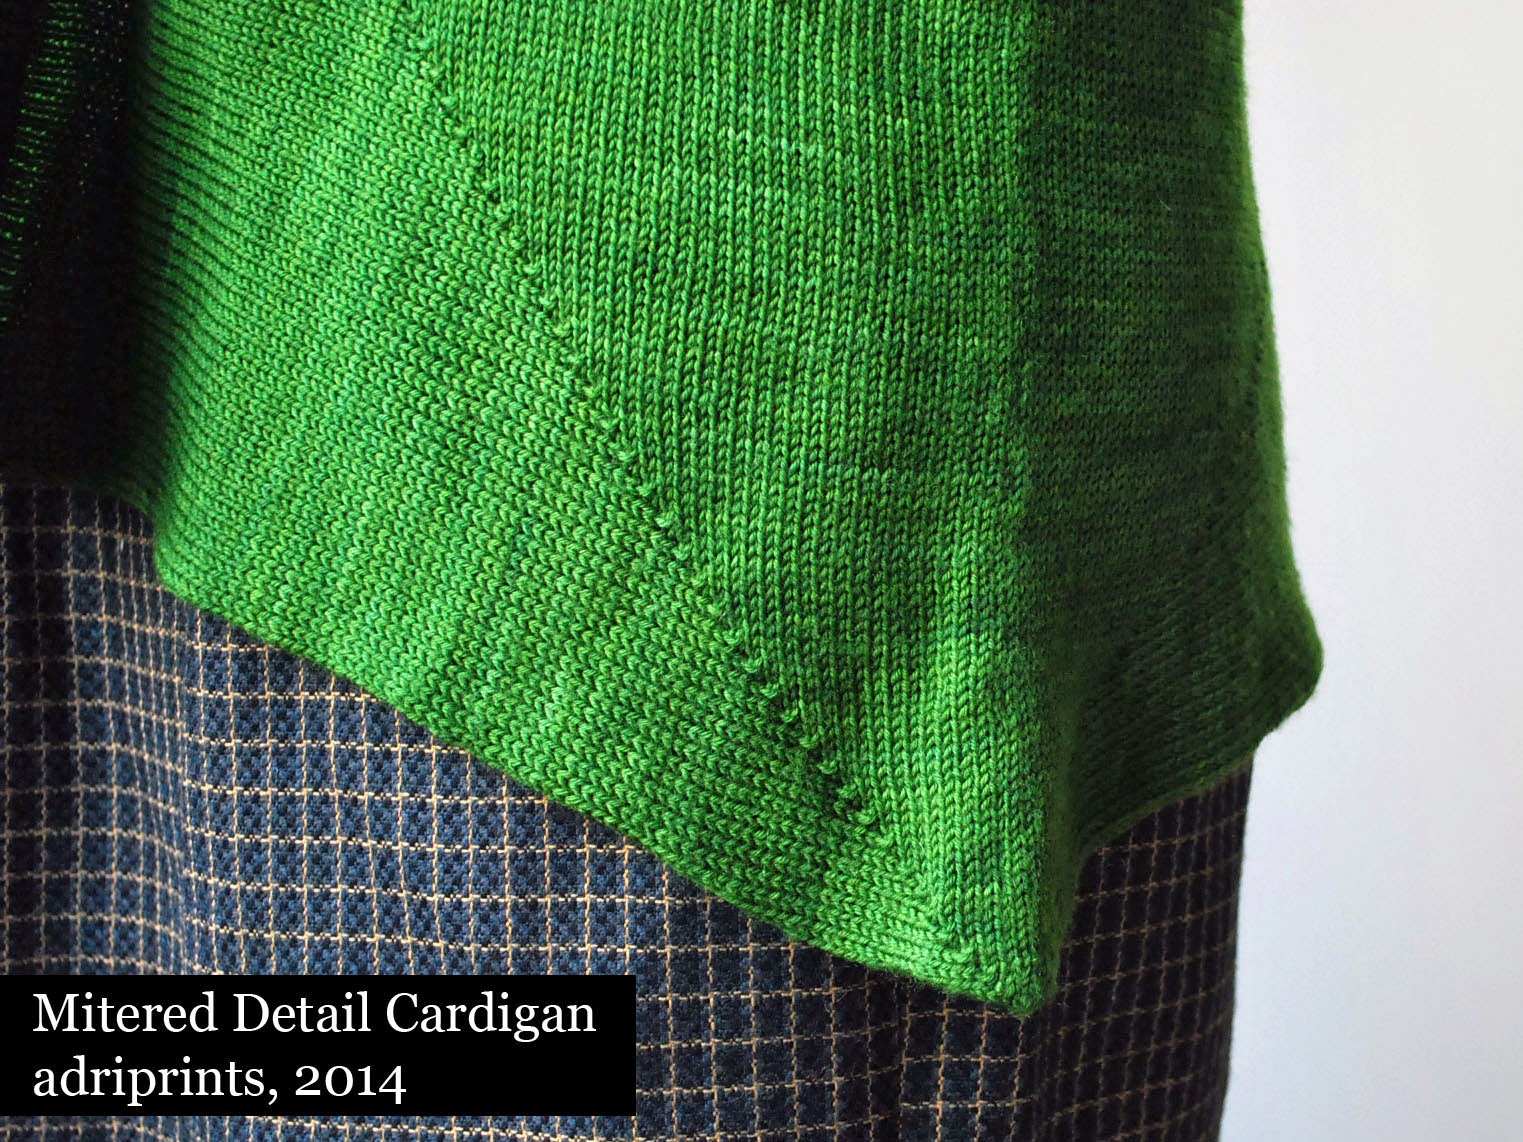
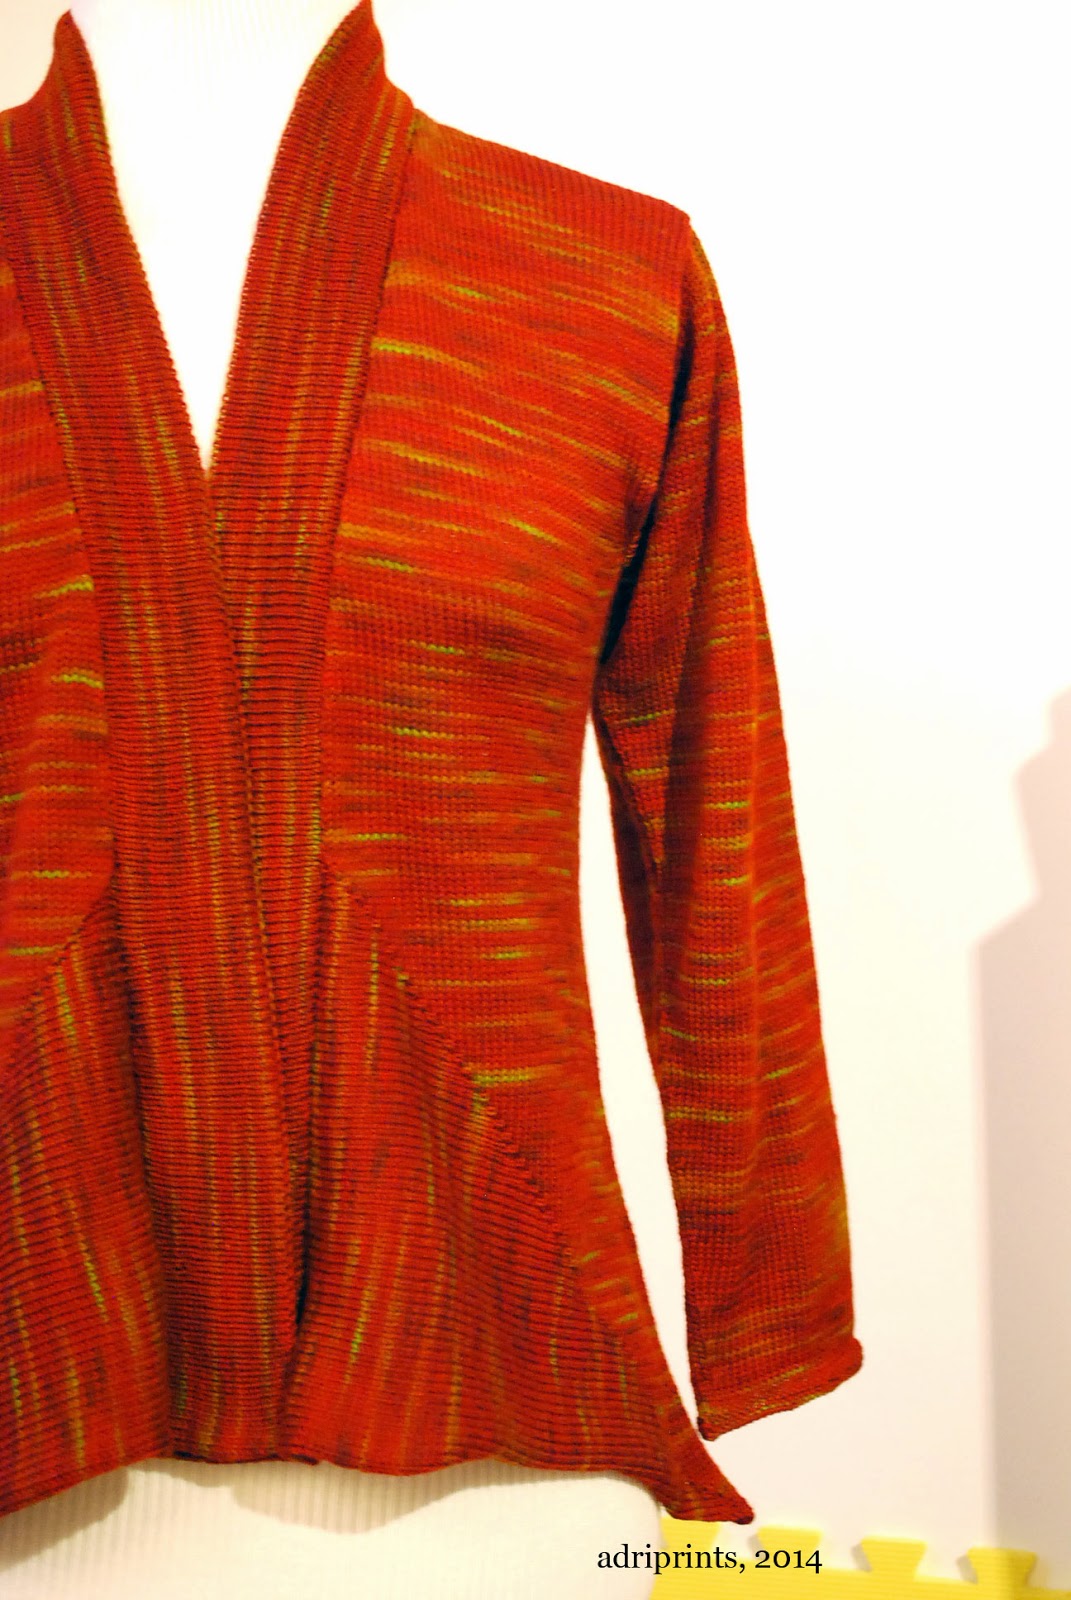
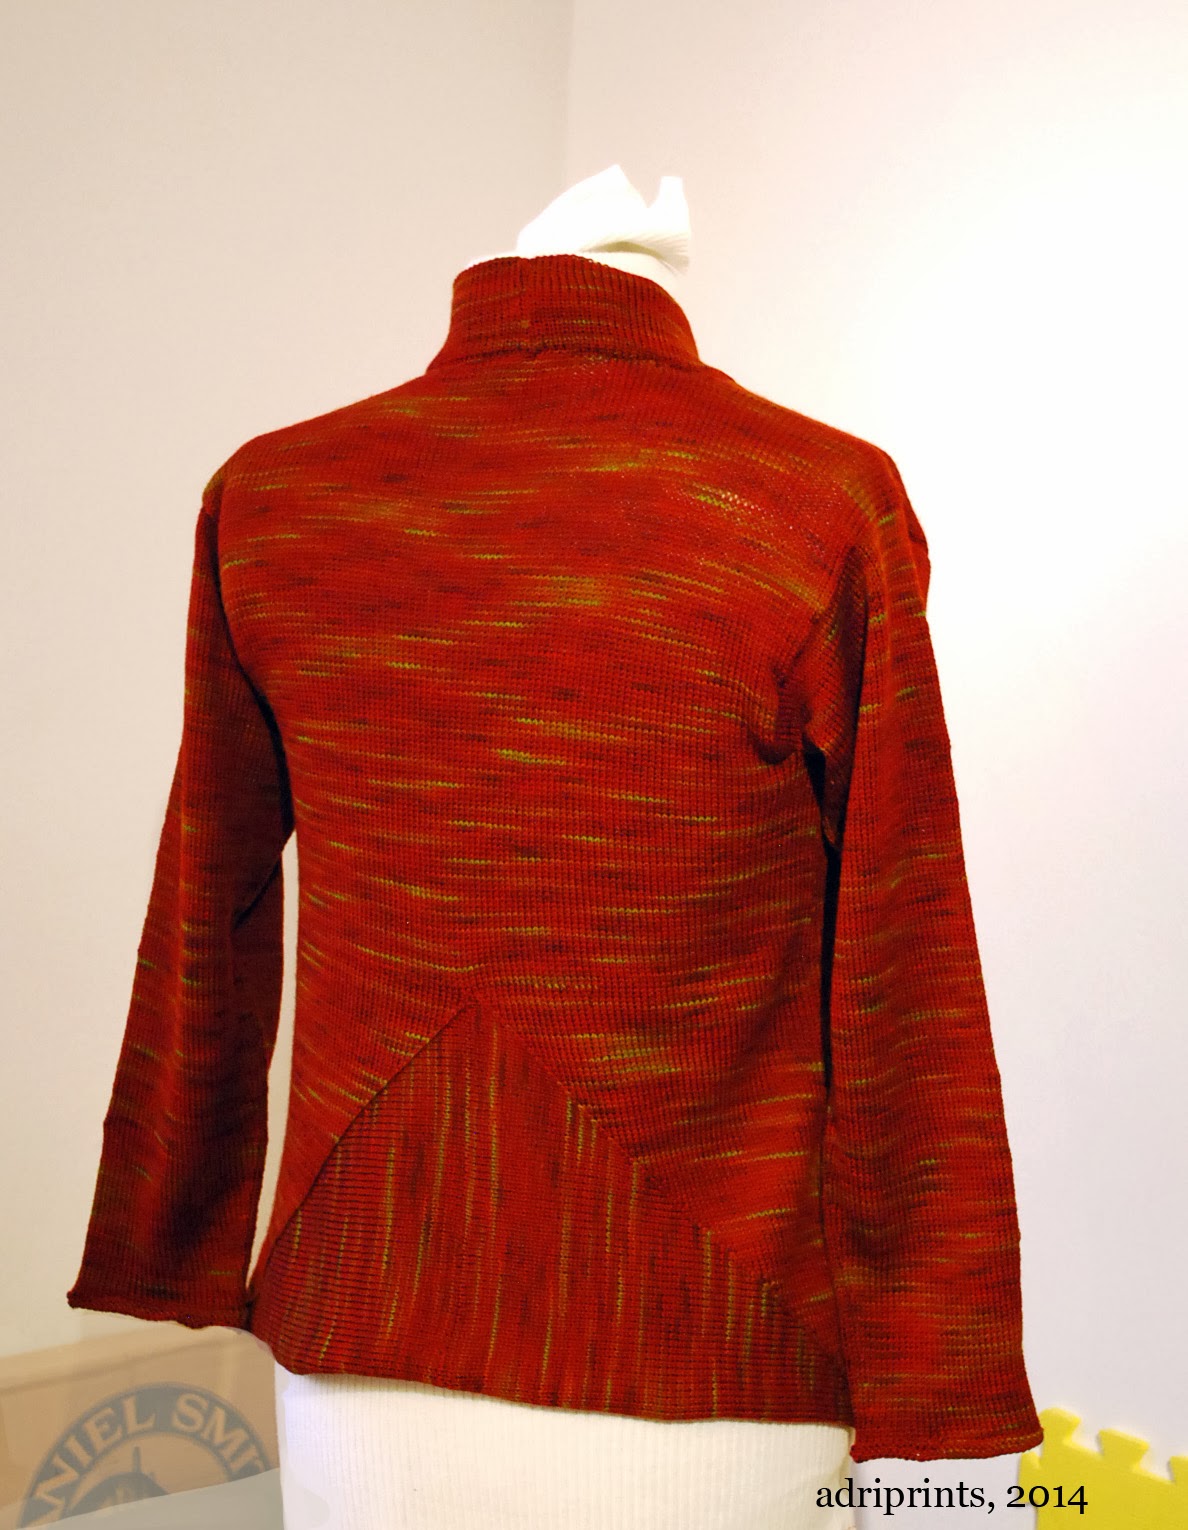
Originally meant for the Ravellenics (Ravelry Olympics-watching related activities), the "Mitered Detail Cardigan" project really pushed me to learn how to better use my knitting machine.  Originally, this yarn was going to be Mary Anarella's lovely "Simplicity" cardigan, but as my belly kept growing, I thought, "that look's just not going to work on me." So, I set about designing this cardigan while keeping "Simplicity" as a visual inspiration, but sharpening it up a bit for pregnancy and after-pregnancy use.  Here's the result...


The front diagonal details were done using short rows.  So fast!


Back diagonal details done by transferring stitches.  Not so fast.


The folded over border was knit in two halves on the machine and then stitched together at the back of the neck.  

That turning purl row, which is so simple to do by hand, was kind of a nightmare to do by KM (knitting machine).  See, I didn't know that there was a difference between stitch transfer tools and garter bars.  There is a difference.  A big difference.  These large transfer tools are simply giant combs that hold stitches and help you move them over, and they have a tiny hole like a small transfer tool.  

Garter bars on the other hand, allow you to, not just move the stitches, but also flip them over and efficiently create a garter stitch.  I did the first side's turning row by hand-manipulating each stitch individually with a tappet tool.  It took me over an hour.  I did the other side by attempting to use the transfer tool as a garter bar, and failed.  I ended up holding the transfer comb horizontally directly under the hooks of the machine and individually lifting the back of each stitch onto its respective hook.  Faster than tappet tool, but not very much fun.  ((insert hysterical laughter here))


The back mitered square detail was not done with short rows which were fast and lovely by KM.  Each of those centered double decreases was done using the stitch transfer combs I mentioned previously.  All the stitches on each side were moved over by one toward the center where they met in the middle.  It took me 3 hours to do each side.  My friends at the local SnB laughed at me and said it would have been faster by hand.  True.  But, I learned how to use my machine with confidence!  That was worth it, right?  How else was I going to learn other than by challenging myself to do ridiculous things under an unrealistic artificial deadline?  What's that you say?  Was that reasonable advice you just gave me? Pshaw.  Reason-schmeason.


Project Title: Mitered Detail Cardigan
Designer: Me  (using Simplicity by Mary Anarella & 128-14 Jacket in ”Fabel” by DROPS design as inspiration)
Yarn: Wollmeise Lace in "Nobody's Perfect - Spice Market"
Amount Used: 281g of 300g skein
Machine Tension Settings: T6.75 for main knitting, T6 for edging
Main Gauge: 26 sts x 40 rows = 4"
Border Gauge: @T6, 24 sts x 50 rows = 4" (blocked to emphasize horizontal stretch)

Unwinding

Sometimes you unsew, sometimes you unknit.  This weekend it was time to unknit and unwind... literally.


The project:
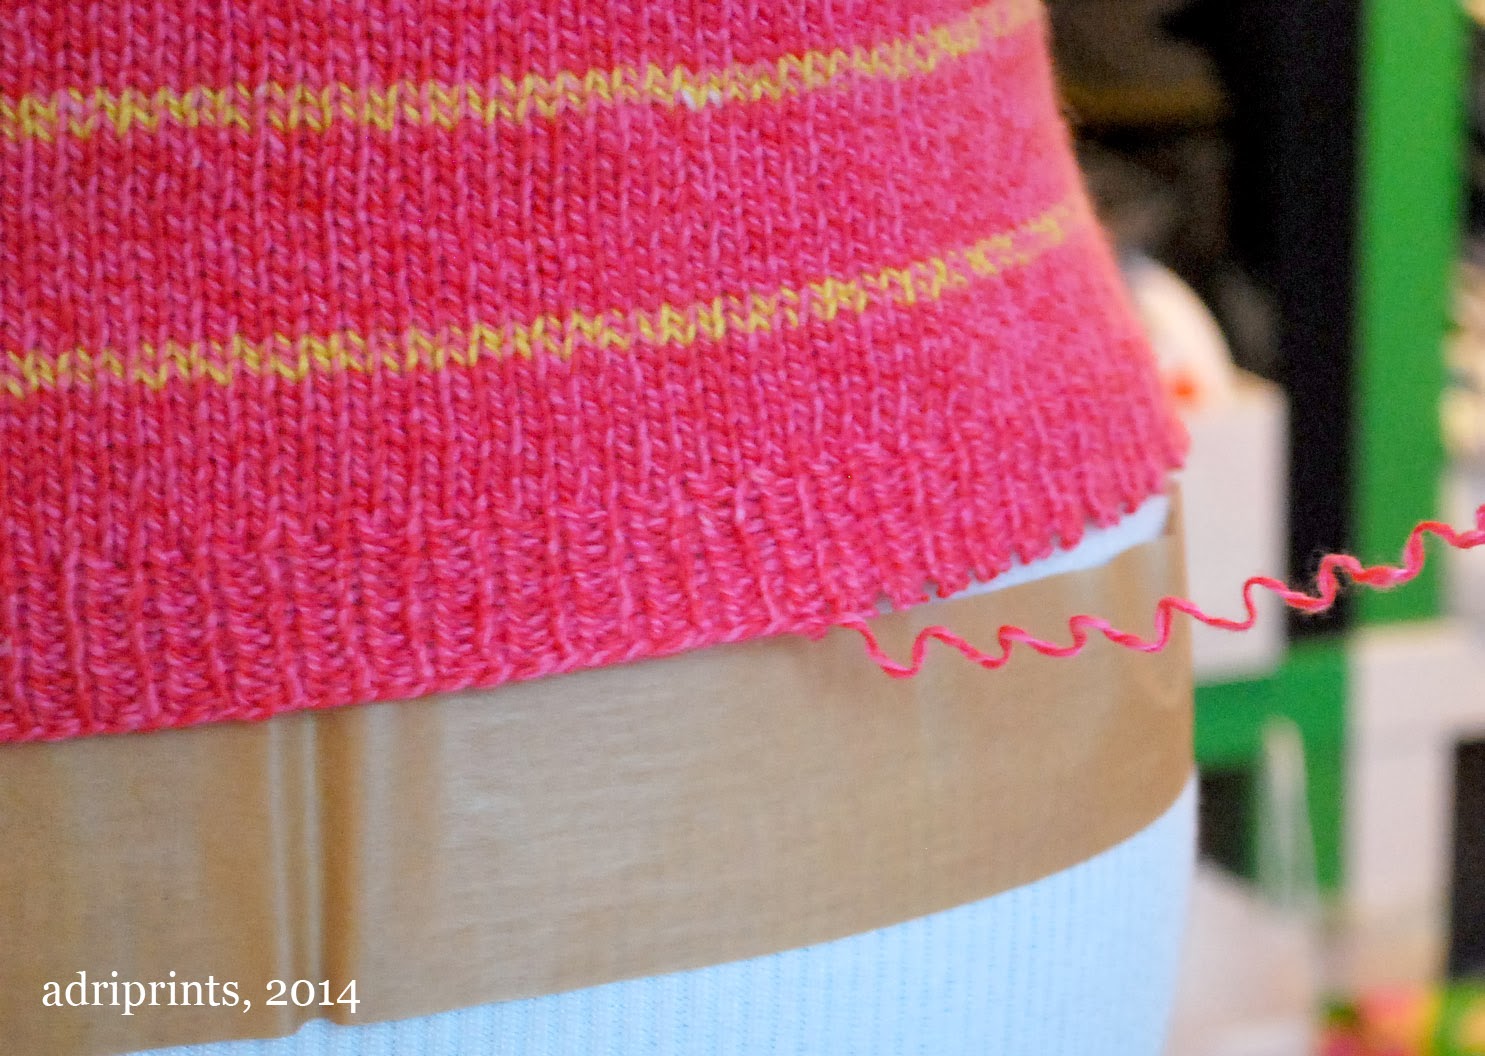
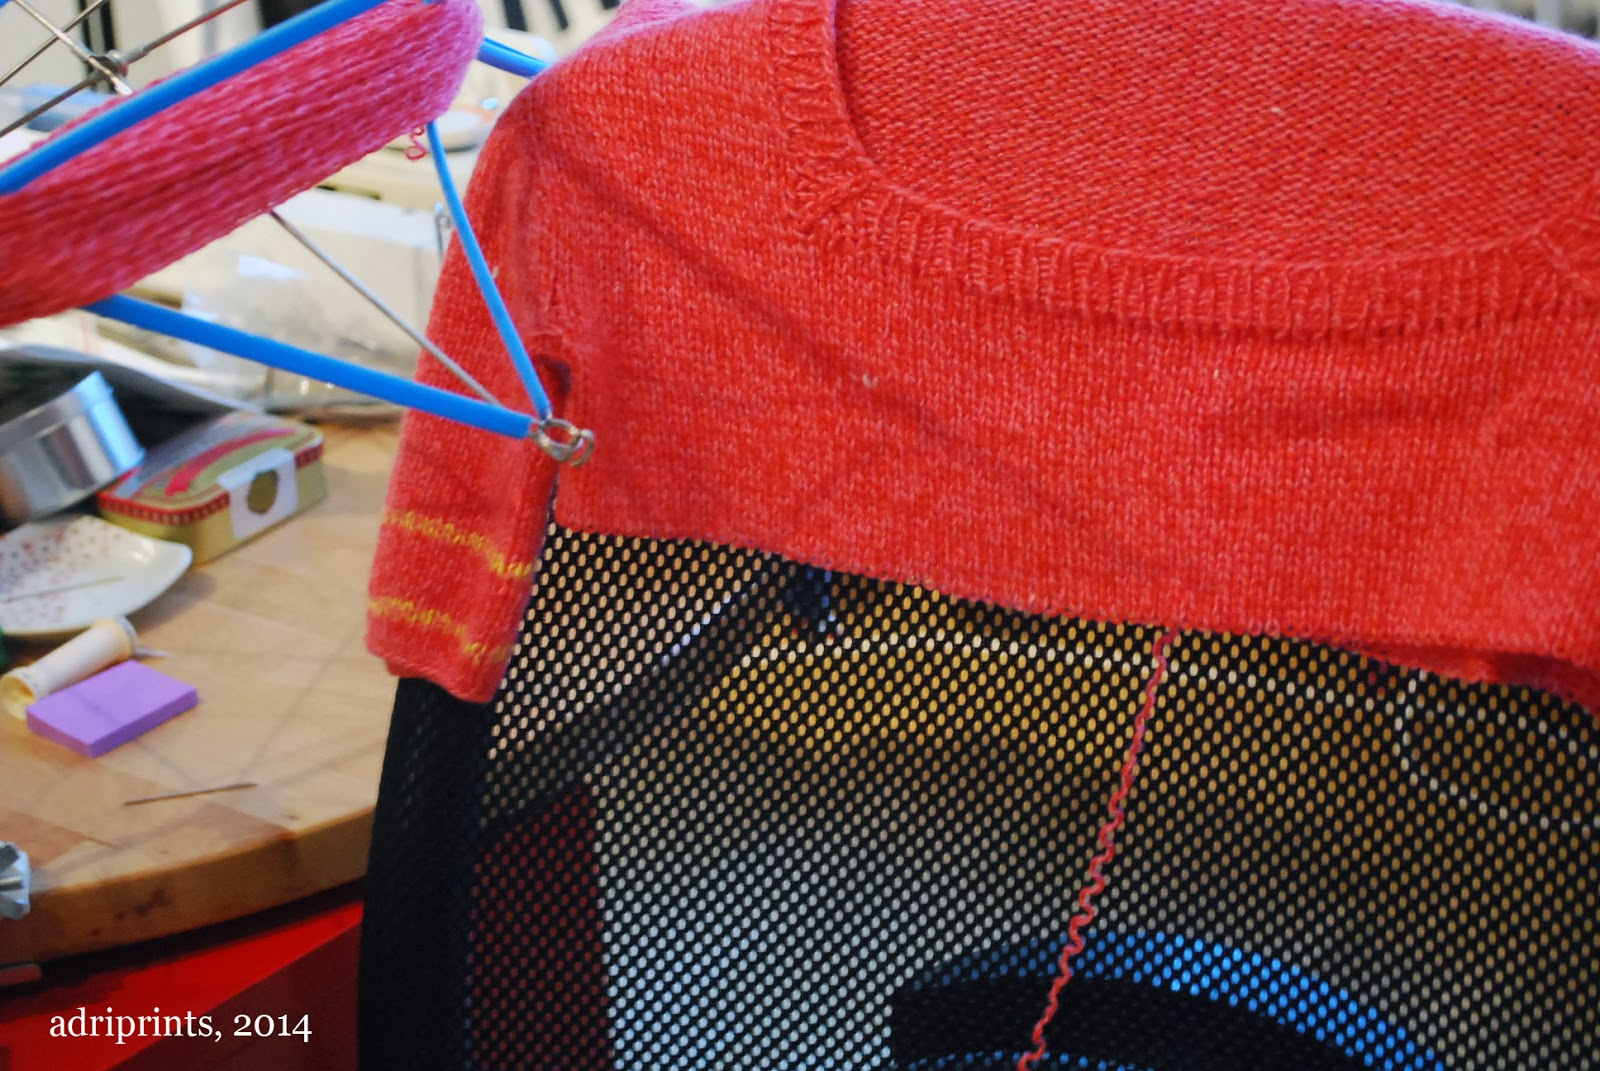
Avril in April was a contiguous method hand-knit top completed last year, but worn only once.  The sleeves and neckline were a bit too unflattering for me.  The neckline came down too low, and the sleeves were weird and poofy. Cool contiguous technique though!  The yarn used is a beautiful, bubble-gum/pepto/play-doh pink cashmere blend yarn.  So, I didn't want to just trash or donate it.  Despite the slightly pop-princess color, I truly love the yarn.  I also have some in play-doh yellow which I used for the stripes. I think it could be something else that I'd wear more often.  Yes.  Time to unwind!


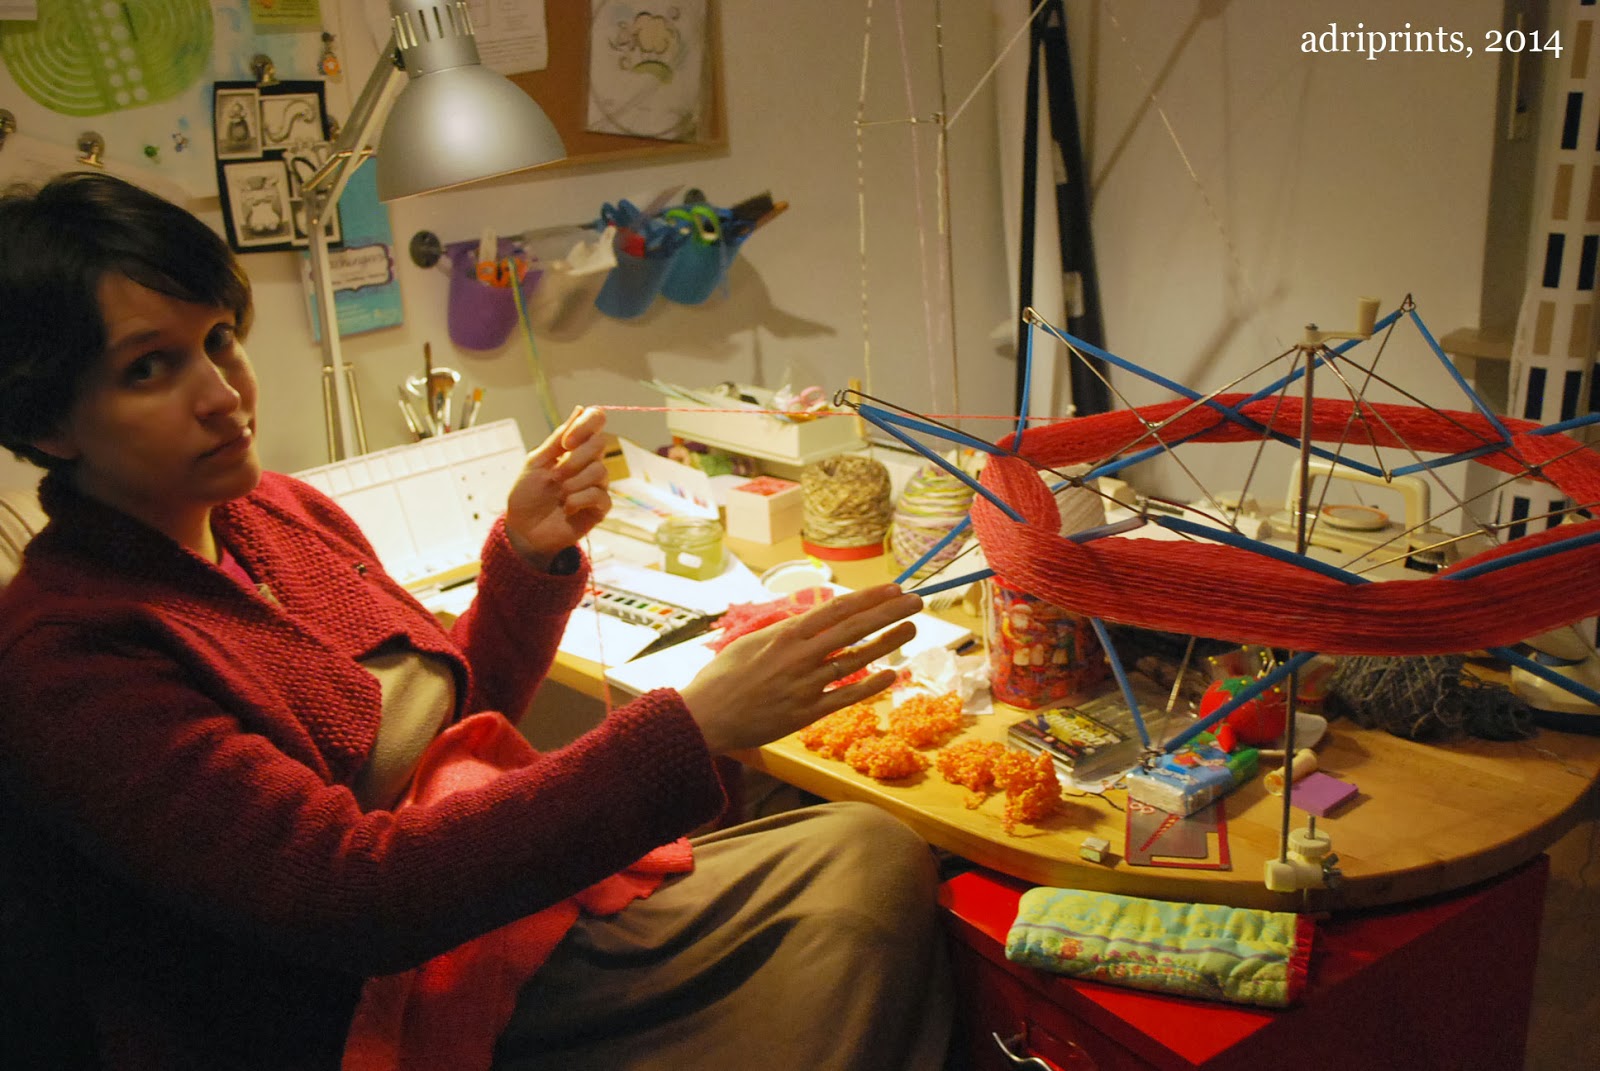
Unwinding takes time!!


Every knitted stitch that was picked up needed to be unwound by hand with a hook or tapestry needle.  That took some patience, but in the end there's this!


 A bunch of little pink balls and one big hank.  So, how do you re-use the yarn once it's all kinked up from knitting?  Well, next, I'll secure the yarn off the winder.  Then, I'll soak it and hang it to dry with a knitting machine weight on one end.  When it's dry, I'll re-wind it into a yarn cake and knit it up!

Knit Now: Ammersee Top and Wind & Storm

When you design and submit patterns to publications, you never know what will strike an editor's fancy.  In this latest issue of Knit Now, Issue #30, you'll find that my knitting pattern, Ammersee Top, is on the cover!  Had she not told me ahead of time, I'd have scared the neighbors with my squealing for joy.  This is the first time I've ever had one of my designs on the cover of any publication, and it was a very exciting surprise I'm so glad to share with you all.

Ammersee Top, photo by  Dan Walmsley, (c) Practical Publishing

Ammersee Top is an alpine-inspired short-sleeved top featuring stranded colorwork, and hand-embroidery to finish the look.  The sample was knit over a speed knitting session of two weeks or so in the fall.  You may recall a bit of a hint when I revealed the button placket in this post here.

Ammersee Top, photo by  Dan Walmsley, (c) Practical Publishing
Also,  in this issue is a favorite pattern of mine which I've been trying to get published since I imagined it.  It's called Wind & Storm, and was inspired by last year's interminable winter (although it could totally fit with the U.S.'s current frosty situation).  The pattern remained in sketch form for a while, so I was so happy to work with Knit Now and Blacker Yarns in order to make it a reality.  The yarn is really cool - I used specifically Blacker Yarns Pure Organic Wool Corriedale with Black Welsh Mountain - it's a real working yarn with body, but softens after washing.  It has this lovely marled look, but still allows for great stitch definition.  I spit-spliced all the yarn ends so I had no ends to weave in when I was done knitting.  Also, because of the quick turnaround, I had help from a friend to knit the sleeves on this beauty... Thanks, Emma!!

Wind & Storm, photo by  Dan Walmsley, (c) Practical Publishing

Wind & Storm, photo by  Dan Walmsley, (c) Practical Publishing

Wind & Storm, photo by  Dan Walmsley, (c) Practical Publishing

Issue #30 of Knit Now can be found here: http://www.moremags.com/knitting/knit-now/knit-now-30-565

2013, A Year in Review

This past year's work collage:


So, what *did* I do last year?  And, did I meet my resolutions from 2013? Let me revisit my resolutions, and let's see how faithful I was to them...
"And, my 2013 New Years Resolutions...knitting- publish a few more patterns, learn brioche knitting. Crochet - do a bit more of it. Sewing- sew a pair of perfectly fitting jeans/trousers, drape 1 dress or outfit. Quilting- finish quilting the 2 quilts from last year and make 1 quilt. Design - learn more about WordPress to create an online shop"
Knitting - I definitely published more patterns than I was expecting: Lustig Hat and Gloves, Squishy Cabled Vest, Easy Lace Loop/Cowl, Rosita Hat and Mittens, Bow Slouch, Columbina Camisole, Tyrian Loop, and Laren Fingerless Mitts... phew!  And, two projects still aren't published... more about that in the near future.

Rosita Hat & Mittens, photo copyright Knitscene/ Harper Point
Brioche knitting - I signed up for a class, and started learning, but then forgot to finish the online course!  Oops.  Let's give that one a try again this year.

Crochet - I used it more frequently this year, and I made a few amigurumi gifts and used crochet as a border in some of my own projects.


Sewing - I did manage to create a pair of jeans that fit me really, really well!  BUT... then I grew out of them, and more on that in the near future.  I loved participating in Me Made May, and hope to do it again next year if possible.
((Confession.)) I still haven't draped anything!! I failed here.  I did start drafting skirt and bodice slopers, but definitely no draping!  ((Ugh.  Guilty feelings here.))

Quilting - I did way more quilting than I thought I could!  I learned to free-motion quilt and I finished a bed-sized brown quilt, a mini lap version,  the blue sampler quilt, a baby quilt, and a double-wedding ring quilt for a friend.


Design-  I finally got my portfolio site transferred to WordPress, but I still haven't created an online shop.  Anyone have advice on easy PDF distribution systems with templates on WP?  Also, I redesigned my crochet font StitchinCrochet(PRO), and released it!


2014...  Truth be told, I don't know what resolutions I should make.  I am anticipating some big changes in my life, and the only things I can hold onto at the moment seem very vague...

1) make some art:  get back into pen and ink, finish digital illustration commissions
2) make some things with yarn: finish hand-knit projects, use machine to stash bust
3) make some things with fabric: continue on the quilting and sewing goodness track
4) blog more efficiently and step away from the internet traps (facebook and cheesy news sites)

Happy New Year!
Cheers to the new year!

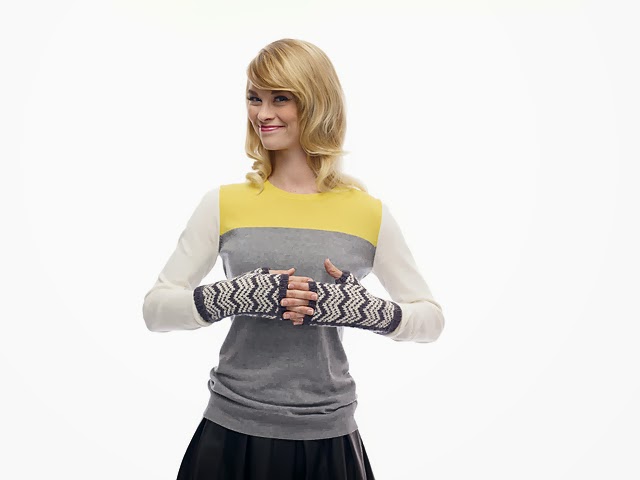
New Pattern: Laren Mitts!

I hope everyone is enjoying their holidays!  Earlier this week, this sneaky pattern was published without me even realizing it!  :D  ((Cheeky chevrons, getting all published while I was holiday daydreaming... ))

photo: copyright Harper Point, Knitscene 2013


Anyway, Laren Mitts pattern is now available in the Spring 2014 issue of Knitscene!

photo: copyright Harper Point, Knitscene 2013


photo: copyright Harper Point, Knitscene 2013

They make a great stash buster and gift since they knit up so quickly!

Details:
-Sizes 6¾ (7¼, 8)" palm circumference; shown in size 7¼"

Supplies:
-Yarn Zitron Finest Royal Alpaca (100% alpaca; 109 yd [100 m]/50 g):
• #6057 kitten grey (MC), 1 (2, 2) skein(s)
• #6059 porcelain (CC), 1 skein

Gauge: 24 sts and 27 rnds = 4" in Chevron patt on larger needles

Tools
• Size 6 (4 mm): set of double-pointed needles (dpn)
• Size 4 (3.5 mm): set of dpn
• Markers (m)
• Stitch holders
• Tapestry needle