Tag Archives: How-to

Review: Knowledgeable Knitter

Review: Knowledgeable Knitter post image

knowledge_010

First, the facts:

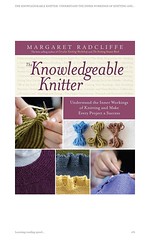
Title: The Knowledgeable Knitter: Understand the Inner Workings of Knitting and Make Every Project a Success

Author: Margaret Radcliffe

Published by: Storey Publishing, 2014

Pages: 296 pages

Type: How-to

Chapters:

1. First Choices: Pattern, Yarn, and Needles
2. Second Thoughts, Planning the Project
3. Third Time Lucky: Modifying Your Pattern
4. Forethought: Shaping and Fitting
5. Work in Progress
6. Evaluation and Adjustments
7. Putting it All Together
8. Borders, Bindings, and Embellishments

KS: Knowledgeable Knitter

The In-Depth Look:

I’m saying right up front that this is one of my favorite kind of knitting books. It’s informative and thoughtful and addresses a whole slew of questions that other books don’t even acknowledge.

I love books filled with great patterns, of course. (God knows I’ve got shelves full of them.) Because how can you not love collections of beautiful photos of garments just waiting for you to make for yourself? They’re inspiring and appealing and great to have around.

But … sometimes you simply want more. Maybe you’re tired of just following in the steps of the designers that came before you. Maybe you like the pattern but not the yarn, or you like the shape but not the neckline. Maybe the pattern uses a technique you dislike, or one you don’t know.

Maybe you just want to get into the designer’s head and know what she was thinking.

Or maybe you just want to understand.

One of my favorite things about knitting–right behind having beautiful, warm, cozy handknits that are unlike anything you can buy in your local clothing store–is that there is so much to know. It’s one of the reasons this site is called “Knitting Scholar,” after all. I like to ask questions and know the hows and whys certain techniques work (or don’t work). I like to know how to modify things if I need to, or how to adapt patterns to suit my needs.

Clearly, Margaret Radcliffe feels the same way.

She says right up front that “Knowledge is Power.” The very first sentence in the book states, “For more than two decades I’ve been focusing my teaching and writing on helping knitters develop their skills and their judgment, on enhancing their creativity and independence.”

Well, that sounds like just my kind of book. I started knitting under the written auspices of Elizabeth Zimmermann and Maggie Righetti, who encouraged independent thought–that you should be a “thinking” knitter, and so I’m always questioning, well, everything about a pattern. I mean, I appreciate as much as the next knitter that a designer has gone to the trouble to do the shaping and all the math for me, but I still like to know.

Obviously, so does Margaret Radcliffe. Her introduction continues with, “So what good are enhanced judgement, a broader knowledge of knitting techniques, and well-developed knitting skills when all you really want to do is follow the directions and knit a sweater? They enable you, even while constructing wonderful sweaters using standard knitting patterns, to tweak each sweater, making exactly the way you want it. You get to take charge of the entire process, both creatively and technically, using the pattern as a starting point. The Knowledgeable Knitter follows the life cycle of a sweater, from selecting the yarn, pattern, and needles, through knitting and finishing.”

What follows is essentially a master class in Everything You Might Need To Know About Knitting.

Yes, many knitters are happy to just follow instructions, but some of us like to know WHY, and this book gives plenty of answers to that. She talks about yarns and needles and how there’s more to swatching than just matching the gauge. There are discussions about cast-ons and finishing, circular versus flat knitting, steeks, shaping, fitting. She talks about fixing mistakes and making adjustments. Blocking. Weaving in ends. Sewing seams. Adding borders. She discusses the zipper “controversy” and the benefits to collars.

Yep. Master-class.

In short, I love this book. It feeds my yearning to understand everything there is about knitting (as if that were possible), but does so in an accessible way. Unlike some wide-ranging how-to books, I don’t feel like I’m being lectured at, but rather as if I’m having a discussion. She’s giving me this information to make my life easier or better, not because I’m doing it “wrong.” I feel free to use or not use any and all of this information (and there’s a lot of it) as I like. As jam-packed full of information as this is, it doesn’t feel like a text-book and it doesn’t feel like a lecture. It’s just … interesting. Extremely, fascinating, informatively interesting.

How can you not love that?

You can get your copy from Amazon.com like I did, or from your local bookstore or yarn shop.

Want to see bigger pictures? Click here.

My Gush: Chock full of interesting, informative details.

Other posts for this author:

Review: Cast On Bind Off (Paperback)

Review: Cast On Bind Off (Paperback) post image

FullCover B1261.indd

First, the facts:

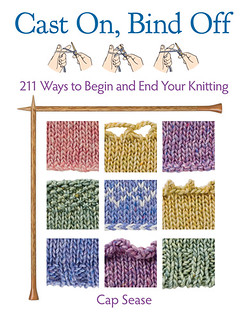
Title: Cast On Bind Off: 211 Ways to Begin and End Your Knitting

Author: Cap Sease

Published by: Martingale, 2014 (paperback)

Pages: 160

Type: Knitting techniques

Chapters:
Cast-Ons
Bind-Offs

KS: Cast On Bind Off

The In-Depth Look:

A reissue of the 2012 hardcover, this time in more convenient paperback!

It’s hard to review a book that’s been around for a while–don’t people already know what’s in there? But that doesn’t lessen the “need to know” element, and in this case … you need to know.

Casting on and binding off your knitting … I think we can all agree that that’s important. If you don’t know how to stop or start properly, it’s never going to matter how perfect or beautiful the knitting in between is. Eventually, things will just unravel into a fuzzy, chaotic mess, and that’ll be it.

Except … most of us know only a few ways of starting and stopping. In fact, I’d wager that most knitters only really know one or two ways to get their stitches safely on or off their needles. Maybe three or four if they have a reference book handy. And almost everyone has a favorite, go-to method that they use for almost everything.

The beauty of this book, though, is the fact that, like so many other things with knitting, there’s so much more. There are dozens of different methods. In fact, according to Cap Sease, the brilliant mind behind this collection, there are 211 of them.

I’m betting that’s approximately 200 more cast on/bind off methods than you were aware of.

Maybe you looked at this book when it first came out in hardcover and thought, “That looks really interesting, but…” before putting it down. Hardcover books can be expensive, after all, and heavy to lug about in a knitting bag.

Which is why you NEED to know that Cast On, Bind Off is now available in paperback. You can find it at your local yarn shop or at Amazon.com.

This review copy was kindly donated by the publisher. Thank you!

My Gush: Just as good in paperback

Washing Fleece in the Washing Machine

You know what’s really hard? Getting a good photo of raw fleece. Even in a room with good light, it’s just difficult to get take a detailed photograph of bits of fluff.

Tunis Fleece
I give you a Tunis fleece I received as a wedding gift last year. (Yup,pretty much the best wedding gift ever.) This is Tunis from the same farm as the roving I have for sale in my shop. It’s been living in a box since then, first waiting for me to have a place to wash it, and then after we moved in to our new house, waiting for us to get a washing machine. After we got a washing machine, I was too busy preparing for baby to think about washing fleeces. Well, that’s not completely true. I thought about it plenty, I was just slightly afraid to do it for fear of felting, and I always so freaking tired, I didn’t bother to figure out where my fleeces were stored when we moved. (Turns out they were in plastic bags, inside a suitcase, in the basement. I think it was originally to protect them from moths, but it was a really good hiding place from myself.)

I love this wool. It’s a solid medium wool, with a little peachy color to it. I think it spins up lovely and sproingy. Because this was a gift, and the box it came in was unmarked, I don’t really know how much it is, but I do know it’s from the 2013 clip. I’m guessing 3 or 4 pounds before washing. Yes, I could have weighed it, but I’m saving that for after it’s clean and dry. What’s good about this fleeces is that it came very well skirted. I didn’t have to pull out any tags or discard any of the locks for being felted or poopy. It is dirty, and there is plenty of VM in it, but it came from a sheep, what do you expect?

Tunis Lock
What a pretty lock.

I would take a good look at you fleece before you toss it in the wash, and get rid of the parts that aren’t going to be good for spinning. No use washing them when you can toss them straight into the compost. After that, getting the fleece clean is pretty simple.

washing the tunis

Supplies needed:
1. Fleece
2. Dawn Original Formula (theoretically, any dish soap should work, but I stick with the one that really strips out the grease.)
3. Washing Machine

Washing the fleece
-Fill washing machine with hot water and about 1-2 cups of dish soap (Use more soap for heavier lanolin.)
-While machine is filling, loosely pick locks apart. No need to get super thorough, you just want to open them up enough to let the water and soap in.
-Add wool to water, gently pushing beneath the surface. Do not mix it around. Also, be sure to turn off your machine before it starts to agitate. Some machines only do this if you close the lid. If you’re lucky like me, your machine goes straight from filling to agitating with no pause in between, so I have been waiting until the machine is filled before adding any fleece, just in case.
-Let sit 15 minutes
-Turn to spin and allow the washer to spin all the water out.

(Repeat if you have a particularly dirty fleece.)

-Rinse the soap out by filling machine again and soaking for another 15 minutes, followed by another spin cycle.

Washed Tunis

What’s really cool about this method, is spinning all the water out in the washing machine really cuts down on dry time. When I was washing fleece by hand and drying it on a rack in a southern window, it would sometimes take days for wool to dry. This wool should be dry later today. (The only downside I can see is if you are a person who really likes to spin from perfect locks, this isn’t going to get you there.)

Obviously, it’s going to need a little bit more picking to get all the vm out, but that’s so much easier to do when it’s not getting caught up on lanolin.

Today I cleaned Tunis and Rambouillet. I’ve never worked with Rambouillet before, so I am excited to get my hands on it once it’s dry. Do you have any favorite breeds?

Dyeing Yarn with Leftover Easter Egg Dye

easter rainbow

Sunday morning, Easter Sunday, Athrun and Brock and I had a morning full of Easter Eggs. We set up a hunt for Athrun in the yard, we opened them and filled a bag full of candy, and we boiled and dyed a dozen real eggs while the cat spread the plastic shells all about the house. (Seriously, these are her favorite toys. She almost didn’t let us get them filled, she was so excited when we got them out on Saturday night, she kept trying to jump in the bag.)

Every year I get a package or two of the little PAAS egg dyeing tablets, which is enough to do about a million eggs. I know we’ll only eat about a dozen hard boiled eggs in a week, so I try not to boil more than that, or it just seems wasteful. This means we always have a ton of leftover dye stock. This year, we did rainbow colors, at full brightness, and the leftovers got used on sock yarn.

I’ve been digging rainbows lately. Our baby quilt is rainbow, baby and Brock are going to have matching rainbow socks, and it seemed like the only thing to do with our rainbow of Easter egg dye turn it into some rainbow sock yarn.

In previous years, when using up the leftover Easter egg dye, I’ve watered it down, put it in squirt bottles and used it on about a pound of top. This year, since I was thinking yarn, I soaked 4 skeins of sock yarn, still about a pound, but instead of squirting it out, I just dumped the dye out of the cups we used to dye the eggs straight over the yarn in six cross-wise stripes. Since the yarn was wet, the color ran a little bit, which I wanted, then I wrapped it in saran wrap and microwaved it for about ten minutes. (I have a really old microwave that works at about half capacity. If you have a new one, it should probably only take three or four minutes. Also, I only use my microwave on food safe dyes, because I don’t have a dedicated dyeing microwave.) Gave it a quick wash and hung it up to dry.

easter<br />
rainbow sock yarn
I love the white showing through!

easter rainbow sock yarn reskeined

easter rainbow sock yarn reskeined 2
Reskeined, you can see how short the color repeats are and how each color will just flash a tad when knitted, and that there is a lot less white space than it looks like in the earlier pictures. As soon as I can scrounge up some sock needles, I am totally casting on a pair of socks for myself out of this!

The other three skeins will be available for sale sometime after the baby arrives, so be on the lookout! (If you’re interested now, let me know, and I’ll reserve them for you, but I’m getting close enough to delivery that I am not prepared to make any promises on shipping.)

Drum Carding From Locks

A few weeks ago, I found a pretty good deal on etsy for some washed Corriedale locks. I love Corriedale. It’s probably my favorite wool to work with (that I’ve come across anyway, I am still trying out new wools whenever I can.) I have long been wanting to play with locks on my drum carder, and while I have plenty of fleece stashed around, I haven’t really had the time or energy to wash it properly. (Horrible, I know I shouldn’t let it sit.)

The locks I got were a bit yellowed and tippy.
corriedale locks
But, the crimp was darling and the strength in them was fantastic. If I had a flick comb, I would have flicked out the ends, but since I don’t, I just picked the locks apart pretty thoroughly. There was still a bit of vm in these locks, but no too much. Most of it came out all over my table in the picking and carding process.

I ran the picked and opened locks through my drum carder sideways. I didn’t weigh them out first, as I had 8 ounces and was planning to give the whole lot the same treatment. My first batt ended up being about 2.5 oz.
first round
It’s a start.

Then, I pulled the batt apart and ran it through the drum carder again, this time pulling the batt apart in strips and fluffing out the strips and getting some more air between the fibers.
round two
This batt looks much smoother and fluffier than the first, but the fibers were still not quite blended enough for my tastes, so I repeated the process again.

round three
After a third time through the carder, I was really pleased with the texture of the batt and the distribution of the fibers. This is a super spinnable little batt. However, I am not all that pleased with how peachy it is because of the yellowing of the wool. My plan is to slowly card up the rest of the locks in this manner–slowly because it’s really hard to turn my drum carder without standing at a funny angle so I don’t hit my giant belly with the handle–and diz it all out into roving, and then dye the lot.

Besides the yellowing, I really like how this came out. It makes a girl feel a little powerful, turning some dirty looking locks into usable, perhaps even pretty, fluffy spinning fiber. I’ll keep you updated as I continue the project!

Tutorial: Zig-Zag Quilt

You can make your own Zig-Zag Quilt top from stash scraps, and it's not too difficult!

Main requirement for piecing this quilt top:
72 white pieces of fabric, 4.5" square
72 print pieces of fabric, 4.5" square

You'll also need:
- additional yardage for sashing, backing, and binding
- batting for the center of the quilt sandwich

Side Note: Someone asked me how I get the fabric for my stash and how I chose the colors for this quilt.  My stash was built up from fat-quarters and yardage for garment sewing.  I am a bit compulsive after sewing projects.  I can't remember where I got the idea to save scraps larger than 2" square after sewing projects.  But, that's what I do. After a project, I cut down the smaller bits of fabric into two categories: strips or squares.  I trim the squares to be 4.5" because that's the size of my plastic template.  And the smaller stuff gets turned into strips or dresden plates.  Then, I have little clear plastic bags where these scraps are organized by color.  Obsessive yes, but hey, it made this project a real snap!


First, the basis of this quilt is the half-square triangle.  It's known in the quilting world as the HST.  After you've mastered that, you're pretty much set to go.  Here's how I did the HSTs for this quilt...


As described above, I started with two fabric squares in contrasting colors of identical size.  In the case of the Zig-Zag Quilt, I started with squares that measured 4.5".  As long as all your squares are consistently cut and pieced, it's all good.  Each pairing makes 2 HSTs.  You lay one white, one color square with right sides together.  Mark the diagonal, and stitch 1/4" above and below the mark.  Then, cut across the diagonal mark, open, and press the two squares you just made.  I do loads of squares at a time by chain piecing and then press them all at once... I learned this from Craftsy's 2012 Block of the Month with Amy Gibson - the February video here is all about the HST.

Once you've made a bunch of these HSTs, they can be combined in so many different ways!


In the case of the Zig-Zag Quilt, here's how I pieced the top:


Each row of zig-zags used 24 HSTs.
The final quilt had 6 lines of zig-zags, which equals 144 HSTs.
This also means that I started with a total of 144 squares of fabric: 72 color and 72 white squares.

In any case, once I had the long pieced rows of zig-zags, I carefully joined them across these rows, making sure to use pins to line up all the seams.  I tend to press my seams open, and this was no exception.


Next, I added sashing to the outer edge of the top (that white outer frame).  My sashing had extra width to it.  If I remember correctly, the sashing was 6" wide so I could trim it down if I had to square up the quilt after free-motion quilting.  I didn't end up FMQing, but it's always good to have a bit of wiggle room for squaring up.

You cut your batting (the fluffy middle) about 4" longer and wider than your top so you have 2" of adjustment... just in case!

For me, the trickiest part of this quilt was the backing.  If you have a really vertical/horizontal element on the back like in my version of the quilt, you want to be sure to hand-baste a few cross-hairs across the quilt so it's accurately aligned to the front.  I ran a line of basting down the center of the big vertical element, and across both the horizontal elements.  This help me to be sure it was oriented correctly to the quilt top. If you want to avoid this extra step, just use a non-directional print, and a whole cloth style for the back.


My first quilts lacked this kind of precision (and were really wonky) because I didn't understand how important basting was.  Once you learn to hand-baste quickly, there's no excuse! It takes a few minutes for a quilt of this size.  I did both pin and hand-basting for this quilt.

Lastly, is the actual quilting.  First, I stitched in the ditch (along the main zig-zags).  Then, I echo-quilted which means I ran a line of stitching about 3/8" away from the zig-zags.  I just used my presser foot's width as a guide.  Then, I quilted the sashing, added the binding (that final outer edge) using this tutorial from Sew Mama Sew and Mary on Lake Pulaski.

And, that was it!

The final quilt including the sashing and binding is 51" x 51".
The main print for the backing is Tula Pink's "Turtle Bay" print from her 2011 collection "Prince Charming" in Indigo.  Everything else was scraps and leftovers from my stash.

I hope this tutorial helps clarify the process of quilting something like this improvised quilt.  Have you ever quilted before?  What were your first quilts like?

MK Tutorial: Mitered Detail with Short Rows


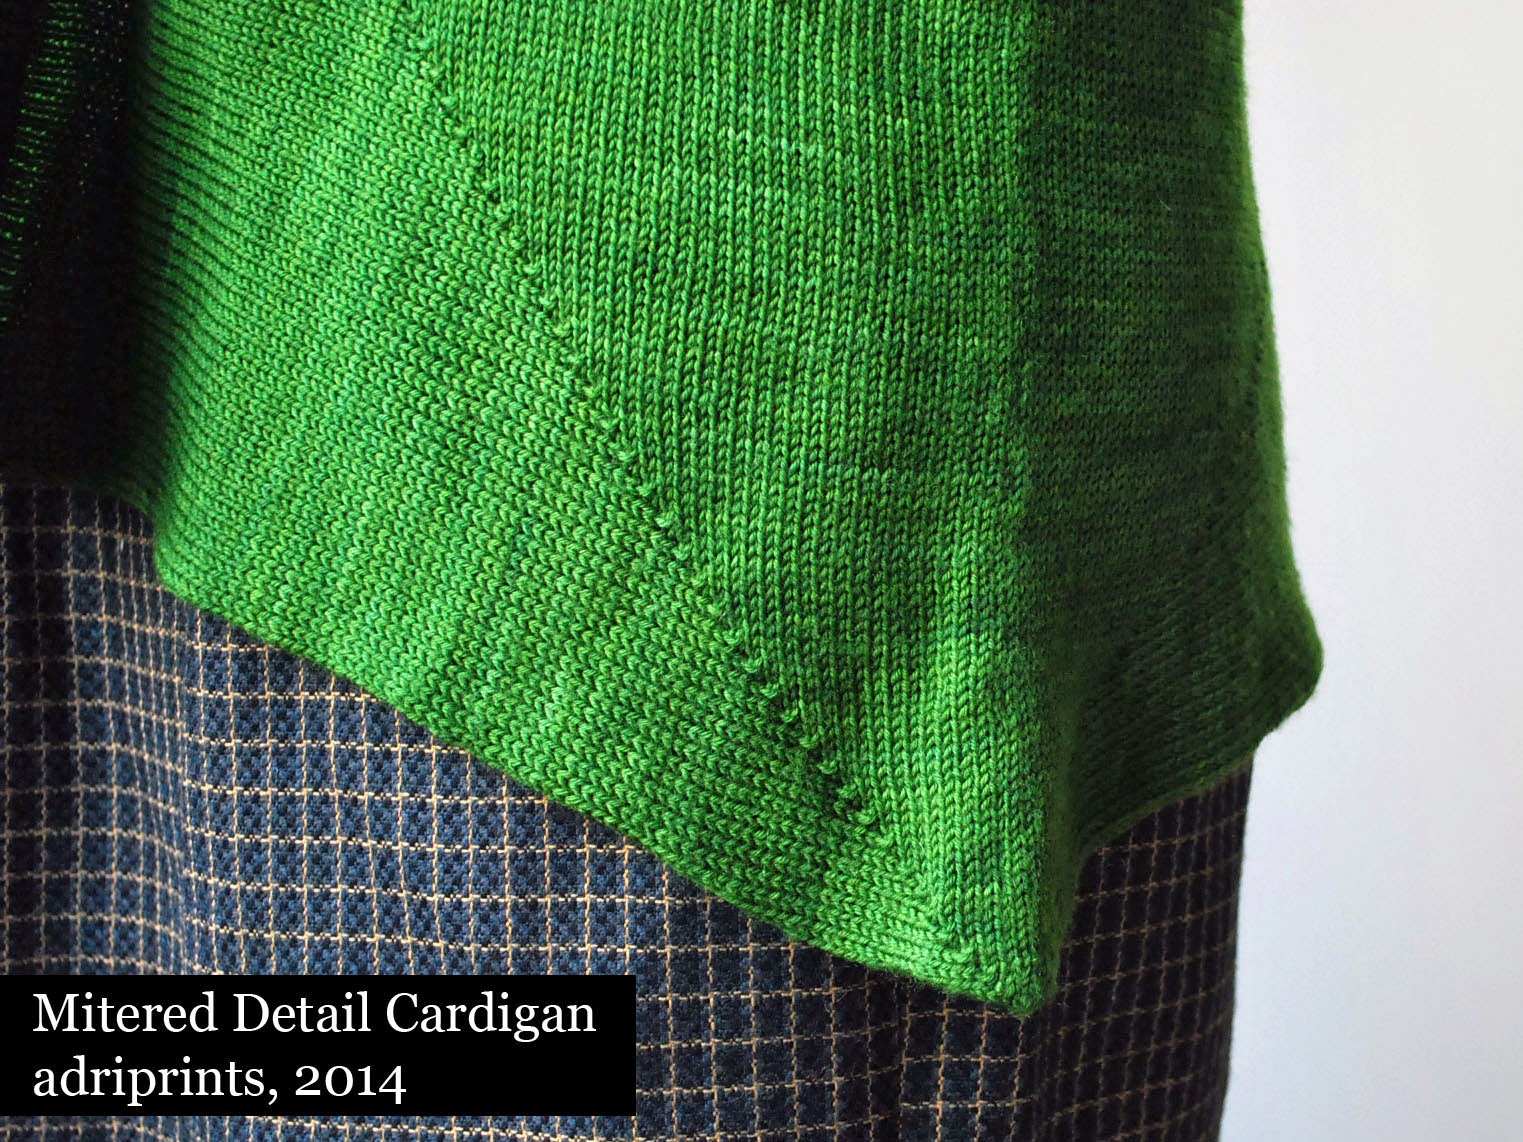
This tutorial is a machine knitting tutorial that leads up to the publishing of my pattern, "Mitered Detail Cardigan."  The mitered detail in the pattern can be accomplished in two ways.  The first way described in the pattern, is with short rows (also known as partial knitting) and by wrapping each stitch as they are put on hold.  In order to best show what I mean, I made a video tutorial for this one...


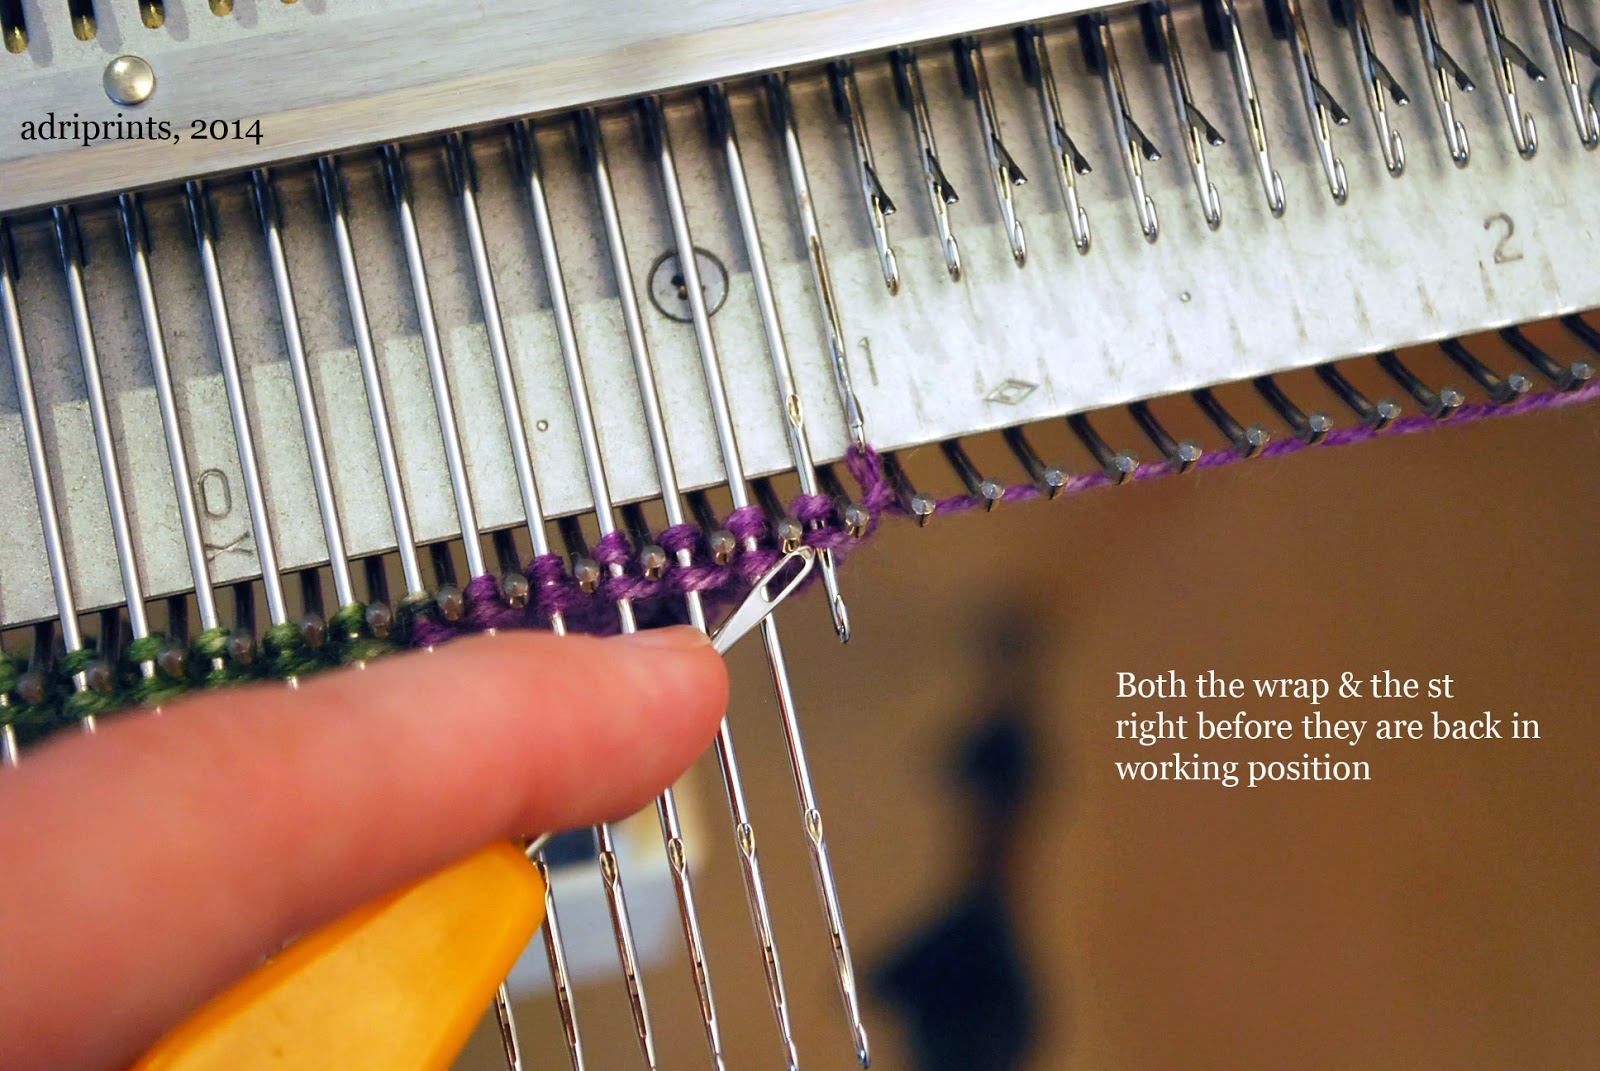
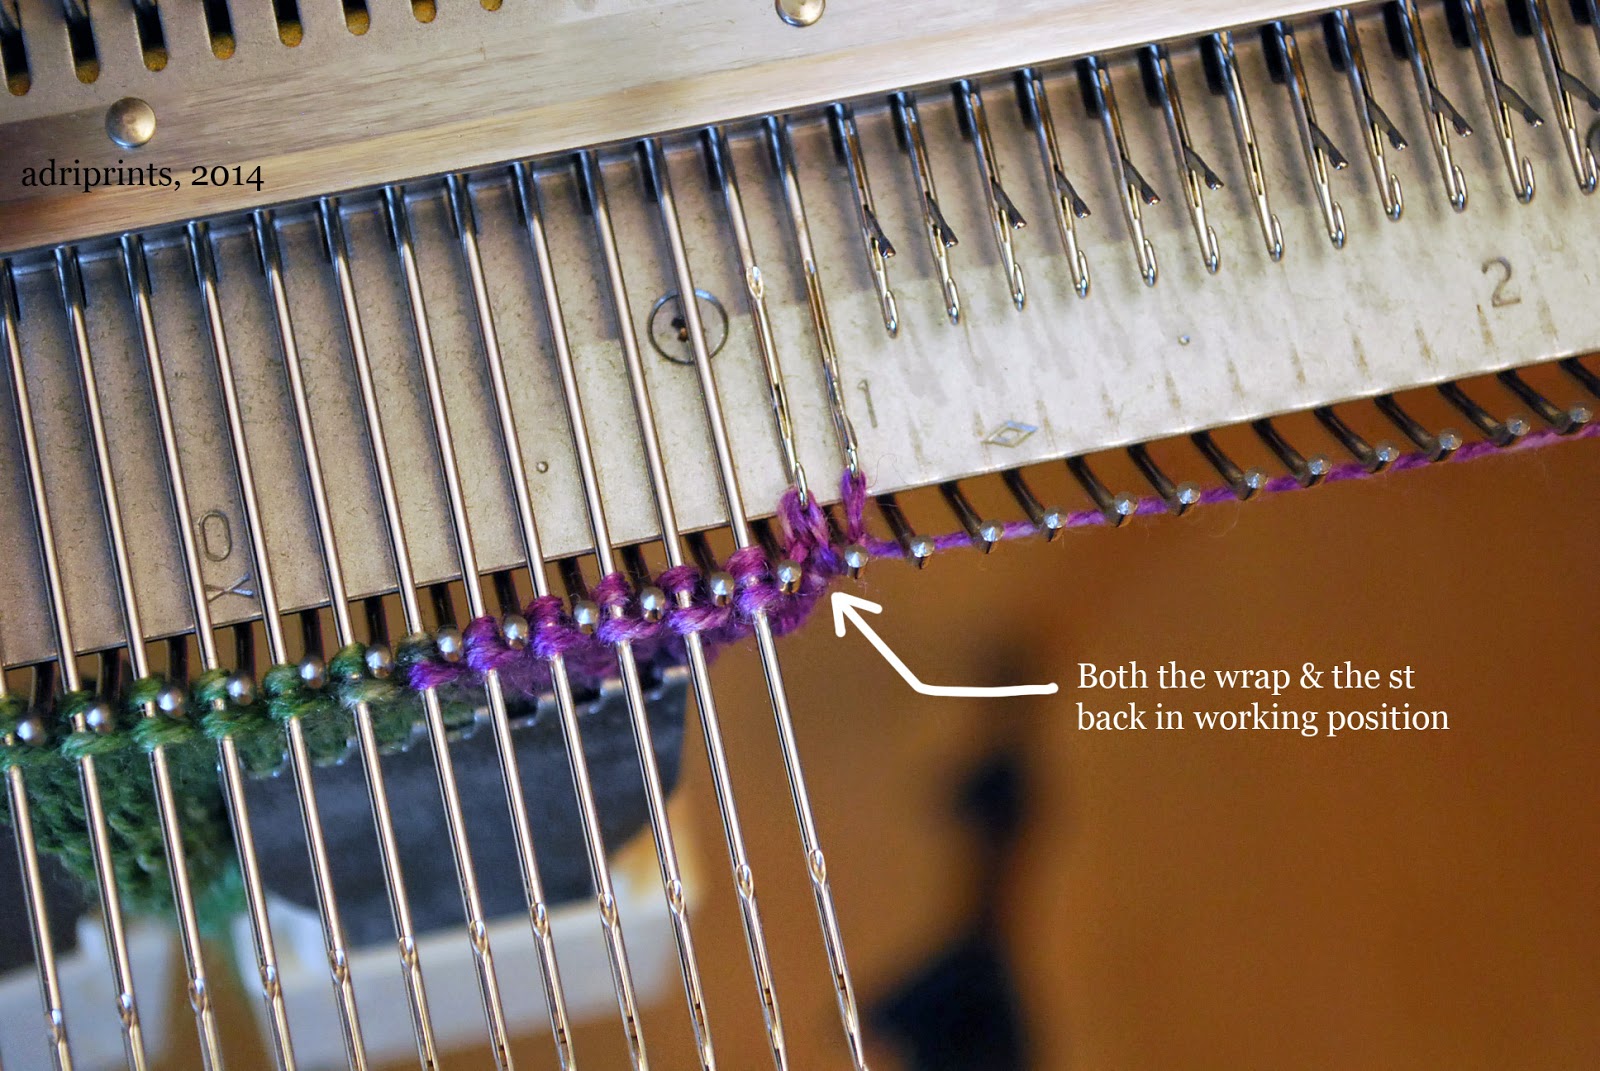
Just in case it's too blurry in the video, here are detailed photos of what it looks like to "reactivate" a stitch into working position.

Wrap & stitch back in the hook part of the needle.

Wrap & stitch ready in working position ready to knit.

Here's a mini sample showing the detail on the front and back.  I think the color pooling of the yarn helps show the order in which things were knit.  The green section happened first, then the purple.  With WS (wrong side - in this case the purl side) facing, this block was worked from left to right.


How I Made My Muslin Baby Blanket Set

Today, I have exactly what you all wanted out of knitting blog, more fabric printing and sewing! Seriously though, I’m having a lot of fun sewing simple things on my sewing machine and learning how to print on fabric. Thanks for sticking around to read it.

meadowlark muslin
I started off with some simple natural muslin from fabric.com. This is the kind of muslin your supposed to make, you know, a muslin out of. It’s not the traditional guazey baby blanket muslin, but since I wanted something that was more tea towel consistency to begin with, I am perfectly happy with this fabric–except for the wrinkles. I can’t tell you how long I spent pressing, and it would still be wrinkled. We’re going to blame it on my ancient iron and then move on.

babyblankethemming
After washing all 6 yards, I cut it into 3 45×45 inch squares. I still had about a 60 inch length of fabric left over for another project. I always press my hems and pin them. I’m not the neatest sewist out there, so whatever I can do to help keep my final product looking nice, I try to do.

babyblankethemmed
I gave these blankets about a one inch hem, partially because of my sloppy cutting, and partially because that’s an easy amount for me to eyeball. Also, I completely charmed with how well the thread matches the fabric.

sheep on a blanket
On the first blanket, I stamped out the sheep using a linocut I made last year and some yellow acrylic paint and a fabric paint medium. This helps the acrylic adhere to the fabric more permanently. You’ll notice when you first do you printing, after the paint dries, the paint is very stiff. This will soften up when you wash it (follow the directions on the fabric medium.)

I’m still learning how printing on fabric with paint is different than printing on paper with ink. So far, I feel like paper and ink are easier, but I feel like paint on fabric is cuter.

baby blanket painting
On the other printed blanket, I used the tiny paint roller to put on my silly stripes. I used three colors, printing the stripes one color at a time. I wanted the stripes a little funky, so I just eyeballed the spacing and didn’t worry myself with keeping the lines straight. Also, I did put an old beat up cardboard box between the blanket and the table top, because the paint will bleed through a thin fabric like this. If you don’t want the texture to your stripes like I have, choose a pristine piece of cardboard and pin your fabric down so it doesn’t move at all.

baby blankets
For the third blanket (in the background), I dyed it with Rit on the stovetop. It was pretty quick and painless, but I’m not sure how much fabric yardage I’ll be dyeing in the future. I really like the natural color of the cloth peeping through between my printing. I do love this sunflower yellow color though.

Stripey Baby Blanket
An above view of the stripes.

muslin blanket set
And here is the finished set. Three unique blankets that are perfect for swaddling and won’t be too heavy as the weather warms up.

How I Made My Own Custom Ring Sling

a handmade ring sling

With my first son, I had a Maya Wrap baby carrier that I simply adored. Between him turning about six months old and now, I have no idea what happened to it. When I found out I was pregnant last August, one of the first things I did was browse through the Maya Wrap website to see which fabrics I liked best. Slowly, over the last several months, I convinced myself that surely I could sew one myself. One of the reasons I wouldn’t let myself do that much sewing when we were living in the apartment, was because I was already getting the hankering to decorate fabrics myself, and I knew that if I was going to sew anything, I knew I was going to have print my own design onto it first. There just wasn’t room for any more stuff in that apartment. No more fiber crafts could fit, so I just focused on woolly things. But in the new house, I have a whole room to cover in wool and fabric and dye and paint…and I have done a pretty thorough job of filling it up in just two months.

osnaburg
I started out with 2.5 yards of natural osnaburg from fabric.com. I washed and dried it as soon as it came in. The edges frayed a bit in the wash, just a warning.

stripey baby wrap fabric
Then I ironed and pressed and spent a long, long time re-flattening my fabric so the paint would go on as evenly as possible. (For the record, the not-straight stripes and sometimes thin paint was on purpose.) I used acrylic paint and a fabric medium fixer (link below) and a tiny paint roller I bought at Joann for $.99 to apply the stripes.

I allowed the fabric to dry for at least 48 hours and then ironed it front and back (on the front with a piece of scrap fabric over the paint) to set the color and then threw it in the wash with a load of laundry. I made sure I took it out of the dryer as soon as it was done so I wouldn’t have to spend an hour ironing it again, and then I spent a few minutes cuddling it.

Next I trimmed all of the big unraveled pieces from the edges, and then zigzag stitched around the perimeter of the piece so that it wouldn’t fray anymore. (Warning: you will likely have to refill your bobbin at least once during this project.)

Then I hemmed three sides: the two long sides, and only one of the short sides. Leave the top of your sling, the part where the rings are attached, unhemmed unless you have a really powerful sewing machine. You’ll have quite a bit of fabric to sew through at the end.

I followed the sewing tutorial on the Maya Wrap website from here about where to sew and how much–which at this point is really just three or four quick seams, but over a serious amount of fabric. Make sure you watch the videos about how to properly thread and use your wrap.

handmade ring sling rings

What you’ll need to make this project:
Sling Materials
-2.5 yards of a 45 inch fabric
-A set of Sling Rings
-Coordinating Thread

Printing Materials
-3 to 5 colors of acrylic paint (I used Americana)
-1 bottle Fabric Painting Medium (follow instructions on the bottle)
-Paper plates and disposable spoons for mixing paint with fabric medium
-1 inch foam paint roller

My total cost for the project:
fabric $9.95
sling rings $3.79
thread $2.99
paint $5.94
roller $.99
Total: $23.66
(Even rounding up for tax and shipping, the project comes in at under $30)
That’s a fraction of the cost of an name brand wrap, and I was able to completely customize it to my tastes. My colors, a wider shoulder and smaller rings, than the original. Now I just need a baby to put in it!

Love and Mending

I wasn’t always a knitter. Nobody in my family really taught me how to knit. (I think my grandmother tried once when I was seven. It didn’t take.) In fact, I only started knitting not long after I started dating Brock. He would meet me in Lawrence after my knitting class let out of the Yarn Barn and we’d go eat noodles at Zen Zero. Even then he was asking me if I would knit him a sweater. I started with a scarf, a little reluctant to commit to a whole sweater so soon.

Brocks Sweaters

I did finally knit him a sweater in 2011, ignoring all the boyfriend sweater jokes everyone made as I worked on it. The classic Cobblestone turned out really great! So great, that last year, I decided to knit him another, The Ishmael Sweater. He has worn one of the these sweaters every day the weather has been less than balmy for the last two years. I take it as the deepest, most loving of compliments that he wears them so much. He understands that when I knit for him, it is an act of love.

And he has just about loved these sweaters to rags.

Holy Sweaters
The elbows on both sweaters look like this. I have patched the green one multiple times. He has only just worn through the elbows on the red one.

Armpit Hole
He also somehow managed to completely rip out the kitchener stitch from one of the underarms. I was hoping this year’s sweater would be finished before the red one gave out, but no such luck. It’s also still January, so he’ll be needing something warm to wear for at least the next two months, but I managed to sneak these away for the afternoon.

Knowing that all my careful elbow mending only lasts a few weeks, this afternoon I finally purchased some of these at JoAnn:
elbow patches
Leather elbow patches. Let’s see him wear through these!

I started with the red sweater, because the mending was simpler. I sewed up the holes on the elbows (though perhaps not as neatly as I would have done had I not been intending to cover them up) and then I closed up the underarm again. I gave the whole sweater a good rubbing with the sweater stone, and then sat down to sew on the arm patches.

The nice thing about these patches, is that they already have holes poked in them, which I think is why they cost so much more than just a regular old swatch of suede. However, the holes were the perfect sewing guide, because I am a lousy hand-sewer with no patience.

But after about an hour’s worth of work, I had a smartly repaired sweater.
Repaired Ishmael

You’ll notice the patches aren’t in the same place on each sleeve. While aesthetically, I would have liked to have them match up perfectly while the laid on my work table, I decided centering them over the most worn parts of the sleeve would be more practical. And sure enough, as soon as Brock tried it on, the patches didn’t look at all lopsided, but covered his elbows perfectly.