Tag Archives: WIP

Checking In

Hi Constant Reader,

I'm back in the studio, but I'm currently sick. The culprit was/is likely all that traveling that got me down, but no matter.  I've got a lot planned, and a lot to wrap up in the next two months.  You know how it is.  November's shouting out at you on the calendar.  You realize exactly how many things aren't finished that needed to be done by the year's end, and that's where I'm at.  I'm re-organizing my schedule.  I'm not taking on any more knitting-related commissions until next calendar year, and I'll be focusing on my UFO quilting, sewing, and self-publishing projects.


Almost Finished:
Twinsies Boy Blanket (knitting machine project) just needs final panel, washing/blocking
Same Same Cardigan (hand-knitting) just needs blocking


About Half Finished:
Blue Quilt (machine quilted)

- - - -
Not Started:
Twinsies Girl Blanket (knitting machine project)
Sugar Block Quilt (machine quilting)
bras/bralettes project (sewing/upcycling)

The Big Move and a Neckline

Quite a bit has happened in my world since my last post.  We discovered what was apparently a family of possums, including some dead relatives, living under our house (a rental) and mice in our AC ductwork.

Yes, you read that right, mice INSIDE our ductwork.  We asked the landlord to remedy the situation, which he basically refused to do (other than to put out poison).  It was the last straw.  He had previously refused to install weather stripping around the doors, fix the refrigerator and freezer door seals, properly fix the only toilet in the house, and it took two giant limbs falling on the house, causing roof damage over the room that was Ella’s before he agreed to cut down the giant dead tree.  His refusal to fix something that I considered a health hazard to my child was the last straw.  So we found a new place to live within a couple of days, packed the entire house in a week while working full time and caring for a teething baby and moved.

We did not have internet set up and have been living out of boxes, but it is SO worth it for the peace of mind.  We had a minor maintenance issue (refrigerator door handle came off) and they arrived to fix it within an hour.  What a change!

Internet was finally installed two days ago, after two weeks without and I am back up and running knitting wise as well :)

First, an apology.  I did not properly put my shoulder pictures on public on flicker, so it did not show up in my last post.  So here are some shots of my shoulder and the neckline I have finished since my last post:

Ojai03 Ojai04 Ojai05 Ojai06 Ojai07

As you can probably see, I think I have picked up too many stitches around the neckline.  The ribbing is all floppy and seems too big.  I tried it on and it is some better, but the ribbing is still too big:

Ojai01 Ojai02

In the second picture you can see the extra ribbing that I have folded over.  I will probably rip it out and do it over, but for now I want to finish the rest of the sweater first and see how I feel.  After a move like I just did, the thought of ripping out any knitting is beyond me.

I hope your worlds have been calmer than mine!

Jessica lives in the cesspool of sin (aka: Asheville, NC) with her husband and Superbaby.  She enjoys knitting, spinning, hiking and has recently become obsessed with Downton Abby and True Blood.  She continues her search for a way to keep work from cutting into her crafting time.

Amber’s Blaithin — The Big Steek

9-17 (3)

As I hoped would be the case, things really picked back up once I got to the excitement of the colorwork section.

9-17 (1)

9-17 (2)

And finally getting to the point where I could try it on was something I’d been waiting for the whole time.

9-18 -- colorwork done!

It fit! And almost perfectly at that! Looks like all my bothering to follow the directions careful measuring paid off.

After finishing the neck, I turned the whole thing inside out to weave in my few ends, graft my underarms, and sew the pocket flaps shut.

9-19 (2)

And while we’re inside out, here’s a look at the backside of the completed yoke. There might be a few tight-looking spots, but I am confident that they will be fine once the whole thing is washed and blocked.

9-19 (1)

Some of the natural yarn floats are looking a little sloppy from behind because they’re held up in the center of seven stitch stretches. I don’t know why I was compelled to secure them and leave that bottom row as is, except that maybe it seemed like a good idea as I went along. And possibly there were some terrible flashbacks of when I used to wear rings and constantly get them caught in the back of stranded colorwork sweaters of all kinds. I’m not sure why I felt the need to share all of that, except that I am embarrassed by my lack of neatness I suppose. BUT ANYWAY. Steeking time!

As I am A) a first time steeker and B) this is a Kate Davies pattern, it seemed like a no-brainer to go with her steeking tutorial. Not only does it get rave reviews, I also assumed it would speak to me in a way I would feel comfortable with, since I really like the way Davies’ patterns are written. (All four parts of her steeking tutorial can be found here on her tutorial page.)

For my crochet needs, I went with a wool yarn that felt good and snaggy and also brags of its felting prowess. If that wouldn’t lock my stitches in place, what would? It might be hard to see what I’ve done because unlike the examples which use contrasting yarns to illustrate each step, I needed to use a matching yarn that will not show through my finished edging.

As suggested, I marked off the body with pins down the middle of the stitch that will be cut to keep me in a straight line. (Oh boy, it’s getting real now!)

9-20 (1)

Getting started,

9-20 (2)

9-20 (3)

9-20 (4)

Looking good so far…

9-20 (5)

9-20 (6)

Eventually, I made it all the way down and back up again (crooked from a few areas where I seem to have accidentally added a few extra stitches, oops!), and my steek bridge was complete.

9-20 (7)

And then,

and then…

9-20 (8)

I will not lie to you, the first cut was wince-worthy. But when nothing horrible happened (as promised), it went very smoothly. The “Cut Me!” ladder up the middle shows itself readily as you go,

9-20 (9)

and unless you’re using a pair of gigantic garden shears and snipping all willy-nilly, while blindfolded, there is not much of a chance of you cutting any bits you shouldn’t. Really! I encourage you to try it sometime. I am officially a steeking convert now.

9-21 (2)

See? Nothing out of place, and the edges feel as strong as can be. Yay! The next step in securing the cut edges in this pattern is the “steek sandwich,” as seen in the many pictures to follow.

These are the very first stitches I picked up for my left side sandwich. I did a really crappy job on that side and had to redo it after I did the other side and saw them together, but it went pretty smoothly the second time around.

9-21

As explained in the tutorial, you pick up and knit stitches on the front of the garment, and pick up on the back and knit a flap there as well. You can see here how the two sides come up and will eventually enclose the crochet reinforced edge.

9-22 (1)

Looking good so far.

9-22 (2)

Close that puppy up!

9-29 (1)

9-29 (2)

9-29 (3)>

Mmmm, sandwich. Now on the other side, otherwise known as, “the one I did right the first time,” the next step after closing up my sandwich was marking off for buttonholes. Being who I am, I measured to keep it nice and even, and found that they could be spaced exactly four inches apart. How pleasing!

9-30 (1)

(And because Mr. Right Side is such a handsome fella, I’ll show you his backside too. Woo woo!)

9-30 (2)

(And up at the yoke section.)

9-30 (3)

The last steps in this Blaithin-y journey of mine are the i-cord bind offs and a little washing and blocking. I can’t wait until next time to show you my finished sweater, but I have to admit to feeling a little sad about what will be my final post in this series. I’ve enjoyed sharing my progress with you all so much! Until next time…
—————————————————————————————————–

Amber resides in sporadically idyllic Berks County, PA with her husband and three children.

She can most often be found knitting, making soap, sewing, or puttering around in her garden. She should probably leave her house more often.

Upcoming Knits Winter: Top Secret Sneak Peek!

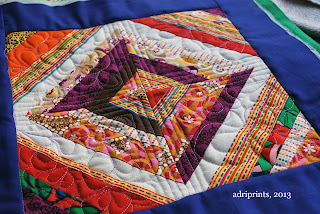
I've been busy lately!  The knitting wave has rolled over me, and it's still washing it's yarny goodness at my shores.  But, while I'm working on these knitted lovelies that are meant for publication, I'm not allowed to share the project in progress.  So, I've settled on giving you all a sneak peek of what I'm working on...


That's all I can show for now, but at least you can see the lovely textures and colors I'm working with this season.  As soon as these two projects are published, I'll be posting right here!

Also, this week I'll be heading over to Denmark to visit during a wool festival... this one.  I'm really excited!  I'll let you all know how it goes.

Amber’s Blaithin — Yay for Yokes!

Blaithin progress

Hello again from Blaithin land! This is an exciting post for me for several reasons. The first one can be seen in the two photos sandwiching this post: The sleeves are done! Not only did I successfully live through the knitting of a pair of things again, but they are exactly the same size and shape and everything. (No, I am not a sock knitter — how’d you guess?)

Blaithin progress

Another happy bit is the unique and lovely fabric this yarn is knitting up into. An ideal amount of floofy, underspun bits make a superbly varied texture, made even more perfect by the fact that they are spaced in a most pleasing way, aka: No giant islands of fleeciness in a sea of otherwise orderly stockinette. Hooray!

Blaithin progress

Super high up on the best thing list is finally finishing the body.

Blaithin progress

Don’t get me wrong, this has been a thoroughly pleasant knit so far, but I did start to get just the tiniest bit tired of nothing but knitting in circles for those last six inches or so. When I finally got to the point of attaching the sleeves on Saturday night, I considered throwing an impromptu party, but it was late and I was very tired so I went directly to bed instead. I can’t say for sure, but I may have drifted off to sleep with the sound of distant party blowers dancing in my ears…

sleeves attached!

After a busy Sunday morning and early afternoon, I finally had a chance to jump into the yoke chart. Because I guess I was really afraid I might freak out and destroy the colorwork section, I put in a lifeline before I started. Sometimes I can be a responsible knitter when it really counts.

starting yoke

Oh, before I go any further, I remember someone requesting to see my backside (my goodness!), so here’s that so far. As far as I can tell, I seem to be staying nice and even and not pulling or going too far the other way and being droopy. Now here’s hoping I can stay consistent!

9-15 (3)

I didn’t get very far up the chart that first day, but I am pleased with what little I have so far, and cannot wait to share the rest of the yoke next time! Provided the knitting winds keep blowing my way over the next few weeks of course. Fingers crossed that they do, because I am so in love with doing colorwork right now!

oh boy!

—————————————————————————————————–

Amber resides in sporadically idyllic Berks County, PA with her husband and three children.

She can most often be found knitting, making soap, sewing, or puttering around in her garden. She should probably leave her house more often.

OJAI BOBBLES!

I have been working away on a fun and interesting part of this sweater.  Everywhere I go, people comment on it.  They are intrigued by the design on this section.  And I have discovered a new knitting love, BOBBLES!  The cable section of this sweater has 5 bobbles per section repeat (90  in all!), which do slow knitting down a bit, but are so much fun.  I have never made bobbles before, but these have turned me into a bobble fan.  OJAI BOBBLES!

Bobbles2

As mentioned previously, I did increase more on the front (effectively taking it up one additional size) than the back.  I just started the increases earlier and continued them longer on the front.  While all these increases were going on, I got to bobble.  And cable.  And purl.  Lots of purl, which made me discover that I might have some bad form with purling since it makes my thumb sore to do too much purling at once.  I don’t dislike it, it is just that the soreness makes me take more breaks than I like.  I will have to find someone to watch me purling to see what I might be doing wrong, if anything (not wrong stitch-wise, just finger-movements-wise).  If you have any purling tips for a continental knitter, please leave them in the comments below.

One thing I did do to help speed up the cable/bobble section was to use cabling without a cable needle.  It might be scary, since you do have to drop a stitch off the needle, but once you get the hang of it it makes cables fly.  I don’t use it for large cables, but the ones in this pattern are 2 stitches wide, so this technique is perfect.

To do this, you insert your right needle into the second stitch on the left needle and pull both stitches off the left needle.

Cable w/o needle

loose stitch

The formerly first stitch is now hanging loose, pick it up with your left needle.

Cable w/o needle

Now place the stitch you just moved to the right needle back onto the left.  You have just switched the positions of the first and second stitches and these can now be knit.  Where on the second stitch you insert your needle, depends on if your directions state to place the cable needle to the back or front of the work.  In the photos above, you would have likely seen directions* stating “place on cable needle in the front” so I placed my right needle in the back of the stitch so the crossover happened the right way.

*Note, these are made up directions for demonstration only and are not necessarily part of the specific pattern.

Now I have to go tackle the shoulders, sleeves and neckline of the sweater.

Jessica lives in the cesspool of sin (aka: Asheville, NC) with her husband and Superbaby.  She enjoys knitting, spinning, hiking and has recently become obsessed with Downton Abby and True Blood.  She continues her search for a way to keep work from cutting into her crafting time.

WIP Findley Edition….Binding Off!

To me, learning how to “bind off loosely” was one of the most daunting things about becoming comfortable knitting, and knitting lace in particular.  I am a pretty tight knitter, and my biggest fear was ruining a beautiful project by binding it off too tightly.  I managed to train myself to bind off thicker yarns loosely, but when it came to lighter weight yarns, I never seemed to be able to get my hands to do what my brain was telling them to do.

I had a terrible experience with another shawl (Traveling Woman) that I knit using sock yarn that I thought I had bound off loosely, but once it came off the needles, the edge looked tight and caused the body of the shawl to seemingly ‘poof’ between the cast on edge and the cast off edge.  I was so devastated that I had ruined my shawl that I didn’t even bother to block the shawl….I tossed it in with my yarn stash for a time-out figuring at some point I could re-purpose the yarn for another project.

A few months later I was organizing my stash and came upon my shawl and felt like experimenting.  I figured it wouldn’t hurt the yarn any to give it a bath to see what happened, and if things didn’t loosen up, I could still go ahead with my plans to frog it.   As soon as I laid it out to pin it, I was so excited that the magic of blocking had fixed my problem.

I shared this experience with the rest of the Aunties on Ravelry, which ultimately led to my learning Elizabeth Zimmerman’s Sewn Bind Off.  I loved the results SO MUCH that I have pretty much used that technique for every project ever since.  I don’t know about you, but once I find a knitting technique I like and am comfortable with, I tend to stick with it.  So when I came upon the bind off instructions for my Kiwassa Shawl, I hesitated.  EZ’s Sewn Bind Off has worked flawlessly for me, did I DARE try something new??  After I looked over the instructions again, I decided I would go ahead and give it a try because the bind off includes a yarn over, which I thought would give me enough ‘extra’ yarn to keep the edge loose.  Plus….there was a whole lot of stitches to be bound off with a tapestry needle.

I even have pictures to prove that I actually did it!

The bind off instructions were pretty simple.  First, Knit 1…

K1

Then do a yarn over and K1…

YO, K1

Then pass the first K1 and the yarn over over the second K1

Pass first K1 and YO over second K1

And VOILA!!

voila!

What do you think?  It looks nice and loose to me.  I have to say that this bind off is pretty quick and easy, and seems to be as loose as EZ’s Sewn Bind Off.  I think it is a great alternative to the sewn bind off, especially when you’re talking hundreds and hundreds of stitches.

So tell me , what is your favorite loose bind off when knitting?  I know there must be other techniques out there that I haven’t tried or even heard of, so please share your knowledge!

I spent these last few weeks of summer squeezing in as much fun time with my kids as humanly possible, which means I wasn’t able to give my shawl a nice bath and block it out like I had planned.  Next time, be prepared for a post chock full of finished shawl photos!

Amber’s Blaithin — Sleeves!

second sleeve so close now

I thought I’d start this segment of my Bláithín saga with a brief explanation of how I came to realize that I have ridiculous monkey arms. It is a rambly and stupid story, so I have thoughtfully inserted pictures of sleeve progress throughout, because I find having pictures to look at makes my incessant rambling far more tolerable.

7-14

When I get a pattern, the first thing I do is read all the abbreviations, pattern notes, and other important bits they stick right there at the beginning. Next, I skim the pattern once or twice, just to familiarize myself a little bit ahead of time. In the case of an item that has sizing options, I measure any parts that need measuring and highlight the corresponding sizes on the sizing chart. Then I go through the pattern highlighting all the number instructions which match the size I’m making.

7-14

The last time I made an actual garment with sleeves for me, I was using a much thicker yarn than what the pattern called for, so I altered the numbers quite a bit to compensate. I measured the really important things like bust, waist, and length from underarms to bottom edge, picked my size, and started knitting away. Thanks to the magic of math and lots of meticulous note-taking, the finished sweater was just the fit I was hoping for, except for one thing: the sleeves were too short. Like, waaaaay too short. The now obvious reason this happened was that I had not actually measured my arms. (Duh!) Instead, I just assumed they’d be the same sweater size as the rest of me, and I was so very wrong.

7-15

Needless to say, I measured carefully this time, several times in fact, thanks to my previous discovery. In addition to increasing the length, I also went two sizes up for the upper arm circumference since I like to layer and I cannot stand the feeling of too-tight sweater sleeves over bunchy under-layer sleeves. Drives me nuts! Especially because I have an annoying habit of rolling up my sleeves on a long sleeve shirt, but throwing a cardigan on over that. (I don’t know. We all have our quirks I suppose.)

7-19 (1)

As for the length, I ended up going up four sizes to compensate for my freak arms. So basically, I am using seventeen times more yarn in my sleeves than in the whole rest of the sweater. (Okay, so that part’s a slight exaggeration, but still…)

7-19 (2)

So there you have it. I freely admit this was the lamest story ever, but there wasn’t too much else I could say about my sleeve and body knitting progress, you know?

Blaithin 2nd sleeve progress

As of today, I am only slightly beyond the picture below. There’s one sleeve done, one with only about 2 1/2 inches to go, and I need 5-6 more inches on the body. Knitting time is tight around here as we get the boys ready to go back to school next week, but if all goes well, I’ll have some colorwork to show you next time!

knitting knitting

Until then, happy knitting. :)

—————————————————————————————————–

Amber resides in sporadically idyllic Berks County, PA with her husband and three children.

She can most often be found knitting, making soap, sewing, or puttering around in her garden. She should probably leave her house more often.

Ojai Lucania Ribbing

Since my last post, I have made some progress, but it feels so very slow to me.  In the past I have knit entire sweaters in 2 weeks, but with a baby around I cannot knit at that pace.

Before I cast on, I decided to make some modifications to the sweater.  First I cast on in the middle of the sweater with a provisional cast on so that I can make it as long as I want.  I am quite short, but my torso is very long.  This does present a problem in that I will have fewer stitches going down than up, but since I am placing the cast on at a break between stitch patterns I will be able to hide this inconsistency.  More on this when I get to the final section of the knitting.

Second, I determined that the XL size was the best “starting size” but that I would need to make some adjustments to fit other areas of my body.  Since I am currently nursing a baby, my ahem nursing parts are larger than they were before.  So I will be making the bust portion of this a size larger, on the front only.  These extra stitches will give me the space I need in the exact place I need it. This will result in my having to make more adjustments in the shoulder section, but more on that later as well.

Now to get to the actual knitting!

As I mentioned, I used a provisional cast on.  I chose to do a crochet provisional cast on with waste yarn as this is the kind I am most familiar and comfortable with. After creating my crochet chain, I placed some knots in the end that I will use to unzip the stitches later.  This will help me remember which end to unzip, making the process go smoother.

knots

Then I picked up my stitches and started the 1 by 1 ribbing.

Crochet cast on

This pattern has waist decreases in the 1 by 1 rib section and increases in the cable section.  Because the decreases are in ribbing, it presents some interesting dilemmas as to how to do the decreases and how to handle the stitch that is left (do you purl it having two purls together or knit it having two knits together?)  It is kind of hard to write about so I will show you.

decreases

The blue line is the center between the decreases.  I tried it first with 2 knits next to each other on both sides of the decrease.  I was quite happy with the look on the right side, but very unhappy with the look of the left side (notice the odd bump in the pink circle).  So then I switched the decrease from a SSK to a P2tog and used 2 purls next to each other on the left side.

p2tog

Notice the stitches look smoother and well, “right” in the pink circle this time.  Once I had that figured out, the ribbing went so fast!  I am in more in love with this yarn the more I work with it.  The ribbing is so squishy.

2x2ribbing


Next up the cable/bobble section!

WIP: Findley Edition!!

Hi everyone! In my last post, I had just finished knitting the set up chart and was ready to tackle the main repeat section of the shawl. Since my one ball of Findley has plenty of yardage for my project, I planned on knitting until I felt like stopping.

I don’t know about you, but when I’m knitting lace, I  get excited to “just keep knitting, just keep knitting….” so I can watch it grow more and more. Hopefully you can tell from these pictures that Dory’s words of wisdom were running through my head quite a bit with this project.

one repeat

Pardon the poor quality of the pictures, my camera on my phone doesn’t do what I want it to.   Here I’ve tried to get a close up of the lace pattern…..can you see it?

one repeat close up

When I went to Boston to help with the Photo Shoot, I was in the middle of the second repeat. Here’s a picture (taken by my friend Brenda) of me on the back of Susie’s car when I finished knitting the second repeat.

two repeat

three repeat


Three repeats down and I still have plenty of yarn left. I’ve decided to do one more repeat before I bind off the shawl.  Next time, I’ll show you the new-to-me bind off used in this project and we can see how beautiful my Kiwassa is after it gets a little bath!

three repeat with mug