Tag Archives: WIP

Amber’s Blaithin — Casting On and Beyond

a ball of Juniper Moon Farm Cormo Rusticus

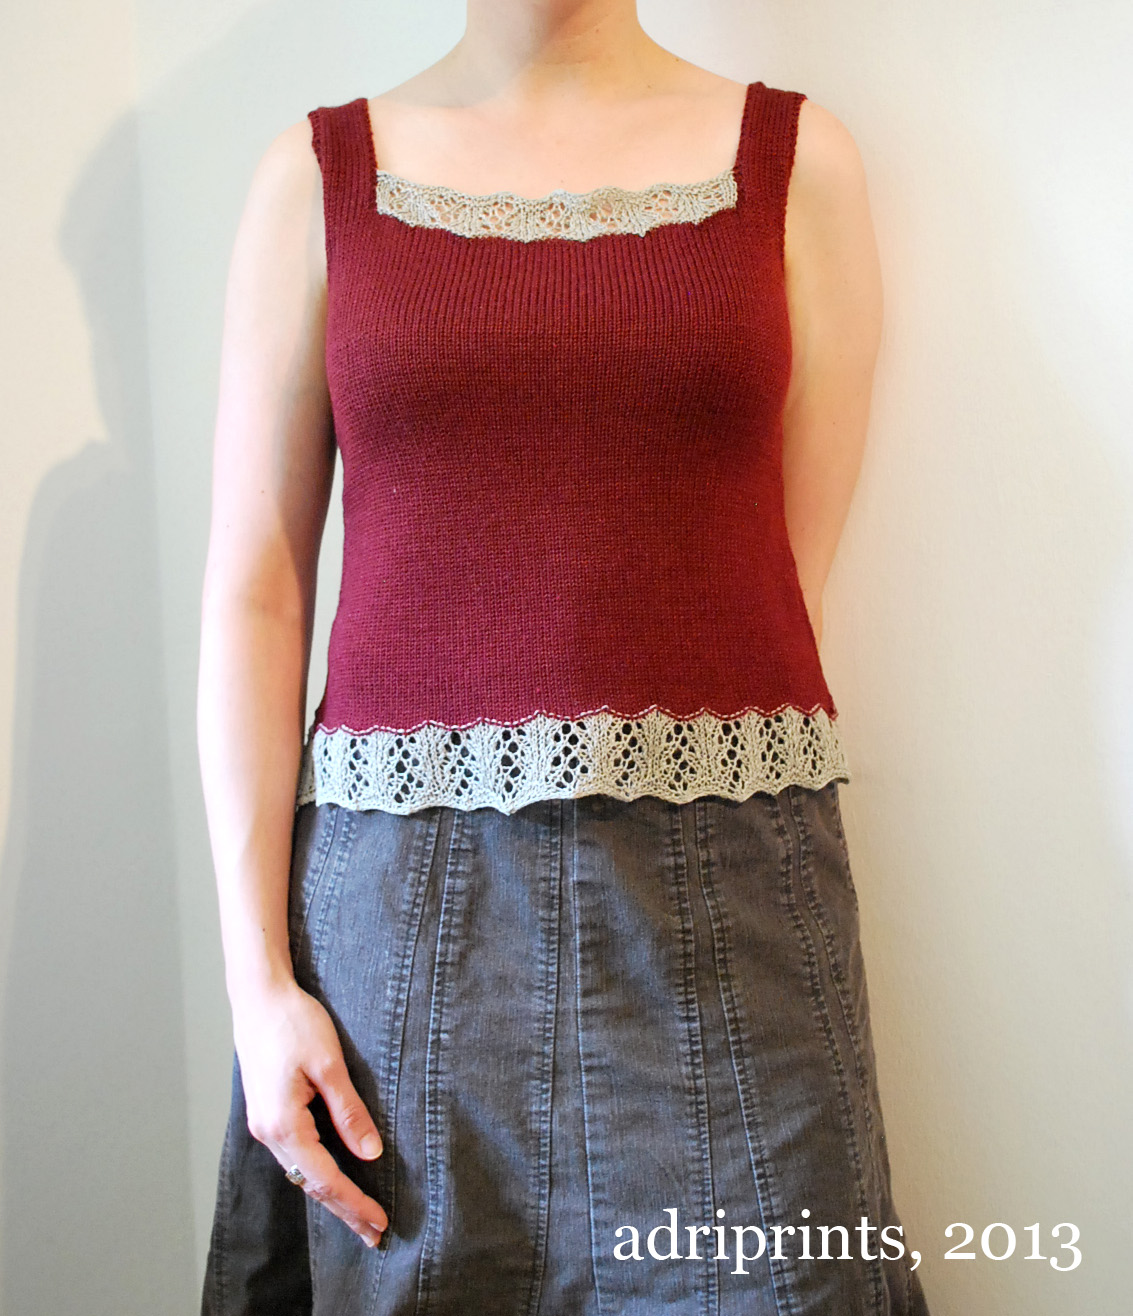
Since my last post, I have been happily knitting away on my Bláithín whenever I had a spare moment. And despite the fact that spare moments haven’t been so plentiful as of late, I do have some progress to share.

Getting started meant doing a provisional crochet cast on, which I may or may not have just fudged in past projects due to my complete lack of crocheting ability. Crochet and I have had a tumultuous relationship since about 1999, when I first attempted to learn the basics. It did not end well, and for many years I called crochet late at night, crying into its answering machine and writing countless, tear-stained letters that never got sent.

But some time in the past few months, something clicked! And after butchering a granny square and proudly doing some extremely crooked edging on another project, I decided I couldn’t possibly fail at a cast on. Luckily, that turned out to be correct and I am now 100% in love with crochet cast on and will use it whenever I can.

crochet cast on is my new BFF

The idea behind the provisional cast on is to do an I-cord bind off with the live stitches upon the sweater’s completion, but I am toying with the idea of adding a 2 1/2 – 3  inch colorwork section before the bind off if I have enough yarn left after doing the yoke. I certainly have plenty of time to think about it, and thanks to this particular cast on, I can decide after I see the rest of the sweater if an added colorwork section will fit with the overall design or detract too much from the yoke.

The hidden pocket construction was an absolute breeze — and so refreshing after the last pockets I did on another project which were downright fussy and fiddly. All I had to do (without giving away any vital pattern details of course) was move some stitches to waste yarn,

pocket flap stitches on waste yarn

then knit up some quick and easy pocket flaps,

pocket flaps

and easily join them right back in with the body (shown here after binding off the pocket openings).

7-5

The length I have now needs to be almost doubled to get to the underarm area, and I need to get started on my sleeves. That ought to keep me busy for a little while until my next post!

—————————————————————————————————–

Amber resides in sporadically idyllic Berks County, PA with her husband and three children.

She can most often be found knitting, making soap, sewing, or puttering around in her garden. She should probably leave her house more often.

WIP’s quilting, knitting, and sketching

What am I working on?  Ah, I always have lots of stuff going on, don't I?
Time to share.

Firstly, Blue quilt is still in progress, but I now have 6 of 20 squares FMQed.
In the quilting world, I've finished the quilt top for this NYC Mod Quilters Challenge.


The challenge is to do a double wedding ring and I'll be entering this li'l beauty once it's quilted and bound...

I'm really excited about it!
In the knitting design world, I'm currently testing this lovely camisole.


And finally, I wanted to share with you all some of the rough drawings I did for a recent open call to submit illustrations.  Before I settled down and entered in my own pen and ink style, I experimented with some digital illustration.  Sometimes when I go digital I get all crazy and can't work my way out.  With these tests, I loved the palette and the main horse, but I couldn't find a way to adhere to all the guidelines which were really focusing on the "playground" theme in general.  Limiting it to the spring horse left me a bit wanting.  Love the form, but couldn't get past the limitations I had placed on myself.  Ah well, I seem to work best in graphite first, then digitally.  Here are some of my digital experiments...


Triple swatching Ojai!

Jessica is the third of our 3 wonderful women who are currently writing about their projects using JMF yarn. She just returned from maternity leave this week, so I’m super impressed that she’s carving out a little time to share her project with us. She’s using her JMF Share yarn in Ojai. Well, when she can wrestle it out of her sweet daughter’s hands! – Lauria

I have been searching for the perfect project for my 2012 share yarn.  You must understand I could not use this yarn for an ordinary sweater.  It had to be the perfect one.  My yarn is the fabulous Ojai you saw featured in Sarah’s Hooray! Cardigan.

yarn1

yarn2

As you can see Superbaby loves Ojai.

When Lucania  by Teresa Gregorio showed up in my Facebook feed, I knew it was the right one. I love the bobbles and cable pattern, the multiple types of ribbing and the 1 by 1 rib hits at my narrowest point which will make this sweater flattering on me.  I tend to get hot easily (which is part of why I live in the mountains) so the short cap sleeve is another feature I was looking for in a sweater.  Ojai Lucania was born!

After reading the pattern through thoroughly, I noticed that there were three different gauges in this sweater.  Yes, I just said THREE different gauges.  I also know from previous experience that I often need to adjust sweater patterns due to my shape (long torso, medium shoulders and XL bust).  I know you might be cringing at the thought of knitting three gauge swatches, but it will be essential to my ability to knit a sweater that fits.

The first gauge is listed as stockinette in the round.  After reading through the pattern I realized it is in reverse stockinette.  This is a BIG difference for anyone who purls looser or tighter than they knit.  If you were to knit every row of the swatch and base your needle decision on that and then purl every row on the sweater, you could end up with a sweater that is way too big or small.

So I need to purl every row on a swatch and to get reverse stockinette. The common way to do this is to make a sleeve, but I don’t want to because this sweater has cap sleeves and I don’t want to waste my precious Ojai!  I need to make a flat swatch of reverse stockinette by purling every row.  Yes it is possible.

The method is one I learned from Tech Knitter when I was test knitting the fabulous Egbertine Cowl.

For my first Lucania swatch, I purled one row, placed a pin in the end, unraveled it, and measured the length of the unraveled row.  You can feel free to use your arm or sofa cushion or whatever is close by; there is no need to pull out a measuring tape.  Then I re-purled the first row (Hint: the pin SHOULD be at the end again or you have other gauge issues you need to work out).

For the next row (row 2) I pulled a length of yarn the length I measured (see why the sofa cushion is better than a measuring tape?) and started working at the beginning of my swatch again as if I were leaving the loose yarn across the back. However, the loose “loop” is the part of the yarn I purled, which placed the working yarn at the beginning of the swatch for my next row. Row 3 is purled like normal, then you repeat the process again.  It is hard to see with one color of yarn, so I will leave the demonstration to Techknitter who has some helpful illustrations.  It is awkward at first to knit that “loop” row since you cannot use your fingers to tension as normal, but it is a skill worth learning.

swatch

You can see that the end of my swatch is a bit messy.  This is due to the imperfect measurement, but the edge stitches are always a bit off gauge and should not be measured anyway. I repeat this swatching process for the garter rib stitch and will do my 1 by 1 rib swatch before I decide which size I will knit.

garter rib


Jessica lives in the cesspool of sin (aka: Asheville, NC) with her husband and Superbaby.  She enjoys knitting, spinning, hiking and has recently become obsessed with Downton Abby and True Blood.  She continues her search for a way to keep work from cutting into her crafting time.

WIP: Findley Edition!

Helen is the next of the wonderful women to post her WIP project here. She was an absolute life-saver at the photo shoot. I knew that a dancer mom would be the perfect “wardrobe mistress.” With incredible grace and good-humor she steamed all the clothes and made sure that each model was ready and waiting for the next shot. It made everything very smooth!

Helen Knitting

She was knitting this at the photo shoot (although not in the above picture with Alison left and Nancy right) in between getting models ready. I loved seeing her shawl progress and I think you will, too! – Lauria

Hi everyone! Up here in New England, we (or at least I) have been knocked on our behinds with crazy amounts of hot, humid weather. Growing up I remember there being about a week of it in late July or August, but this year it started early and has being going on FOR-EV-ER. And the afternoon thunderstorms (and tornadoes!!) are clearly not doing their job and cooling things off.

When it’s this hot, I start searching through lace shawl patterns to see what strikes me. This time, I picked a pattern that I’ve had in my faves for a while now, the beautiful Kiwassa Shawl.  After reading the back story, I knew I wanted to knit it in a woodsy color.   I thought I was going to knit it in a shade of brown, but then I remembered JMF’s Findley in the Malachite colorway. Isn’t it beautiful?? Isn’t it perfect??

Findley in a bowl

The Kiwassa Shawl is a triangular shawl with a lace pattern that is mirrored on each side of a center “spine” stitch. I love the construction of these kinds of shawls because once you get the flow of the pattern, you really don’t have to look at the chart. That means I can take my shawl with me when I go to work and pop off a row on the shuttle ride and a few more on break. I love knitting lace so much that I get a little addicted to it, and am really happy when it’s just complicated enough to be interesting, but not so much that I can’t knit it wherever I am.

When working with Findley, take my advice. Resist the urge to pull from the center. I know it seems like it should be a center pull ball, but in the interest of your sanity, RESIST. They are NOT center pull balls, confirmed by the distributor. I learned this the hard way. Thankfully, my friend Nancy was kind enough to detangle my mess while I was working at the photo shoot and when I got home, I promptly cut my yarn and wound that baby into a ball. Sanity intact!

Since Findley comes in at a generous 798 yards per ball, and the pattern calls for at least 700 yards, I’m NOT knitting a swatch (gasp!) and am just going to see how many repeats I can get before I need to bind off. The pattern gives me a few options on where to bind off, so I have a lot of wiggle room when I get there.

Set-up section done

Look! It’s lace!! You can see the center spine has been established, as well as the garter stitch edge. Isn’t it exciting when you can see the pattern starting to emerge? This is when I have a really hard time putting my lace projects down…I just want to keep knitting and knitting so I can see more and more of the pattern. Before I know it, one more row turns into 20, it’s after midnight, and I have to get up in the morning for work.

Next up for me is the main repeat section of the shawl, which I will knit until I go crazy (well, crazier anyway) or run out of yarn. I can’t wait to show you how far I get!


Helen lives in Western Massachusetts and longs for the day when she can knit while at work.  When she’s not knitting or spinning, she enjoys running, hiking, and hanging on Rav with the rest of the Aunties as realhelen.

Amber’s Blaithin — Swatching, Swatching

We’ve got a great group of ladies lined up to help me with out WIP series so I don’t go prattering on by myself! First up is the amazingly multifaceted Amber, who will show you what she made with the very limited-edition, unlikely-to-be-repeated Cormo Rusticus that we sold a couple years ago. I’m very excited to see her progress with this sweater, and I’m sure you will be, too! – Lauria

plan

Hello there! My name is Amber, but if you’re active in the Juniper Moon Farm group on Ravelry, you’ll know me as HowdyPandowdy. I’m going to be doing some guest posting over the next few months to share my progress on Bláithín , which I am knitting with some luscious Juniper Moon Farm Cormo Rusticus,

JMF Rusticus again - in the morning light

JMF Rusticus again - in the morning light

and some stunning Gilead Fiber Farm Shetland (dyed and spun by owner Kristen Judkins).

Gilead Fiber Farm Shetland "Fuego"

Here is where I admit that I have a slight tendency to be a bit, shall we say, long-winded? So instead of launching into a fourteen chapter back story about all the neato connections between pattern, yarns, designer, etc, I will cut to the chase and present it all in list form. (You’re welcome.)

1) For some time now, I have had quite the knitting crush on the genius that is Scottish designer Kate Davies  (and especially her gorgeous color work). I could never quite muster up the courage to try anything before, but after my dear friend Lyn “gifted” me this pattern on Ravelry, it was time to dive in!

2) Kate Davies also happens to be one of the designers for The Shepherd and The Shearer. I managed to snag a spot before that announcement, so it was basically like being given an entire orchard’s worth of delicious cherries on top of what was already the best sundae ever.

3) In honor of Susie’s trip to Scotland, one of our group members on Ravelry suggested those of us stranded stateside should come up with some Scotland-inspired activities to enjoy, which is what spurred me to re-ogle all of my favorite patterns in the first place.

4) Shetland sheep (the breed I have to thank for the beautiful, autumn-colored yarn from Gilead) originated in the Shetland Isles. One of the tinier islands, Fair Isle, should be familiar to all knitters as the namesake of the popular colorwork style featured in many of Kate Davies’ designs.

5) And finally, Kristen Judkins, gifted dyer and spinner and owner of Gilead Fiber Farm, got her start as a shepherd when she won a flock of goats in a giveaway from Juniper Moon Farm!

So now you know that I play most of my life like some sort of bizarre Six Degrees of Separation game, but hey! At least you got the abridged version.

But anyway, swatching?

swatch

Because I am doing only two colors for my sweater and knitting the main body in the JMF Rusticus, I wasn’t sure if I wanted to continue the Rusticus right up through the yoke background, like so,

white background

or switch to the GFF Shetland.

color background

I decided I didn’t want to lose the nicely contrasting yoke background (which is one of the things that drew me into the pattern in the first place) and did a third swatch featuring the Shetland as the background color. This time, I tried holding the Shetland double (it’s a fair bit thinner than the Rusticus), and modifying the bottommost edge slightly to better transition my color change.

washed and lightly blocked

Doubling the Shetland makes a sturdy-without-being-too-thick fabric that I think will lend itself very nicely to the yoke structure, and the Rusticus washed up like a fluffy sheep cloud dream. (Technical description, of course.) Despite some pulling here and there, I think it came out nicely and feel confident in my ability to not destroy my finished product — well, not until it comes time for steeking anyway, but we’ll deal with that when we get to that point…

For now? Lots of knitting going on here, and hopefully I’ll have some good progress to show you next time!

—————————————————————————————————-

Amber resides in sporadically idyllic Berks County, PA with her husband and three children.

She can most often be found knitting, making soap, sewing, or puttering around in her garden. She should probably leave her house more often.

WIP Blue Quilt and Google Reader Reminder


Just in case you're still using Google Reader to subscribe to my blog, today is the final day it will exist.  If you'd like to continue to read my blog, you can follow me on my facebook page here, check out alternative RSS feeds, or you can easily follow using Bloglovin' and this button below:

Follow on Bloglovin

In other news, I'm FMQ'ing like a fiend!  It's really addictive.  And last year, I snagged a box full of thread from a quilt designer who was clearing out her stores and getting into knitting.  So, what a treat to use all the threads I bought from her!  I love the look of the variegated threads on solid fabric.  With each block I feel like I'm getting better at controlling/coordinating the motion between my hand and the foot pedal.  It's a bit like driving manual (stick shift / standard).

Details from the latest blocks...


Finally Free-Motion

FMQ= free-motion quilt(ing)
After walking around the blue quilt blocks, starching, prepping, observing... procrastinating... avoiding...

front of block 1
back of block 1
I took the plunge.  I finally said, "Adri, get it together and just free-motion quilt.  Just do it!"  So, I revved up my FMQ mojo by watching Leah Day on her Craftsy class and her blog videos.  I finally bent back the pin of my FMQ foot, wrapped it with a rubber band, and then, I did it.  I free-motion quilted.  The mods to the quilting foot work well by the way.  I had tested it before - I've been practicing on a quilt sandwich for a while - and working with the modifications afterward make a difference.  It's worth giving it a try if you have a generic foot at home like mine.

front of block 2

back of block 2

 And, I think my first two quilt blocks are a really good effort!  Whadya think?  I feel like I have more control when my hands are further apart, so I'm going to try and rig up a stand or something to keep the blocks at the same height as the sewing machine.

The sensation of FMQing is a lot like drawing or doodling, but with a whole new kind of stylus!

WIP: Sarah’s OJAI Hooray Sweater – All finished!

Hello lovely friends! This is Sarah, and I have a WHOLE SWEATER to show you today! Get excited!

Quick recap: I’ve been knitting Veera Valimaki’s wonderful Hooray Cardigan in Juniper Moon’s 100% cormo wool share yarn (I used once-in-a-lifetime 2012 spring share yarn in the Ojai colourway – next year’s shares are over yonder!)

Last time, I left you hanging – which buttons did I choose?! In the past, I’ve almost always chosen matching buttons for my sweaters, but this time I went with contrasting ones. The unique material was too neat to pass up: these buttons are made of antler!

Blog 6 Photo a

I am totally charmed by them.

Blog 6 Photo b
How to decide where to put the buttonholes? While the pattern suggests just a couple of buttons at the top, I wanted the lowest button to hit right at my waist. So, I spaced the buttonholes evenly from the top of the collar to the narrowest part of the sweater.

I also used a different buttonhole than the pattern suggested, because I bought biggish buttons. Ideally, buttonholes should be a little bit smaller than the buttons themselves, so they’ll stay closed! I used the two-row buttonholes described in this excellent knitty tutorial.

Blog 6 Photo c Once my button band was complete, I finished the whole thing with a (super long!) i-cord bind off, to match the sleeves.

Blog 6 Photo d I had to be a bit careful binding off around the curved bottom front edges – when working an i-cord bind off around corners, it can get a bit tight and end up puckering the knitting. Luckily, there’s an easy way to avoid puckering: when I got to a corner, I worked a row or two of plain i-cord without attaching it, to provide a bit of extra give and help everything lay flat.

Blog 6 Photo l I-cord forever! All bound off and ready for a bath. I always take a “before blocking” photo so I can see the transformation.

Blog 6 Photo g After a soak and a gentle towel squeeze, I patted the wet sweater into shape. Although a sweater like this one doesn’t need a severe blocking, I did use a couple of pins to make sure the collar and curved edges held their shape while they were drying.

Blog 6 Photo h Blog 6 Photo i Air dry! Buttons sewn on!

Blog 6 Photo j HOORAY! OJAI!

Blog 6 Photo r-2 Blog 6 Photo n I’m SO happy with the finished sweater. I can never resist casting on with my Juniper Moon share yarn right away, and all my favourite sweaters are made out of share yarn. This one is definitely my new favourite.

Blog 6 Photo q-2It has been a total joy to share my sweater-knitting-process with all of you, and thank you so very much for all of your kind comments on my posts. Happy sweater knitting to you!

(Psst… There are more photos, including some detail shots, over at Flickr.)

Sarah hangs out with her cat, drinks a lot of tea, and knits as much as possible in beautiful Victoria, BC.

WIP: Uki Cowl – Drop Stitches

Okay this WIP post is a little backwards! You got to see my finished Uki cowl in the pattern release, but now I’m going to show you a little bit about how to make it.

This pattern starts off with a provisional cast on and the smaller needles. My favorite cast on is simply to knit a few rows using waste yarn, so that’s what I did. (I worked one drop stitch section before I started documenting, to make sure I did it correctly.)

UkiCowlWIP00005

Then we get onto the business of setting up for the dropped stitches. It’s very important that your row with yarn overs is correct.

UkiCowlWIP00003

Then I knit, knit, knit with the larger needles until I worked the number of rows specified in the pattern.In the below picture, you can see how just a few inches of knitting transforms into many after you drop the stitches! This is what makes it such a fast knit.

UkiCowlWIP00001

Now it’s time to drop the column of stitches that that started with a YO down. This is the row that I made sure to do un-distracted. I tried to drop one section while hanging out with other people and it did not go well! I had to put it away and fix it when I had some quiet time. Dropping these stitches will only take a minute, so you don’t need to carve out a chunk of time. You just need 3 minutes of focus.

Knit One,

UkiCowlWIP00008

Drop One: slide the next stitch off the left needle,

UkiCowlWIP00009

repeat to the end of the row…

UkiCowlWIP00010

Every few stitches I stopped and ran my finger along the column I was dropping to make certain that it was the same column that starts with a YO. If it’s not and you allow the stitches to drop, you’ll drop them all the way to the CO edge.

UkiCowlWIP00011

UkiCowlWIP00012

UkiCowlWIP00013

UkiCowlWIP00014

UkiCowlWIP00015

Next comes the fun part! It’s time to manipulate the fabric to get the stitches to actually drop down. You could easily wait until you’ve done all your sections, but I liked to check for two reasons. The first is to make absolute certain that you’ve dropped the right column. The second is that the scarf grows so much in length, I want to feel like I accomplished something determine how long my scarf is so I know how many sections I want to repeat.

Sabine is a sticky yarn, so  I gently tug my knitting in both directions to coax the stitches to drop and spread.

UkiCowlWIP00018

UkiCowlWIP00019

UkiCowlWIP00020

UkiCowlWIP00021

If you did this same cowl with a silkier yarn like Findley, I bet you wouldn’t have to coax the yarn nearly as much!

UkiCowlWIP00002

When you’re done, all the stitches made with the larger needle have taken up the spare room from the dropped stitches!

I hope that this helps if you get stuck. Are there any more questions about the Uki Cowl? Did you make one this weekend?