Tag Archives: color challenge

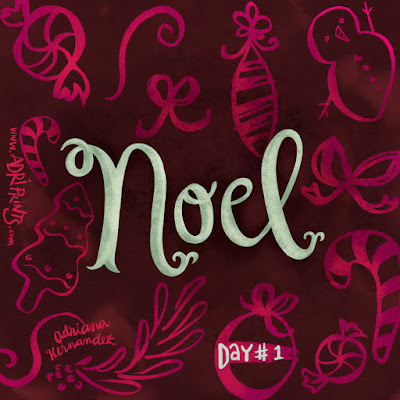
Process: Advent Calendar Noel Image

Hello! I just wanted to introduce myself in case you hadn't met me before.  I'm Adriana Hernandez-Bergstrom!  I go by Adriprints on my work, and  you can find me really easily with that moniker.  I'm the founder of the Finch & Foxglove art collective, and I did the first illustration on our digital Advent Calendar.

I am a really process-oriented person and I love learning how others get to the images they do.  I hope you can learn a little bit from my process too!

The "Noel Peppermint Bark" illustration started off as a doodle that I did in August or September.  I was at my mom's house playing around with an old watercolor set that I had left at her house in case all my luggage was lost.  In my mind, I was working on a tropical-Christmas kind of theme...


In between then and now, our group came up with a wonderful color palette for our advent calendar.  We looked at vintage Christmas postcards to get us started.  These colors were rich and wonderful, but not really tropical... and I really wanted to use the "Noel" lettering.  So I traced the lettering in Adobe Illustrator with the pen tool, used a color from our palette, and started working on composition with the other illustration assets that matched the palette a bit better.  I had created these assets or icons a few weeks ago by painting in watered down gouache.  They were extras from the greeting card project I did in October, and I did a direct "live trace" using Adobe Illustrator to capture them...


Once I had a composition that I liked, I brought each element separately into Photoshop, converted them to Vector Smart Objects and began to add texture and depth...


I really wanted a rich feeling like chocolate in the background, and at first I tried mint + chocolate with the lettering...


But, as you can see it looked a bit too cold in this version.  It read like mold or marble or something unappetizing.  So, next I tried peppermint, and that is what you see in the final image.  A little bit tastier, I think!


This is just one of the many illustrations in our wonderful digital advent calendar.  Follow along on our Finch & Foxglove Advent Calendar page!

Scrapbooking: Greetings from the Lido Deck!

I am so happy with this one!  I couldn't believe I got it done on time to be considered for the Make Art That Sells weekly review either.  Our things finally arrived from Germany and it meant we were in super-unpack-cardboard-box-processing mode!  But, I was also in a "making mode" as well as "where the heck is my scanner mode"... and so I made and found my scanner at last.

Here is my work resulting from the theme we were given: vintage cruise ship correspondence.  It's a bit of a mash-up but I think between the chosen color palette and my brush pen illustrations which have a late 50's early 60's vibe in them, that it's enough to cover the vintage aspect.   I really wanted a Piña colada after drawing this... love those so much.


Working on Magic

Something clicked for me after MATS A, and that's the concept of joy in one's work.  I connected it finally with the idea of creating magic in an illustration. It's something I have struggled with for a long time, and am always working on.  So, this past week, I made it a point to focus on this element and re-work some past illustrations.

I started with my sketches from the Global Talent Search back in 2013.  I loved my sketches for this project, but ended up submitting something completely different and kicked myself afterward.

Anyway, I worked with this palette which I used for the competition and that I love, and it helped me focus on just having fun and making a sweet little repeat.

revamped repeat

original illustration from 2013

Next, I thought of a different concept with the playground scenario.  What if the playground animals came alive at night and had fun jumpin' around in a magical firefly forest after dark?  So, I re-inked the original sketches, illustrated all-new spring animals, and created a night-time palette to help me focus on illustrating.  Here is what I came up with:

alternate night time theme, 2015


Wouldn't it be so cool if it came in actual glow-in-the-dark fabric?  I keep thinking of a pajama set for my little guy that glows in the dark!  That would be neat!

MATS A, Week 5: Gifts

As I posted my final assignment for my first MATS class in the flickr group, I was really sad.  I mean it!  I was so sad it is over.  There are still a few days of "wrapping it up" and the final review, but the 5 weeks of meaty assignments with endless potential...

Wait a sec, this is just the beginning!


Put those tissues away!  Although MATS A is over, it's time for me to shift gears and get ready for phase 2!  Transition time!  This is the toughest part I think, but I've got a pretty darned good toolkit and support network to help.

My next steps in this whole illustrator as full-time career move include:

  • refining my projects based on the feedback I received
  • assembling a portfolio with enough pieces in a marketable style
  • presenting my work to companies (and/or a representative)

I've been doing research since the start of the year on artist's representatives.  Between MATS and the Skillshare, Creative Live videos, Illustration podcasts, and the books that each of my teachers have recommended, I've got a fairly good idea of what it will take for this to work... and it's a lot of WORK! :D  But, I already knew that, and hard work is quite familiar to me, and I kinda like it.

Anyway, a review of Week 5...

Mini Assignment: identify and photograph or illustrate your favorite collections of items in your life. In my case, I have a lot of scissors... and looking at the photo I realize I missed two pairs in the kitchen. Oops!  I also have a huge collection of rubber stamps and many, many items relating to what I'll call "the paper arts" - illustration, drawing, painting, drafting, etc.
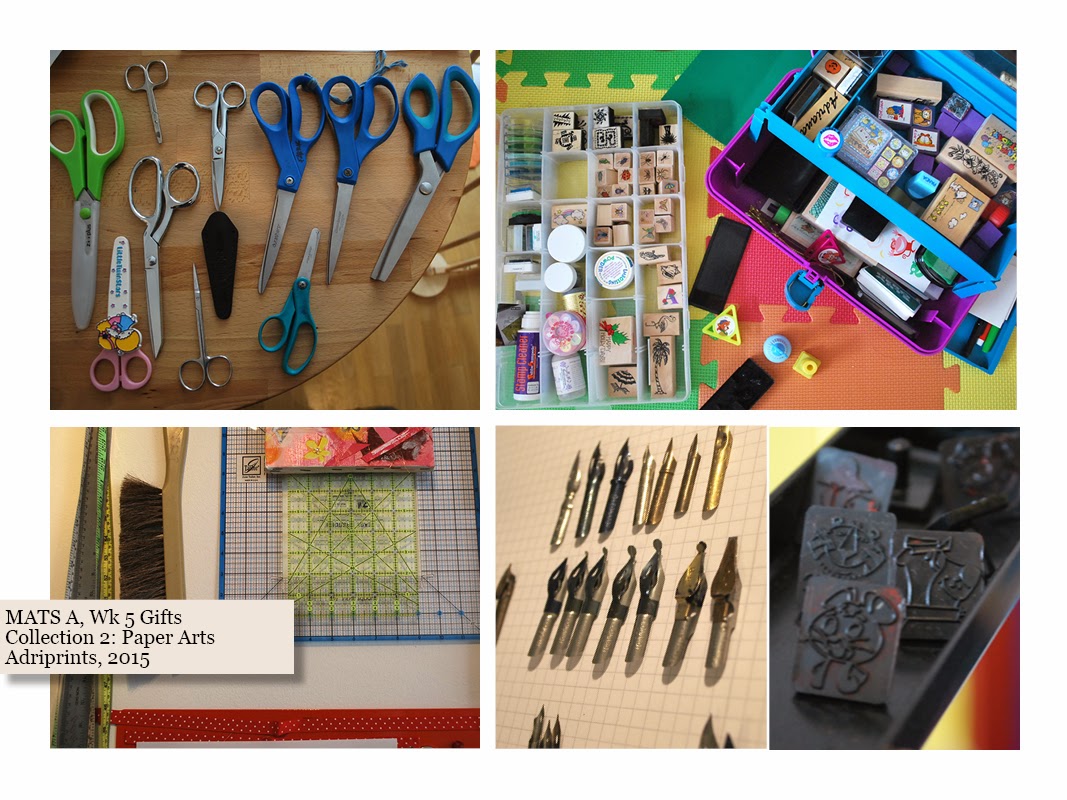
yes! an authentic Caboodles case, and Corn Flakes stamps from the 1960's

I have a cute collection of house-plants, too!  It's too bad I didn't have a balcony garden this year otherwise, I'd have used those too.  Hmm, I could get my photos of them from years past for another one of these...
 And then there's the fiber arts. This is just the tip of the iceberg, but my photographed collection includes my two favorite skeins of yarn in my stash, so many spools of thread, fabric scraps, patterns, and my all-time favorite buttons... 

When our big assignment came, I wasn't sure where to go with all of these photographs and illustrations.  I was overwhelmed with the sheer number of things I had scanned, isolated, color tweaked and sketched.  Overwhelm!

I showed this image to my fellow MAT-sians at the height of my overwhelm.  I've realized this is a typical stage in the artistic process. This is the part where you feel self-doubt and uncertainty and the judge part of the brain is telling you you're nuts for attempting this.  Don't let that judge win!  My classmates helped for sure.


So, I kept plugging away at it!  I thought of a way to bring my favorite collections together and here is my secret: key phrase.  I created a key phrase to help guide me.  My phrase for this piece was "tropical vacation yarn fetish".


I started by creating creatures that lived in this overlush place, these creatures had to be over the top.  I have been dying to do mash-up creatures and I thought this would be the perfect opportunity for a little Frankensteining!  Above you can see my first creature above.  It's a jackelope iguana, but it gets butterfly wings eventually.

Here's a .GIF of how the piece developed once I got going.

Just in case it doesn't loop on its own, click on the image to see the short GIF

The materials in the class for this week were really helpful.  There was a great list of businesses that are in the gifts market, templates, and wonderful life tips.  All in all, it was a really strong week with which to finish the course.  I'm so looking forward to MATS B in the fall!


MATS A, Week 4 Wall Art

This week was a very freeing experience for me.  Before this year's Bootcamp and MATS class, I hadn't done a proper painting in forever.  I was a scenic artist for half of my 20's and had painted giant scenic backdrops, kitschy scenic flats, furniture, design illustrations, etc.  And, this week felt like I was taking all that experience, plus a distinct perspective as an adult and I was able to just let it flow.

Here is the final mocked up in a frame...


The assignment called on several specific requirements - choose a pair of colors based on our zodiac sign, use collage, include text.  My sign corresponded to the colors pink & yellow. I was really excited about pink & yellow, but truthfully, I would have been excited no matter what the color combo.  I love getting direction and parameters to work within, and I also love color.  Yay color!


Next we had to collect 2-D and smallish 3-D items that were in our colors, a color scavenger hunt!  My studio is lightyears beyond the mess that it was last year.  I've tossed so much, and even then, I managed to have no shortage of things in these colors.

button collection and swatch for gloves WIP
ancient i-pod and lovely silks
And, once I figured out how I was gonna work, I was off to the races.  I didn't have a large enough canvas so I worked on five little canvases that I would seam together digitally.  Dekopatch, gesso, matte medium, acrylics, markers, pens, post-it notes, paper, rice paper, fabric, buttons, tissue paper, cardboard, and stamps... to name some of the things I used to make this piece.  While things were drying, I rotated the canvases and made linocut plates.  I had a really good flow going, and I was listening to my fave tunes on the ancient i-pod.

lino cut and watercolor dots
The next part, the digital seaming, was a bit more tedious, but it allowed for a kind of freedom that I hadn't had before with paint.  The ability to "undo" is an amazing weight lifted off one's shoulders.  The fear of making the next mark is completely gone, and it was great!


This project was tons of fun, y'all.  Tons.

Fairisle February 2015, Week 2

This week, members of the fairisle course had their first chance to STEEK!  Yes, we did.  We cut through our knitting.  And, we did it with impunity!  Hahah! (snip, snip, snip!)

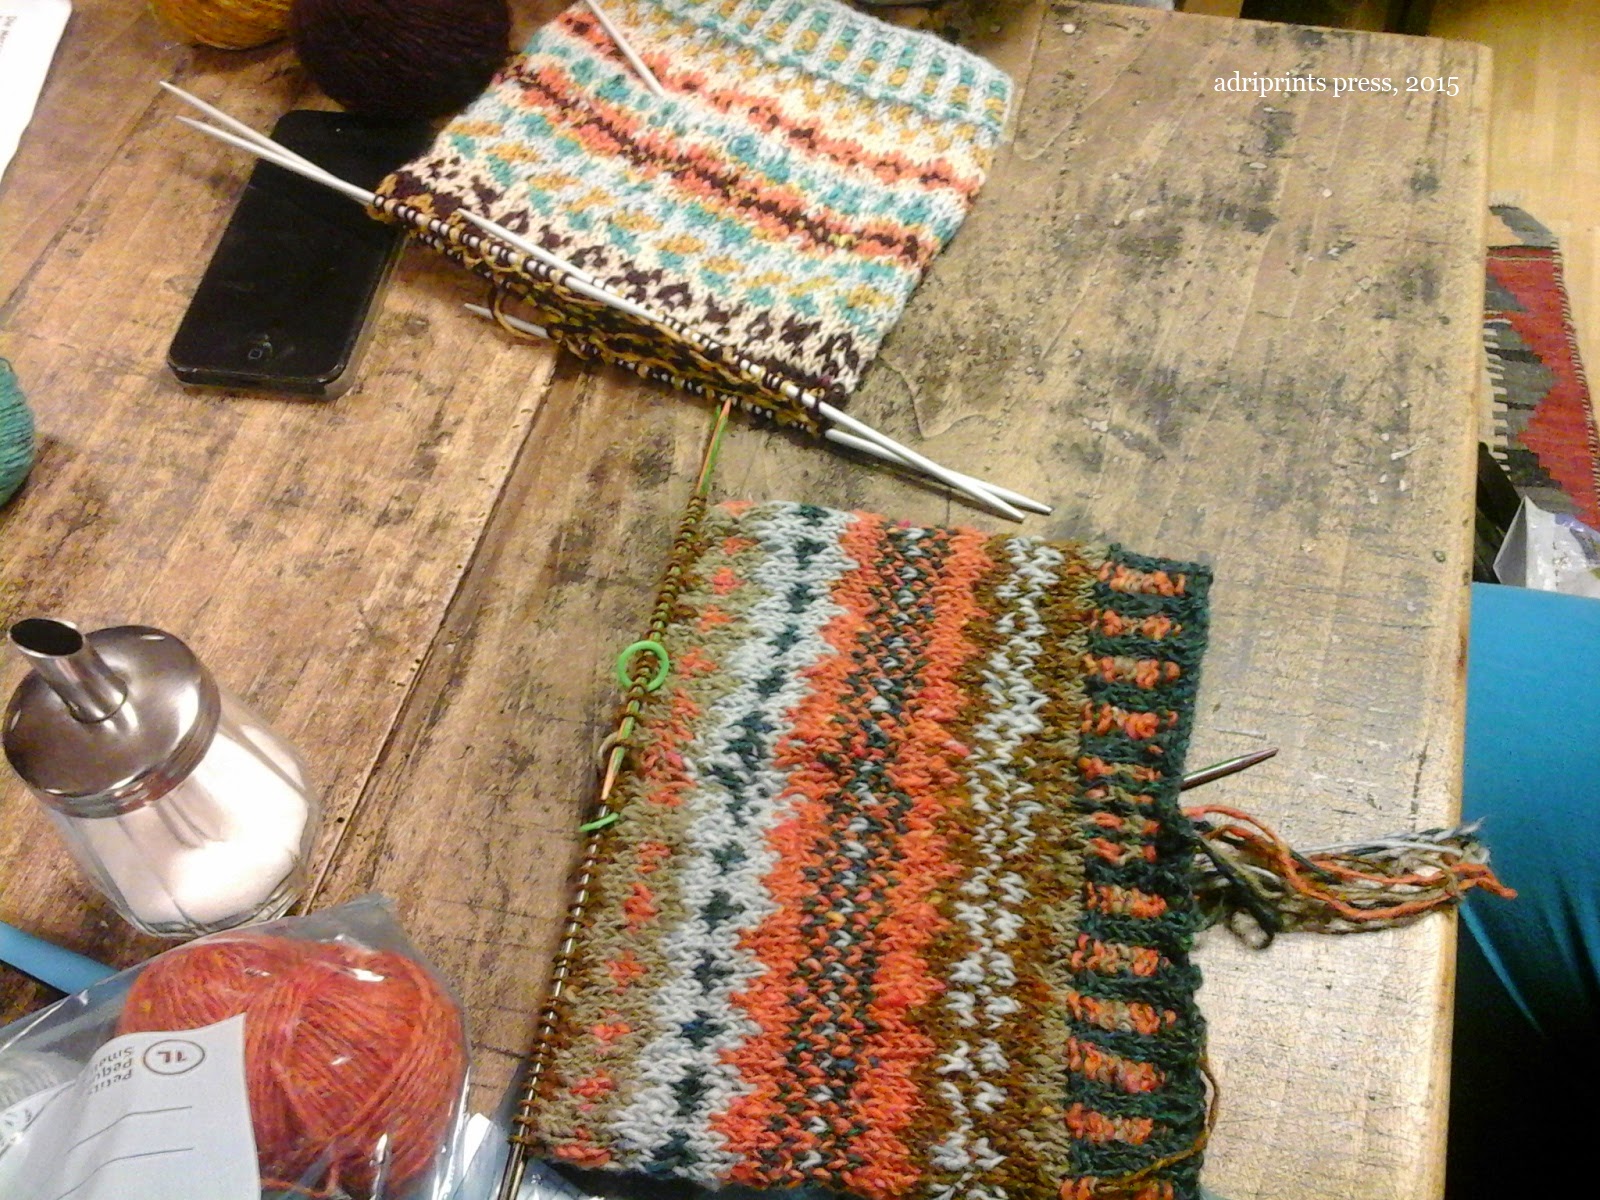
Here are some photos from class...


I love their color choices!  Check out those beautiful palettes!


I was able to make some fairisle swatches using the knitting machine, and I am fairly certain it's what helped many overcome their fear of cutting through their knitting.  Amanda might recognize this yarn if she looks closely... thanks, Amanda!


Lots of students even decided to go the traditional route instead of doing the crochet support.  I think this group was especially motivated to cut their knitting.


MATS Bootcamp #1

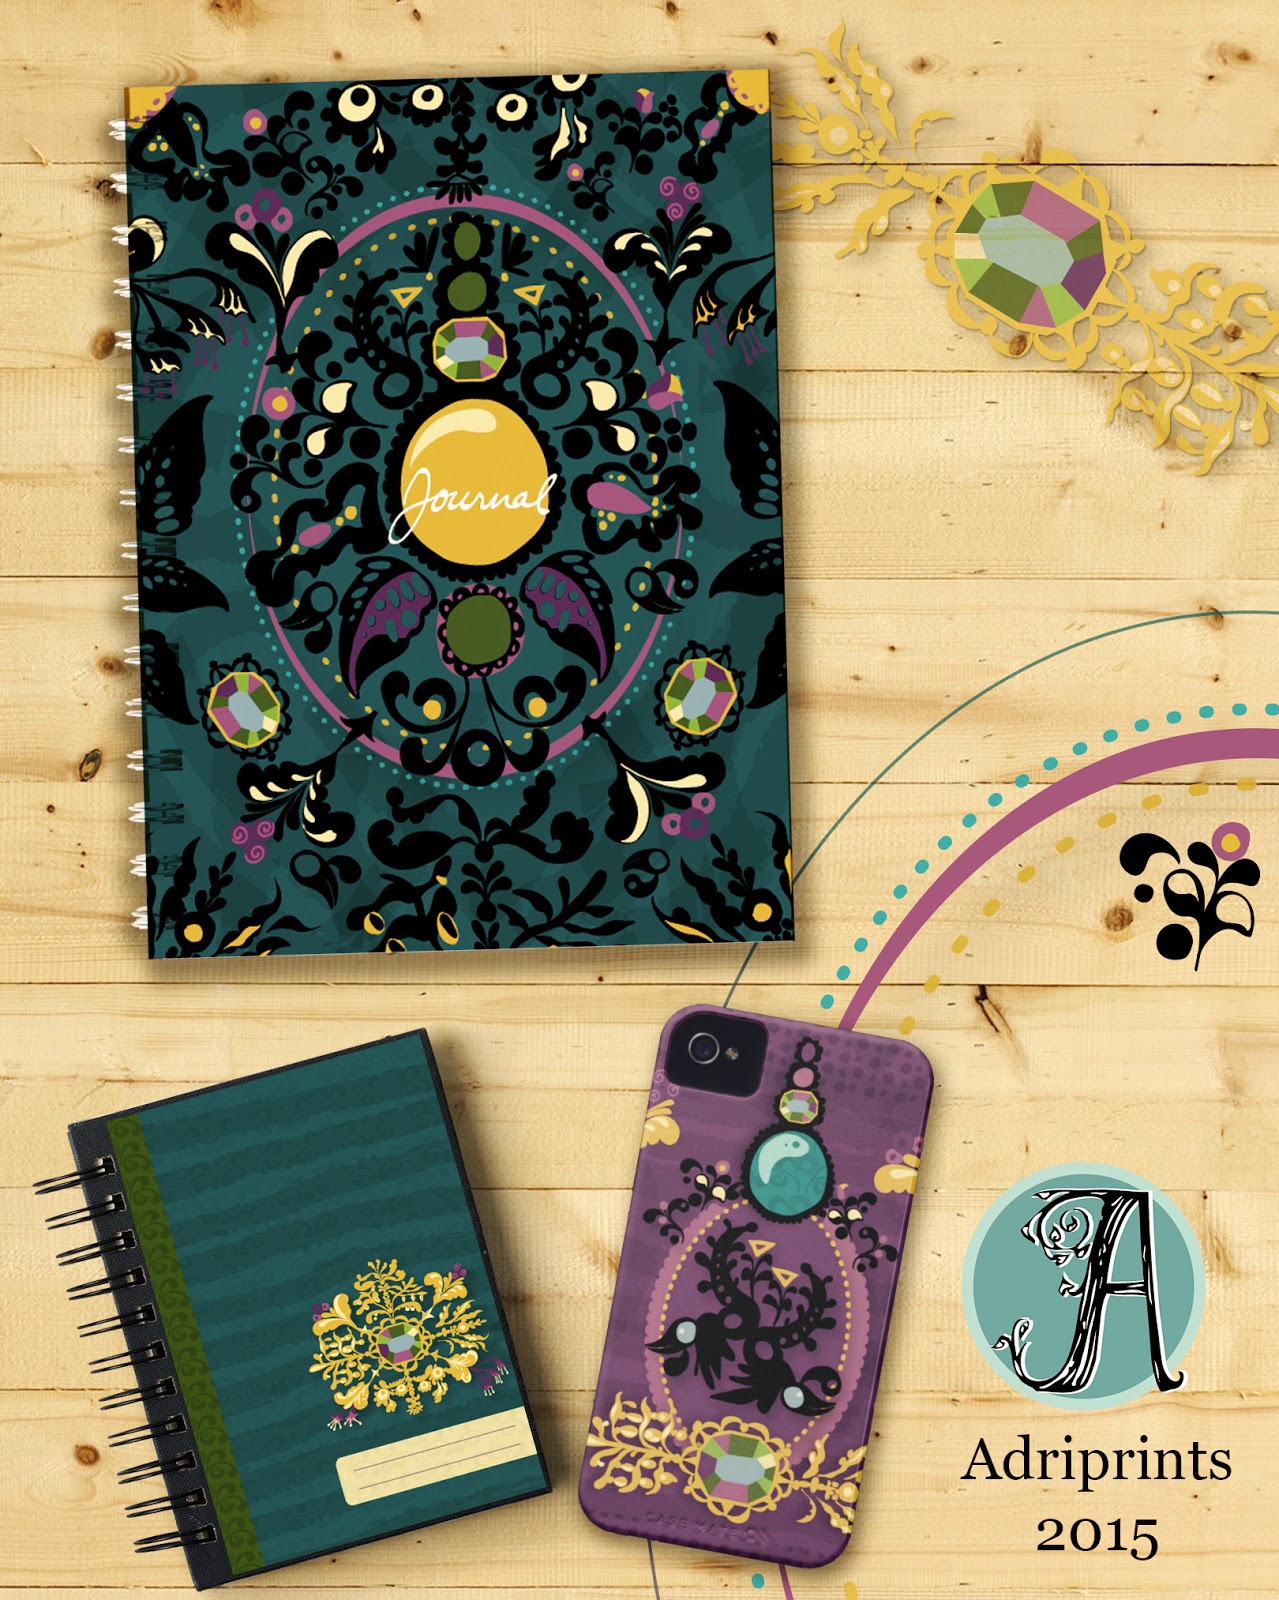
Our first Make Art That Sells (MATS) Assignment Bootcamp (whooh mouthful!) assignment was to brainstorm with Edwardian Brooches...and then, we were to turn our musings into a journal cover.

This is what I came up with for the assignment:


Here's how I got there...

We got our Mini Brief and after preliminary research, I started sketching like crazy.
sketching like crazy!

ballpoint pen crazy sketches
You can probably already see which direction I chose to follow in the end, but at first I didn't know.  I went in a couple of directions at once. I wasn't sure which idea would work, and I brought some of the sketches onto my tracing table.  Other sketches I painted over, others I traced with felt-tip pen, but I scanned everything first -- just in case it didn't work out.

In the end, I felt I needed to pick a style.  My sketches went generally into three styles:
1) swoopy intricate
2) crunchy colorful painty
3) slightly naive line-art

I went with "swoopy intricate" and then I created two moodboards: an observational one from the research and a style guide to help reign in my madness.


FYI: These mood-boards were from a template from a really helpful Skillshare class with Elizabeth Olwen.  The class really helped me with workflow and technical tips with Illustrator.  I can highly recommend it if you're looking to figure out how to make a repeating pattern in Illustrator.

I focused mainly on plants, flowers, and birds... although I really wanted to try insects I just had to focus.  I really could have worked on it forever.  This is the trap I set for myself.  Infinite possibilities and I just drown.

Anyway, the mood-boards set me on my course and my ship sailed here next.

I played with hundreds of variations with the brooch widgets until I saw a classmate's background treatment, and it clicked for me.  That's what I was missing.  Context!  So, I added textures to the background.  Tweaked the elements some more, and even started a whole new artboard where I tried something completely different, and then cleaned things up for the final mock-up layout.  And, that's how I got to the journal cover and accessories I turned in.

It's been a while since I felt like I was doing something super exciting while I was illustrating.  I still get excited about knitting design, but it had been a while in the illustration department.  Reflecting upon the first MATS Assignment Bootcamp 2015 assignment, that's what I felt.  I felt energized about drawing.  I'm elated that the Assignment Bootcamp community is turning out to be more awe-inspiring and supportive than I could have ever imagined.


Zig Zag Quilt Finished!

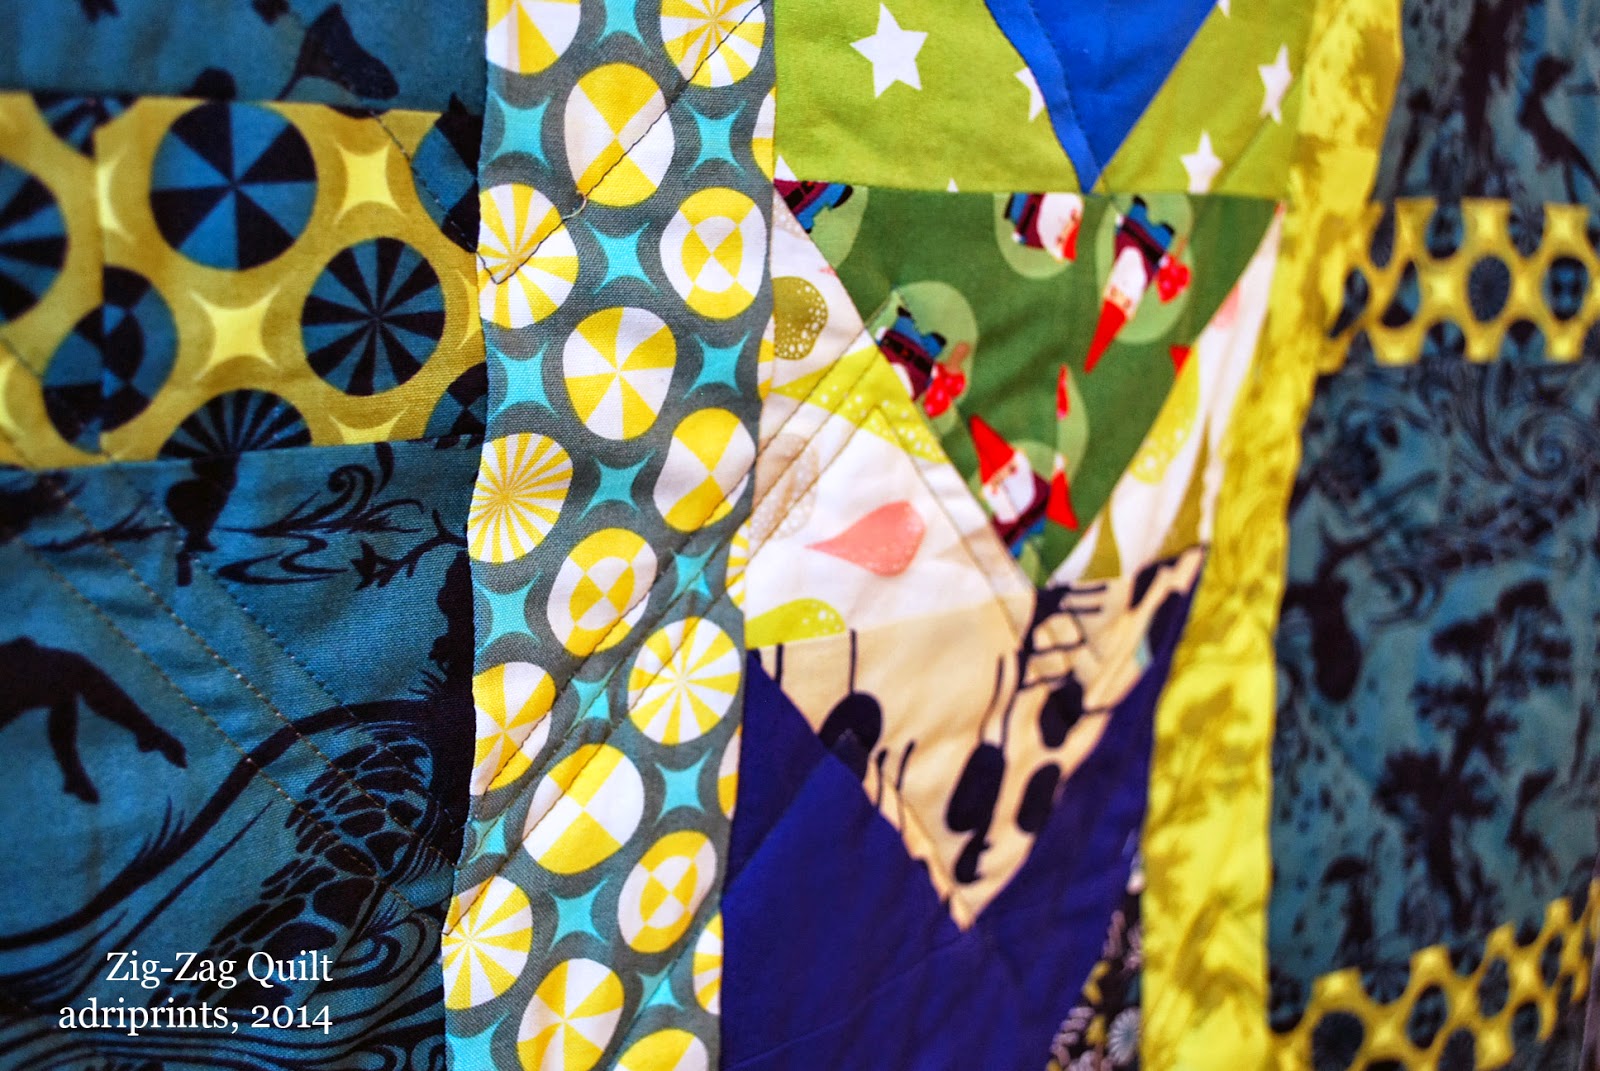
Happy Easter!  And, happy finished Zig-Zag Quilt!

The FMQ foot for my new machine is still on back-order so I decided I should just stop waiting and finish the quilt.  So... I did!


 I used a couple of tools to help me finish the quilt which I can recommend...


Firstly, I used the Robert Kaufmann Android phone app to help me calculate how much fabric I needed for binding and sashing.  You can find that here.  For i-phones you can find it on i-tunes.

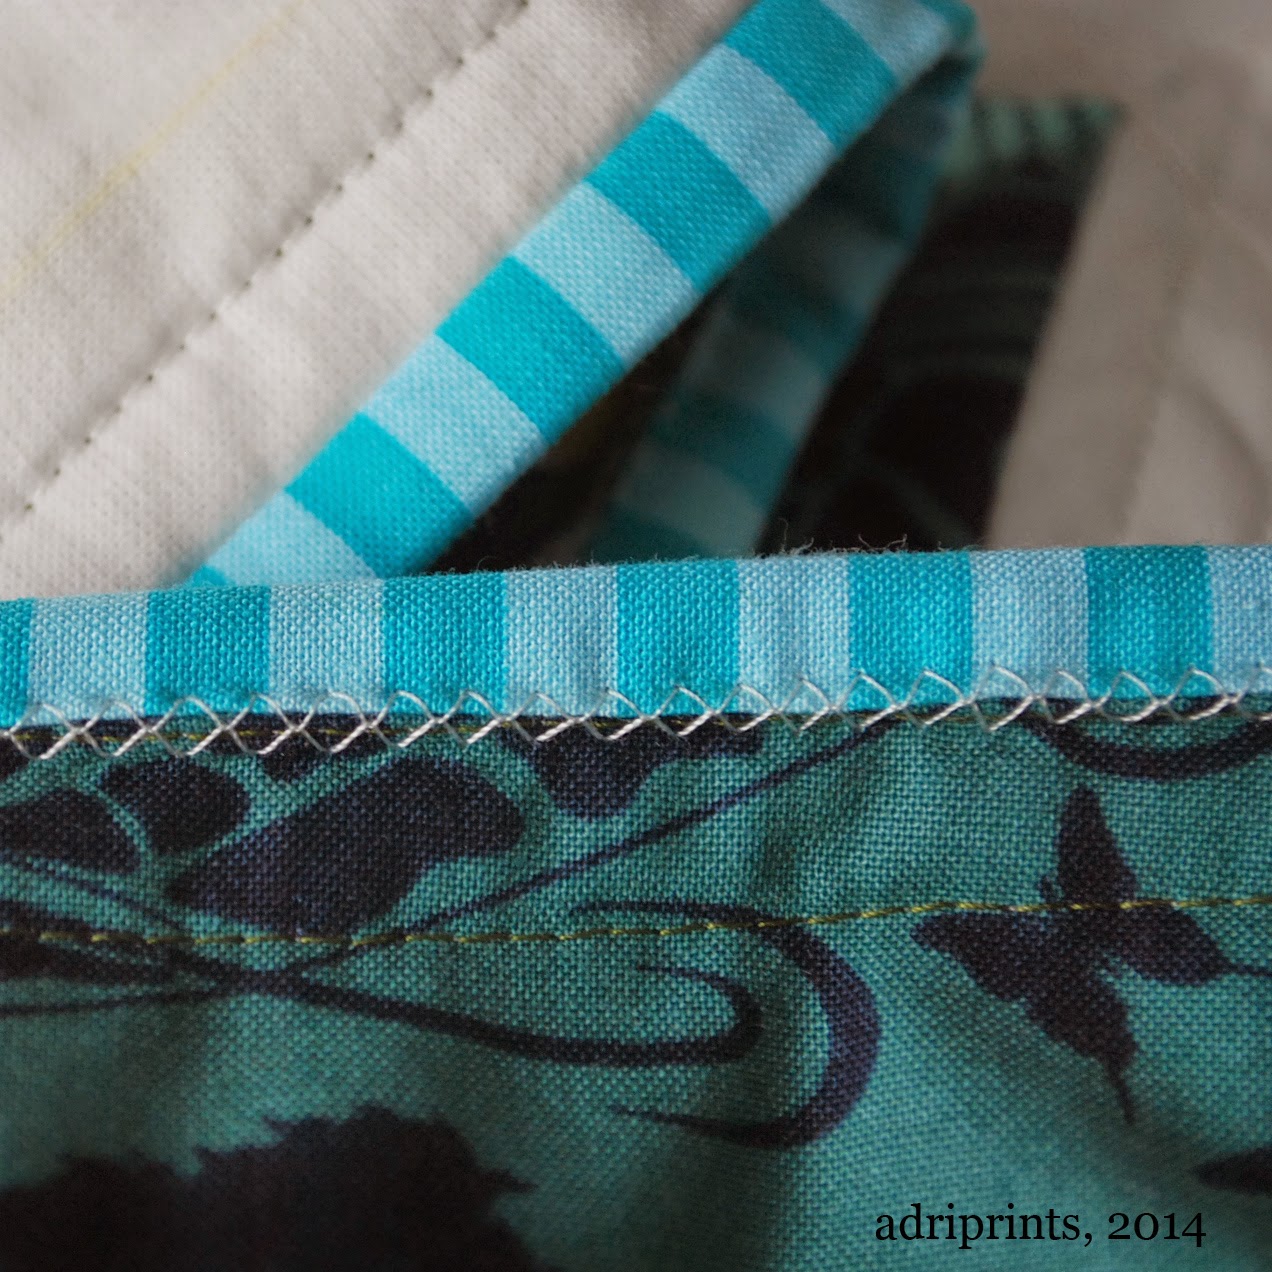
Secondly, I used this tutorial to get a kind of hand cross-stitch look with a plain old zig-zag stitch on my sewing machine using this tutorial here.

It looks like this when finished...


On the front, the finish is invisible, but the back has a pseudo-cross-stitch look which I really like!

And, that's about it.  I cut the striped binding fabric across the stripes so it would make a checkered border, and echo quilted the zig-zags to add some interest and structure.  I'm really pleased with how it came out, and hopefully the baby will enjoy crawling on it and being cozy in it!  I'll post a tutorial in case you all want to make your own zig-zag quilt.  It's fairly straightforward.

WIP: Zig Zag Quilt & Mitered Cardi

This past weekend, I made so much progress, but alas, I did not finish the quilt.

I do have the quilt sandwich ready to go, and am strongly considering a straightforward quilt-job instead of FMQ'ing.  See, the sewing machine shop sold me a FMQ'ing foot for my new machine (more on that later), but I could not for the life of me figure out how to install it.  I don't think it actually fits my machine.  So, I'll go check on that sometime this week.  In the meantime, here's my progress!

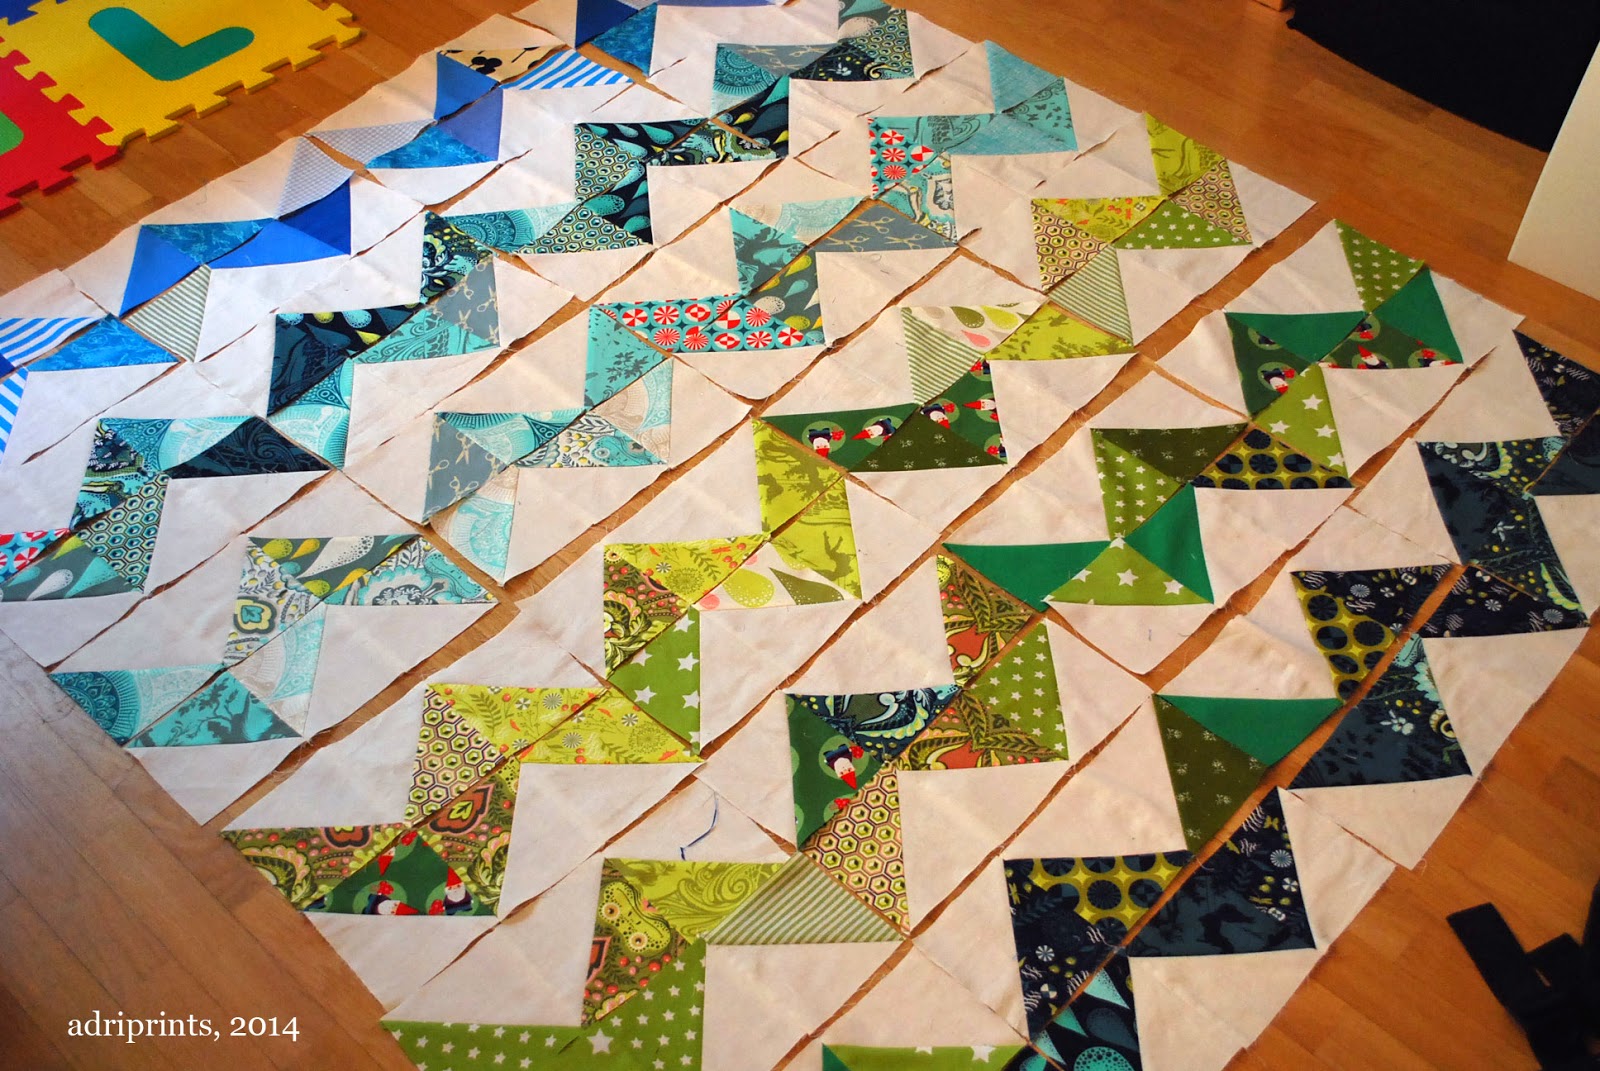
I finished piecing the top...


Added a border and pin-basted it to the batting and back...


All I need to do now is quilt!

As for the second Mitered Detail Cardi, here's where I'm at...


I've got to sew the side seams, knit one more sleeve, and add the edging!  So close!

P.S. If you haven't already entered, there's a giveaway in the previous post!  Feel free to enter and win a quilted fabric pouch.

WIP: Zig Zag Quilt

I'm making progress!


Earlier this week, I pieced together the HSTs (half-square triangles) into groups of 3, then I pieced the groups of 3 into zigzags!


Hopefully, by the weekend, I can get the top done and go buy some batting!  I'm going to do the back and binding in fabric from my stash.  I wonder if I have enough binding from the Blue Sampler Quilt to bind this one, too?  Hmm...