Tag Archives: experiment

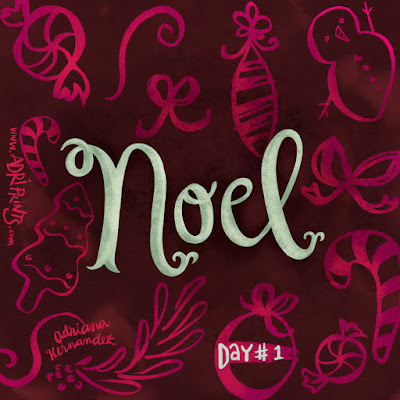
Process: Advent Calendar Noel Image

Hello! I just wanted to introduce myself in case you hadn't met me before.  I'm Adriana Hernandez-Bergstrom!  I go by Adriprints on my work, and  you can find me really easily with that moniker.  I'm the founder of the Finch & Foxglove art collective, and I did the first illustration on our digital Advent Calendar.

I am a really process-oriented person and I love learning how others get to the images they do.  I hope you can learn a little bit from my process too!

The "Noel Peppermint Bark" illustration started off as a doodle that I did in August or September.  I was at my mom's house playing around with an old watercolor set that I had left at her house in case all my luggage was lost.  In my mind, I was working on a tropical-Christmas kind of theme...


In between then and now, our group came up with a wonderful color palette for our advent calendar.  We looked at vintage Christmas postcards to get us started.  These colors were rich and wonderful, but not really tropical... and I really wanted to use the "Noel" lettering.  So I traced the lettering in Adobe Illustrator with the pen tool, used a color from our palette, and started working on composition with the other illustration assets that matched the palette a bit better.  I had created these assets or icons a few weeks ago by painting in watered down gouache.  They were extras from the greeting card project I did in October, and I did a direct "live trace" using Adobe Illustrator to capture them...


Once I had a composition that I liked, I brought each element separately into Photoshop, converted them to Vector Smart Objects and began to add texture and depth...


I really wanted a rich feeling like chocolate in the background, and at first I tried mint + chocolate with the lettering...


But, as you can see it looked a bit too cold in this version.  It read like mold or marble or something unappetizing.  So, next I tried peppermint, and that is what you see in the final image.  A little bit tastier, I think!


This is just one of the many illustrations in our wonderful digital advent calendar.  Follow along on our Finch & Foxglove Advent Calendar page!

MATS A, Week 2: Home Decor

Review of Week 2, MATS Part A which focused on Home Decor.


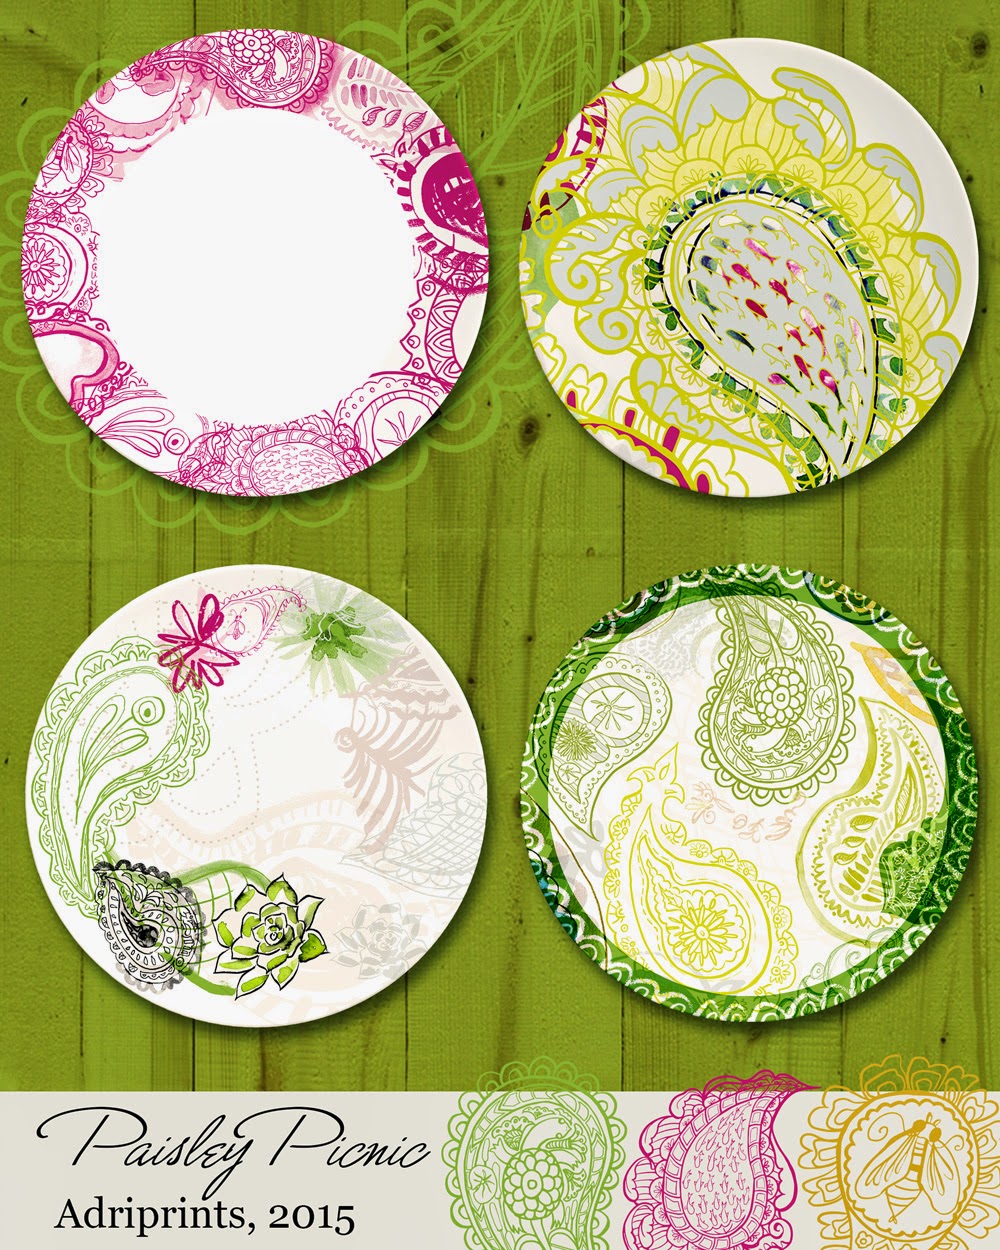
We started the week with Monday's Mini Assignment which was "go crazy with paisley!"  And I did!
I went ahead and went crazy doing different graphite illustrations on wacky paisley motifs thinking we were going to do bedding or bathroom textiles, maybe even upholstery or a room.  I imagined paisley swamps and bogs and that's where my head was when I started illustrating for this project... some kind of paisley pond world.

And then we got the main assignment: plates.  One of the worksheets that came with this week's assignment had this very important question when thinking about plates: Would you eat off of it?  My stomach had a sinking feeling when I came to that question.  It had never crossed my mind that we'd end up focusing on plates!  Some of my illustrations were not really food friendly... frogs eating flies, hungry anyone?!


It is a tough question, isn't it?  If it's a decorative plate, then no, I wouldn't eat off of it.  But, my utilitarian tendencies wouldn't let it go at that simple solution.  I couldn't just design decorative plates.  I don't own any purely decorative plates, and it was an important aspect of this week's project to be your own customer.  I worked through the designs until I felt that these were a series of plates I could see myself picking up and serving desserts or summer drinks or a festive picnic meal.  I learned this about myself - I am picky.

Here's the progression of one of the plates, the upper right one in the layout.

And then of course, there's the real-life stuff that kind of stressed me out.  We were traveling and we had no internet access, and I bought a hot-spot card to use the city's wi-fi, but it was spotty at best. Little dude was finding everything exciting and did not want to sleep or nap, which made it a bit of a a time crunch. We were at this ridiculous cloister atop a giant hill in a tiny town in Germany, and it was beautiful... but technologically desolate.

Thoughts on Week 2 Course Materials

With this week came a wonderful set of worksheets that had some great questions about this market and specifically plates.  These are the kind of questions that get you un-stuck when you've made progress, but aren't "finished".  I am treasuring them.  They're the "Hey did you think about this or that?" aspect of illustration.  I tend to sketch quickly and get things into the computer and then find myself all self-doubty at some point.  Those questions are invaluable!

The interview this week was with a Crate + Barrel art director and it was interesting to read how she makes decisions on artwork.

So, is the Home Decor market for me?  I think it could be, but I still like the puzzle aspect of bolt fabric better.  Home Decor felt like the ocean to me, and I like knowing where the edges of the pool are when I'm illustrating.  Maybe I'll feel differently depending on the item.

Also, a special shout-out to my fellow MATS-ians.  Thanks for your help pushing me forward this week!  I needed it.

Picante Dirndl

When I was a kid, I loved comics.  I was a big fan of the "what-if" and alternate reality issues that comics would sometimes print.  This idea of "what if's" popped into my head as I posted about this past week's MATS Bolt Fabric Assignment, and it wouldn't let go.

What if... I did make a dirndl out of my own fabric?

I imagine it looking like this!  I used Burda's Dirndl Pattern 8448 as the basis for this visual mock-up.


I think that would be really unique to wear to Oktoberfest 2015!

Please note that I do not have any affiliation with Burda or their patterns, and I do not represent Burda or their parent company in any way.  Just an illustrator and DIY-er here.

Two-Part Nappies Revisited: Part 2

A quick tutorial on how to make your own diaper inserts using my pattern (or your own drafted pattern).
These diaper inserts require an outer waterproof cover of some kind, and will fit from newborn to 6kg+ (at least they're still working for us!).

the absorbent inserts inner flannel / outer terry cloth
Materials
  • Absorbent fabric (German term in parentheses) such as flannel (Flanell/Molton), terry cloth (Frottier), hemp fleece (Henf), or jersey, etc...  Feel free to recycle materials you already have; like an old flannel blanket, an old sweatshirt, or a towel.  I use terry-cloth on one side because I like to use Snappis and avoid hook & loop closures, but feel free to use whatever closure method you want.
  • Elastic (I used 1/4" wide elastic that is resistant to high heat)
Instructions
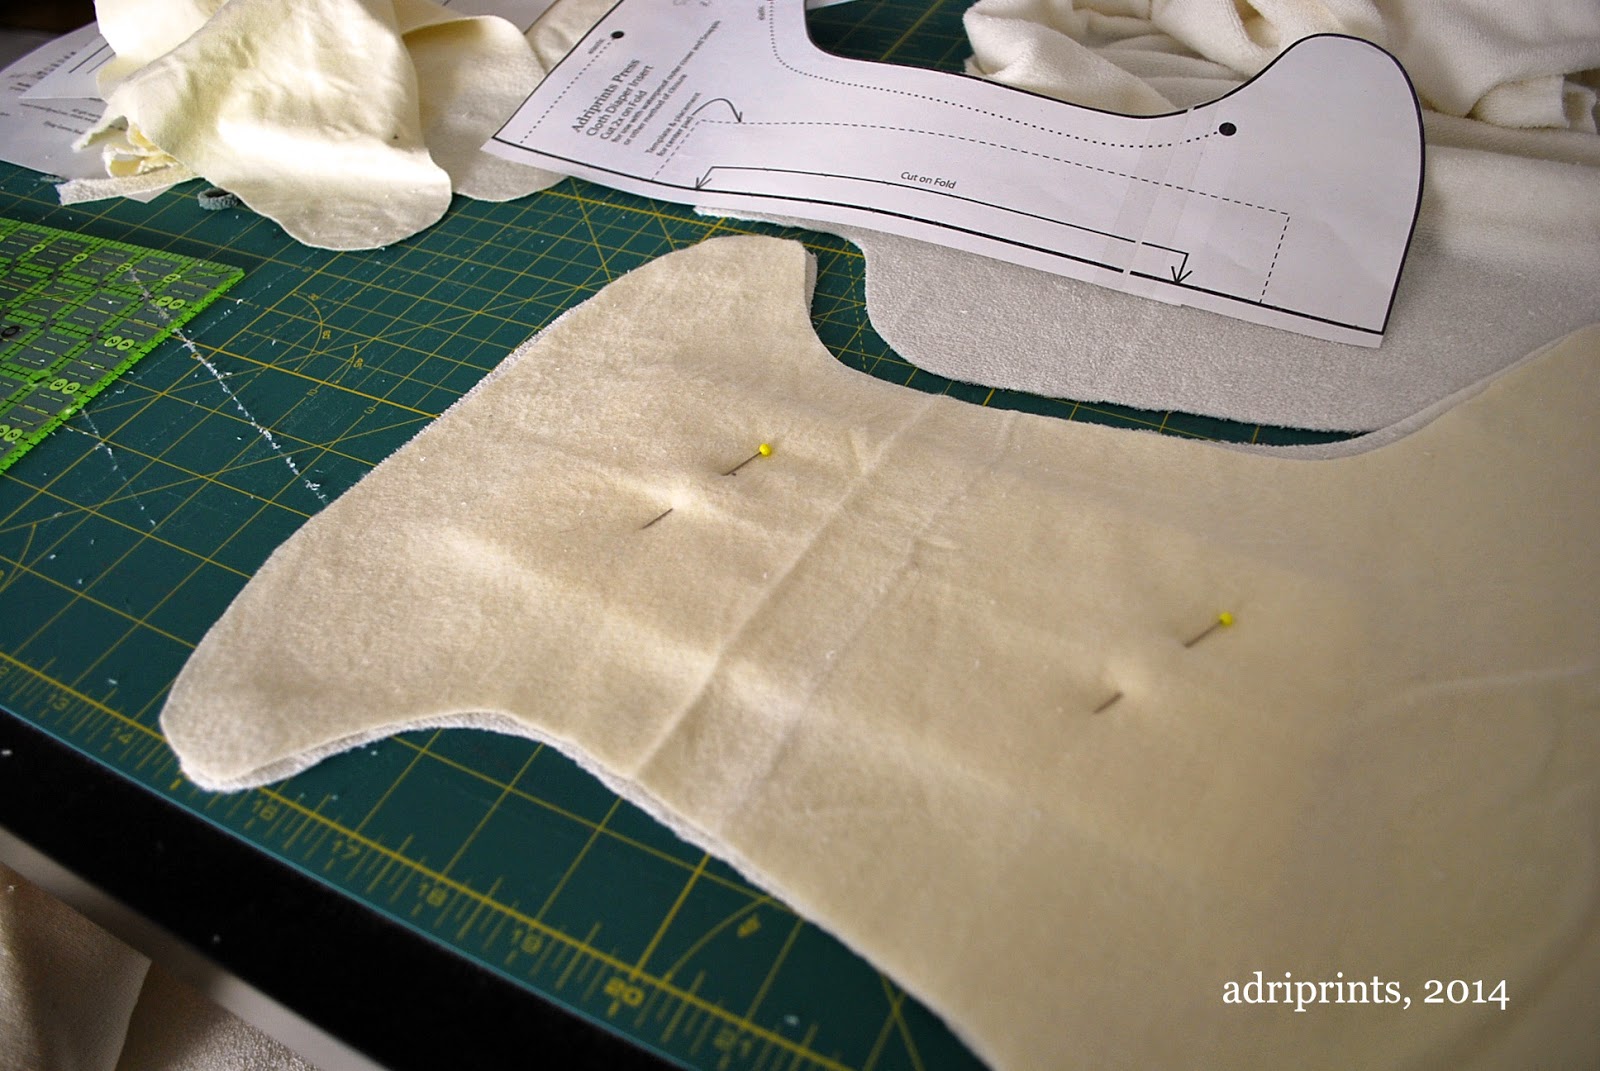
1- Place the paper pattern on the fold, and cut your materials for the diaper insert.  Don't forget to transfer all markings to your fabric.


2- Cut fabric for center pad (it's that center rectangle with the dotted line in the pattern).  I cut 2 layers of bamboo terry-cloth.
3- Layer the 3 elements as follows: absorbent material #1, pad rectangle(s), absorbent material #2.


Center the pad, and secure all three layers with pins.


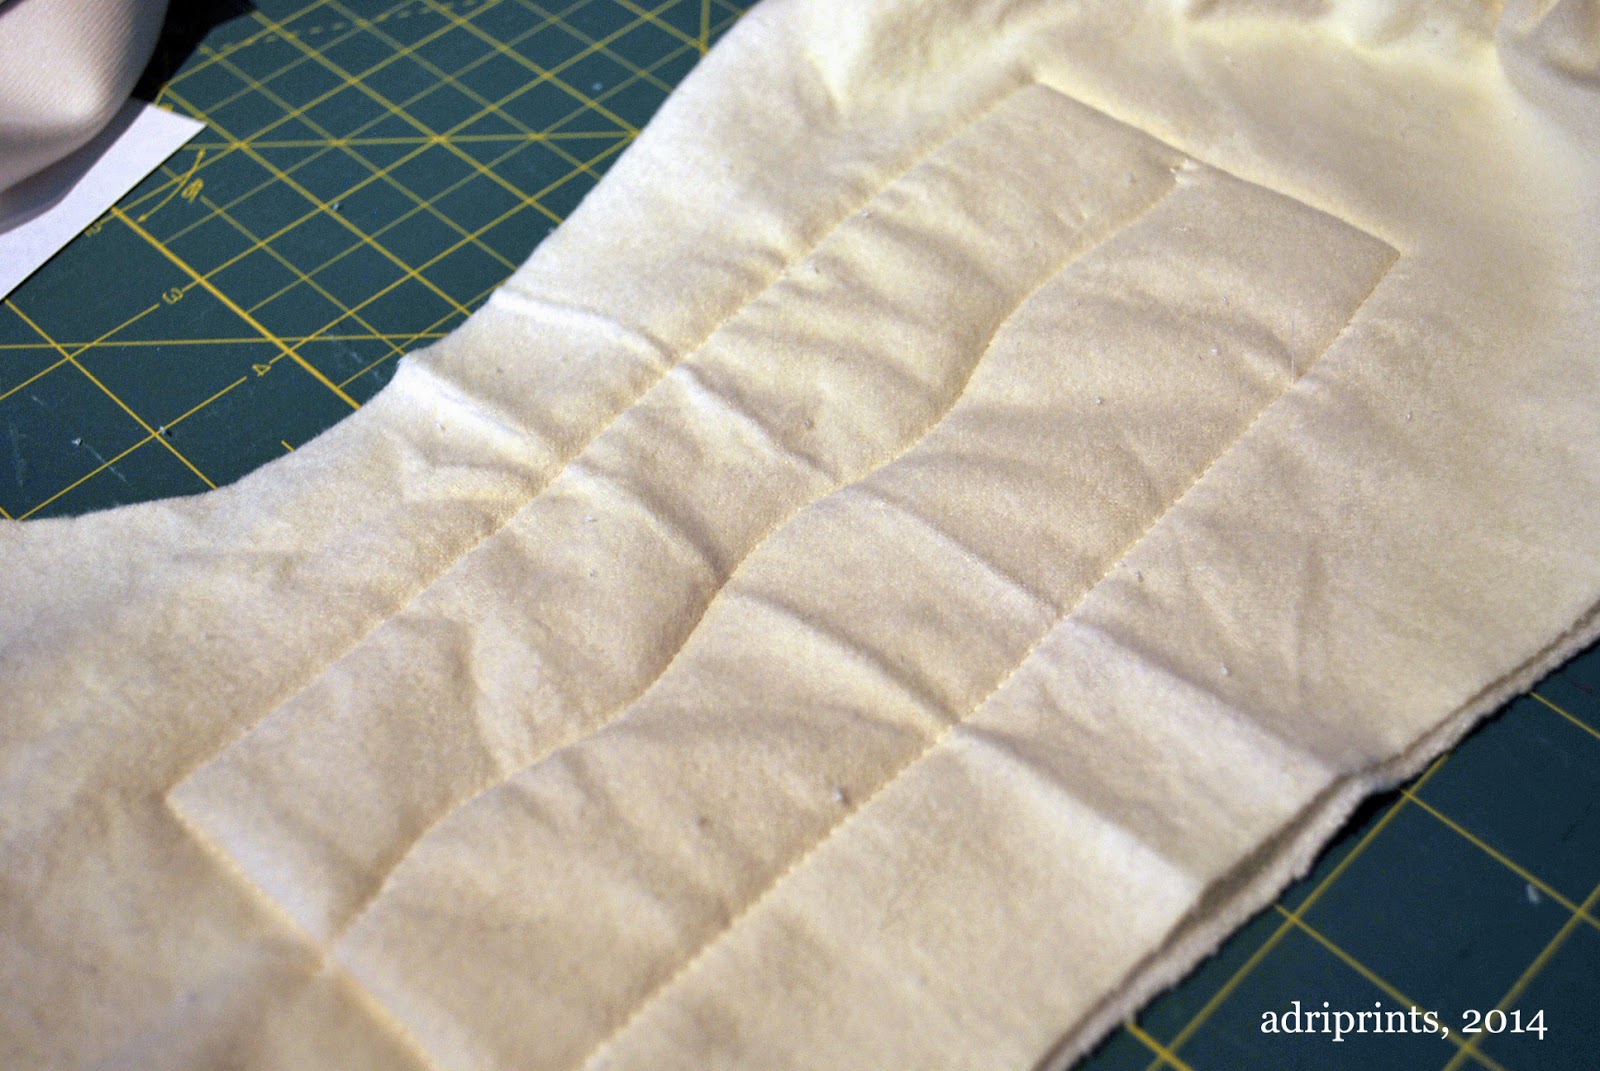
4- With the smoothest fabric facing up, sew 1/8" to 1/4" within the four edges and across the center of the pad to secure it in place.


5- Measure the elastic band for the sides and top, then cut elastic 2-3” shorter than the measured length.
6- Tack both ends of the elastic where indicated and pin at the center.  Make sure to leave a little space on the outer edge for finishing the fabric.
7- Use a zig-zag stitch to attach the elastic on the back of the insert and the leg openings, stretching the elastic between the two outer layers as you go.


8- Use a zig zag stitch or overlock around all the outer edges to finish.  I stretch out the back and sides while feeding it through the overlocker.  I do not serge over the crinkled/gathered edges.

Wash a few times, and then let baby poo all over your work! Hahah!

Two-Part Nappies Revisited: Part 1

This post covers lessons learned in making diaper covers at home.  In cloth diapering, the outer cover is a waterproof barrier that prevents leakage.  These can also be used over regular disposables to prevent leaks, or just because they're really cute.


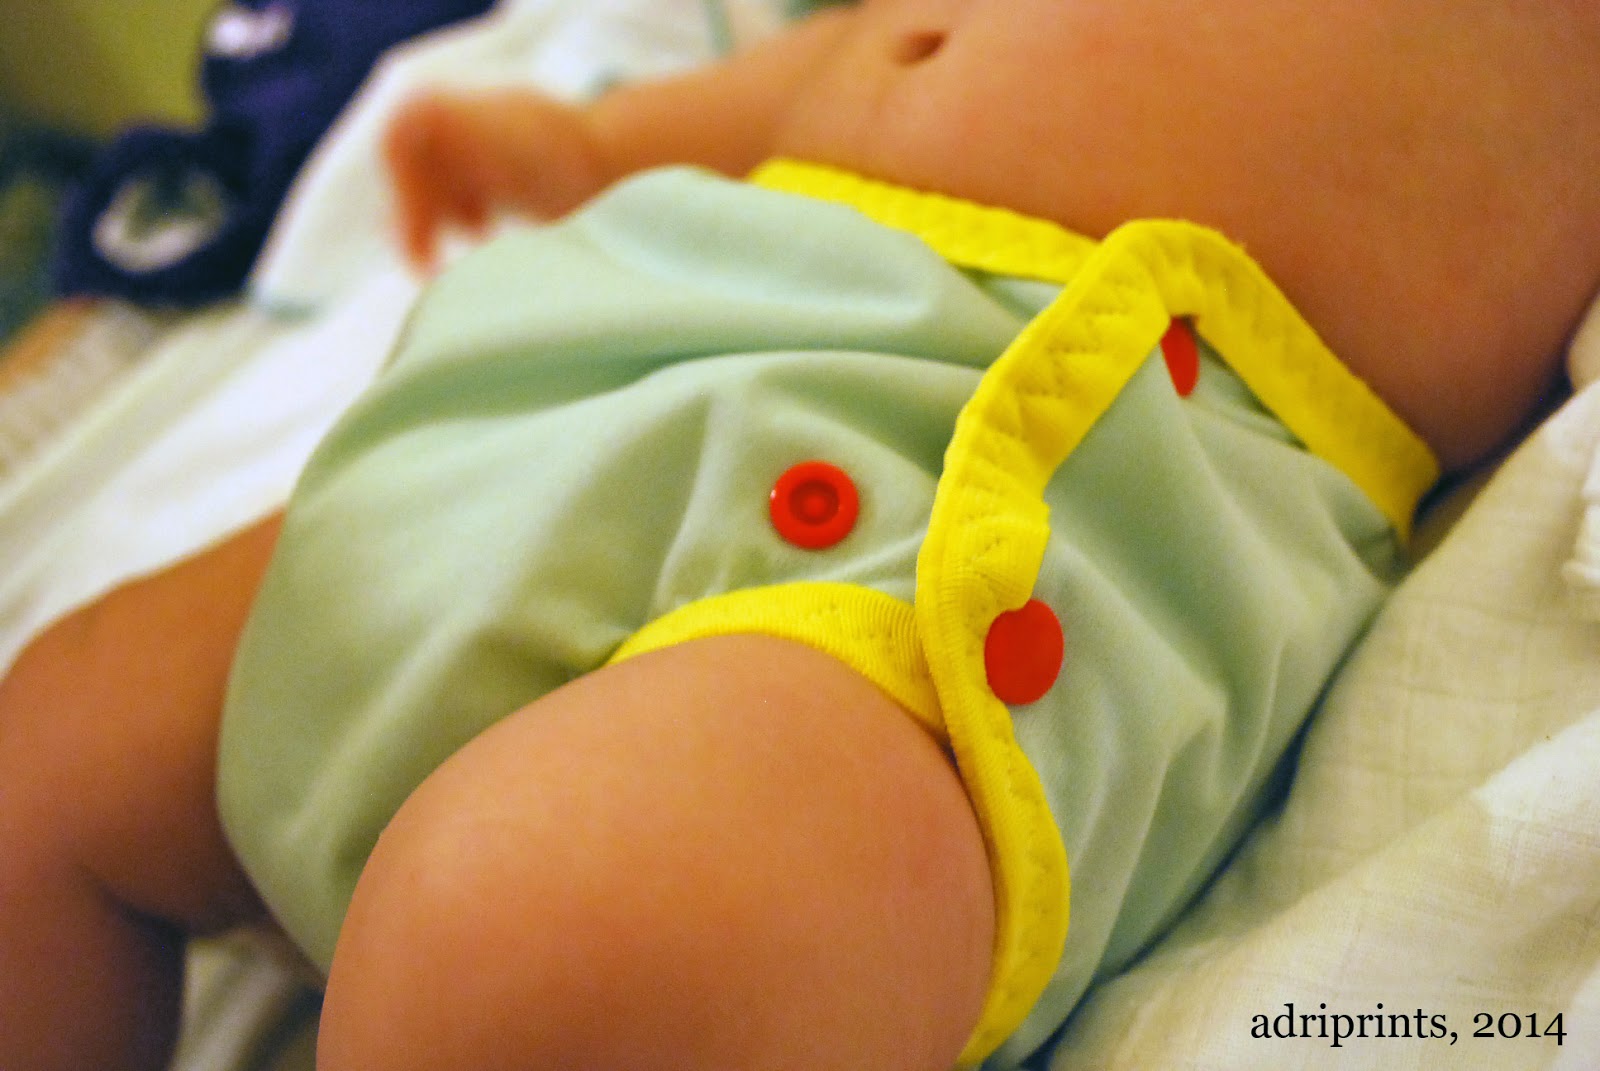
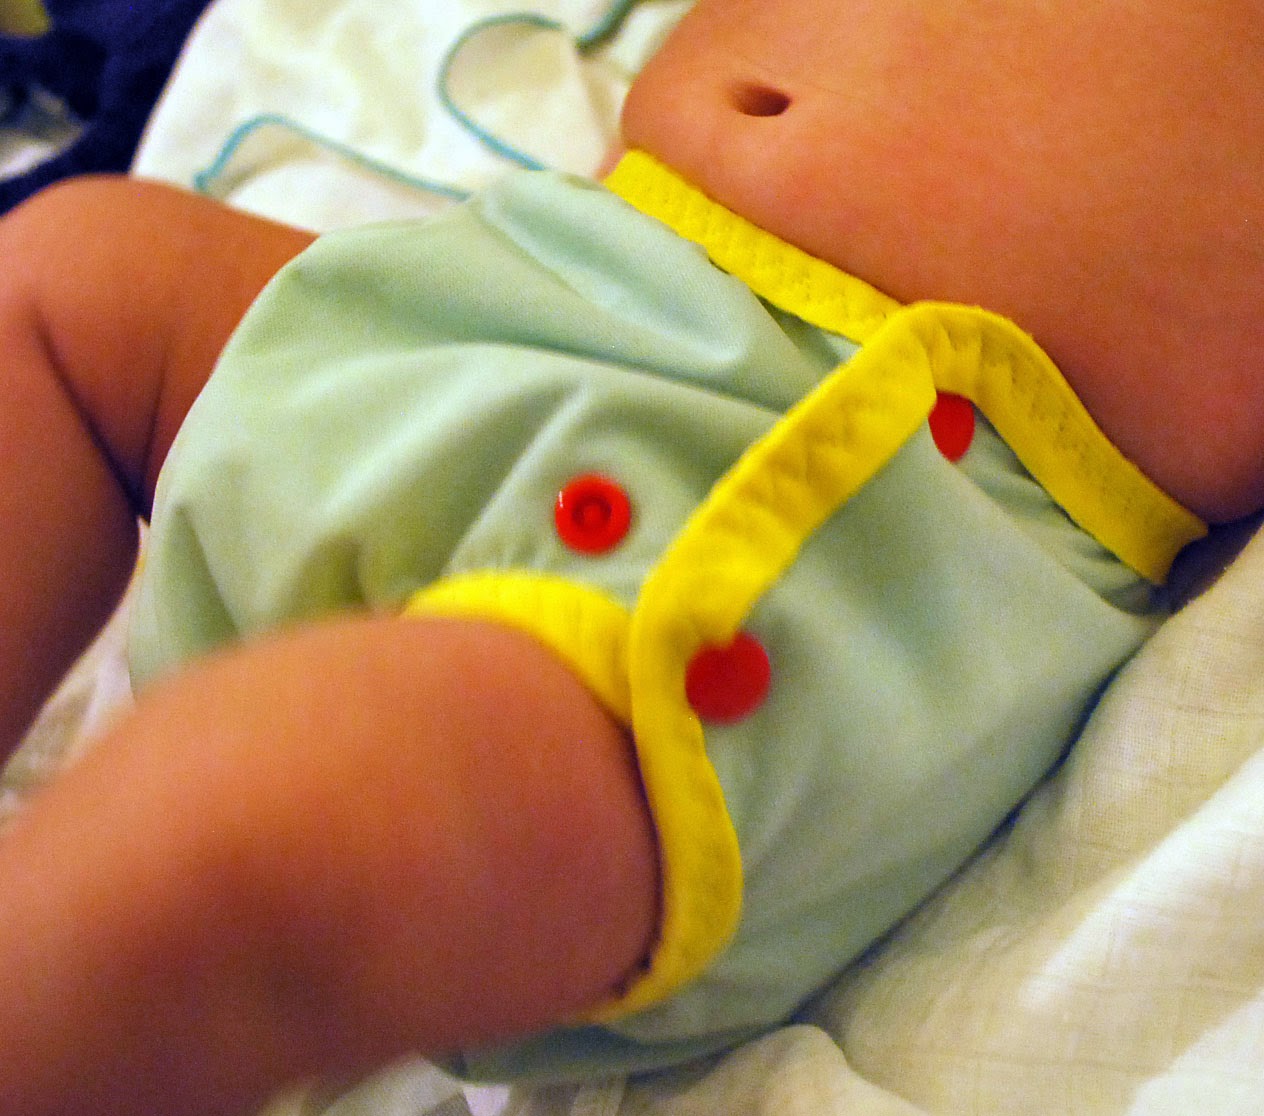
After a few mishaps and lots of leaks, re-purposing PUL, and studying more cloth diapers, I think I've found a few types of cloth diaper systems that work for the little dude.  This particular diaper cover is a homemade version of Motherease's diaper cover the Air Flow.  It works really well with the diaper inserts I make at home (more on that later).  These are not easy to come by here in Germany, so to me it's worth the effort of making more of them.

What I've learned so far:
FOE - fold over elastic goes on a LOT easier if you use a triple zig-zag stitch.  This video was key.
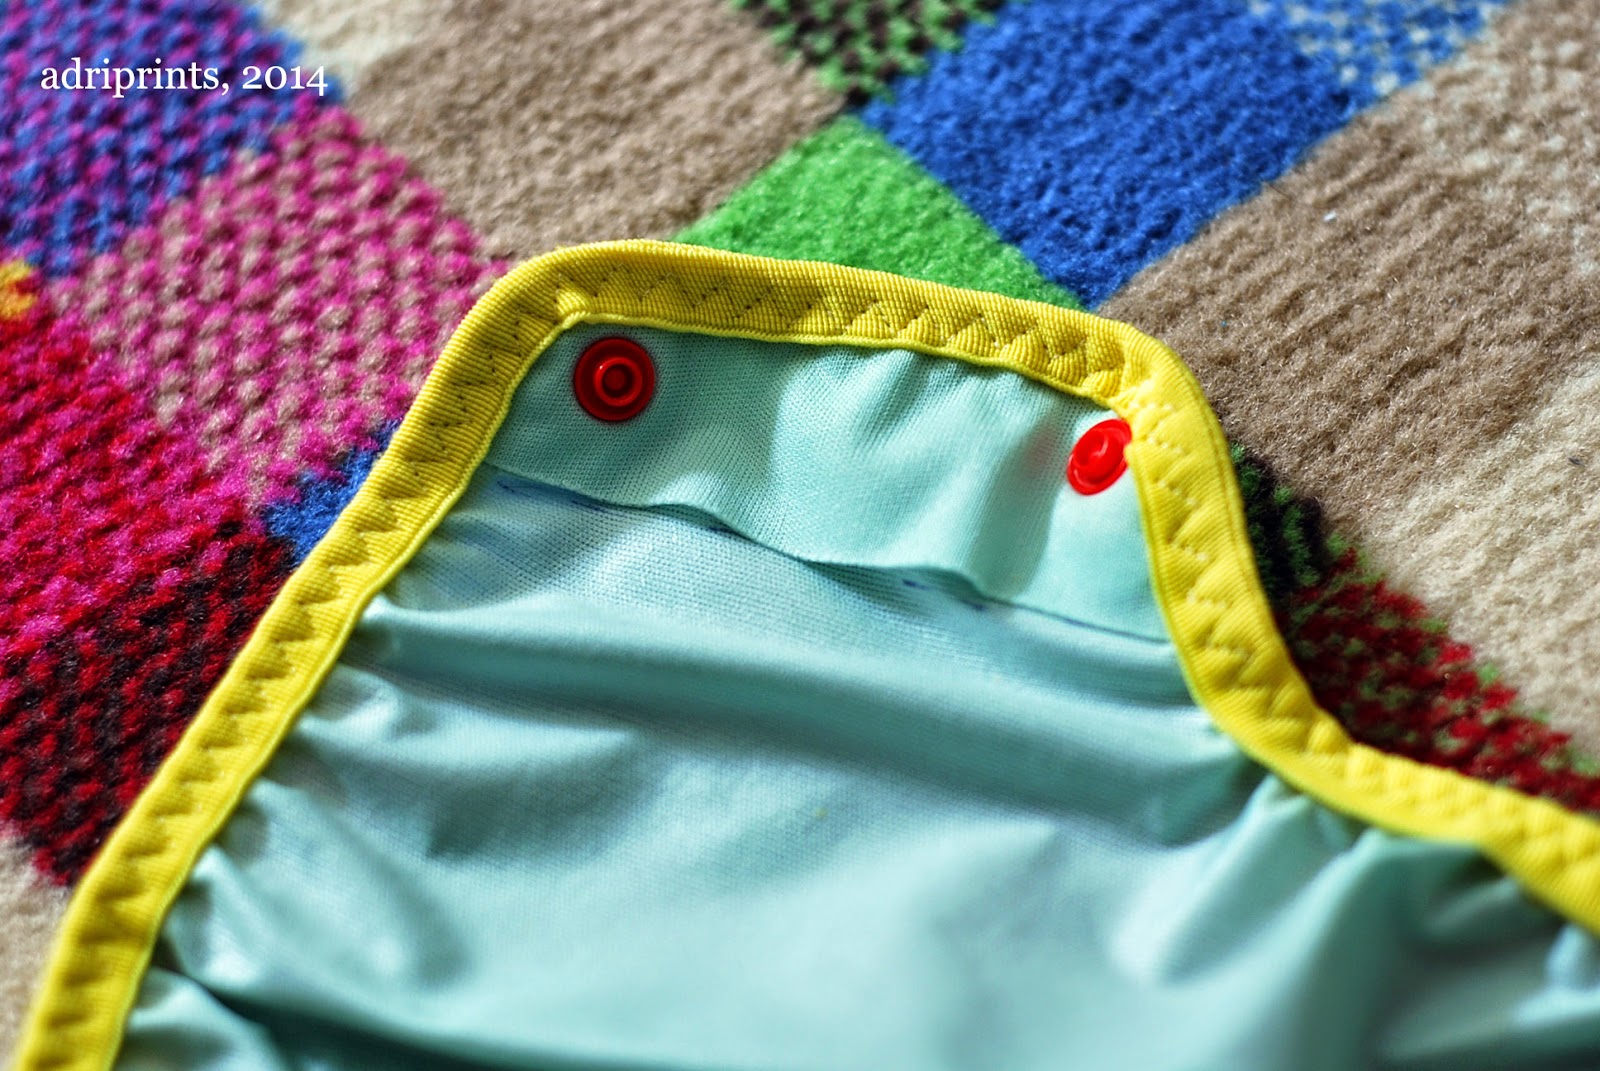
detailed photo of the inner wing of the diaper cover


KAM snaps - these snaps make a better seal with the Eco-PUL I bought from Diaper Sewing Supplies when there are 3 layers, and it's been exposed to warmth (i.e. it's been through a 60* wash and tumble dry).  That's it!  That is what was missing last time.  I didn't wash/dry the cover before trying out the snaps, and it was too thin.  Now I'm kind of sad I chopped up the grey & yellow cover before washing/drying.  It may have been salvageable.  Oh well.


With my latest effort, I went with a retro color combination!  Aesthetics aside, they work really well.  No leaks or poo-splosions yet!


As for the diaper inserts (the absorbing inner part of these two-part systems), I've drafted a pattern for anyone who wanted to try it on their own!  You can download it from the Google-Drive link here.

Come back this weekend to see the photo-tutorial on making your own diaper inserts!

My First Mabel

Sewing for two new shapes (baby + me) has been interesting!  My figure has definitely become fuller after having the baby, and it continues to change even now that I'm two months postpartum.  I'm not getting too attached to my new bust-line because I've heard everything shifts and changes after having a baby, but in the meantime...

Knits!  I've been sewing a lot with jersey in order to give me a little flexibility with this changing body of mine, and that adorable and speedily growing baby in my life.

The first project I tackled was a super fast pattern that I heartily recommend to those with little time to sew: Colette Patterns' Mabel.


I made a slightly more A-line adjustment to the pattern and added a lining to diffuse some unexpected bulges, but other from that,  it's straight from the pattern sheet.

Pattern: Mabel from Colette Patterns
Fabric: single jersey

For baby, I've been working with knit hemp and knit terrycloth in order to make some cloth diaper inserts.  I've since tested them, and they work really well! They're trim and really absorbent. I'll share the pattern as soon as I trace it digitally  ((we'll see when that happens! Hah!)).


Project: Baby's cloth diaper inserts
Pattern: self-drafted
Fabric: hemp knit, cotton terrycloth

And, those failed diaper covers were converted into breast shields.  Yep.  I just cut 'em up and sandwiched some soft interlock on both sides of the PUL fabric.  So sad to see all those snaps go to waste.  Oh well.

3 Hours Past’s Blank Canvas Tee: Maternity Hack

During Me-Made-May 2014 I'd like to share some of the me-mades I've made in more detail.  In order to see if I could replicate a maternity/breastfeeding top that I love, I tried my hand at drafting and here are the results!


If you're just starting out sewing with knits, a great place to start is a simple dolman sleeved t-shirt like the Blank Canvas Tee from 3 Hours Past the Edge of the World's Blog.  If you're past that, are ready to try some drafting, and would like to make yourself a breastfeeding or maternity top, then this is the mod for you!

Start with the Blank Canvas Tee from 3 Hours Past...

Added Materials

  • additional fabric because the length of the T-shirt is extended.
  • 1 piece of elastic - soft baby elastic or elastic about 1/4" wide that suits your fancy in the width of your t-shirt + 2" or so.

Extra Skills

  • sewing with elastic

Special Tools

  • twin needle
  • stretch needle 75/11  (a whaah?  Here's a needle guide from Schmetz)
  • pencil and ruler
  • maybe tracing paper if you don't want to write on your pattern
Inspiration: From boob design, this short sleeve maternity/nursing top is one of my faves.  It fits really well and the split top allows for belly room.


Okay.  Ready to make your own?
First print and assemble your pattern pieces from 3 Hours Past... Then, here's our goal: we want to create two pieces for the front that overlap by around 5" / 13cm for the smaller sizes.  You'll likely need a bit more overlap for the larger sizes or if you usually find yourself doing large bust adjustments.

The goals.
Measure from just below the armpit curve to your goal overlap length, then add 1" / 2.5 cm so you have enough to turn up a hem.  Trace what you have onto your fabric, or onto tracing paper to make pattern pieces.  I've highlighted what I did to the pattern in the photo below.


See the red highlight?  That's the top front piece.  The blue highlight shows where the the bottom front piece would be.  For the bottom, I took the design line straight up and did not taper in like the pattern - it's housing a big belly at the moment, and I thought it would be advantageous to have a little leeway.

The other change I made here was adding length.  Add what you will.  My goal was to have a t-shirt around 28" so I added a few inches to the bottom of both the back and front bottom pieces to achieve that.  I just followed the design lines to my goal length. To calculate length, I measured from the peak of the shoulder, parallel to the fold line.

Alright, you've traced and cut your 3 pattern pieces.  Do you have your edging pieces (no change from pattern) cut, too?  And those two strips of interfacing for the shoulders?  What interfacing? I used Vlieseline G785 since it's stretchy, lightweight, and works with knits. Everything cut? Great! Let's get these pieces ready to put together.

Assembly:

  1. Step 2 from pattern: Iron on interfacing to WS of back piece shoulder edges
  2. Front top piece - finish bottom edge with zig zag stitch or serge, turn up and twin needle the hem from the right side
  3. Front bottom piece - add elastic to top RS edge using a triple zig-zag stitch.  How?  I simultaneously slightly stretch the elastic while guiding the main fabric under the presser foot.  I do not stretch the main fabric.  Right hand for elastic, left hand for guiding fabric.  I do this 2" at a time so I don't lose my nerve.  Then, I fold over the elastic so I only see the final fabric, and straight stitch the bottom edge of the elastic.
  4. Overlap the two front pieces- With RS facing you, make sure the front top is on top, and the front bottom is behind it.  Make sure the overlap is what you desire and pin.  Stay stitch within the seam allowances (so ~1/8" from the edge) to secure the overlap.
  5. Step 3 to 9 are the same as the original pattern.
And there you have it!  You've made a maternity/breastfeeding t-shirt!  Feel free to change the neckline and make it a scoop neck like in the inspiration photo.  I like crew necks so I kept the pattern as is.  But, I think I'm going to try and make a tank or sleeveless v-neck.  We shall see!

Colette Sorbetto: Maternity Hack

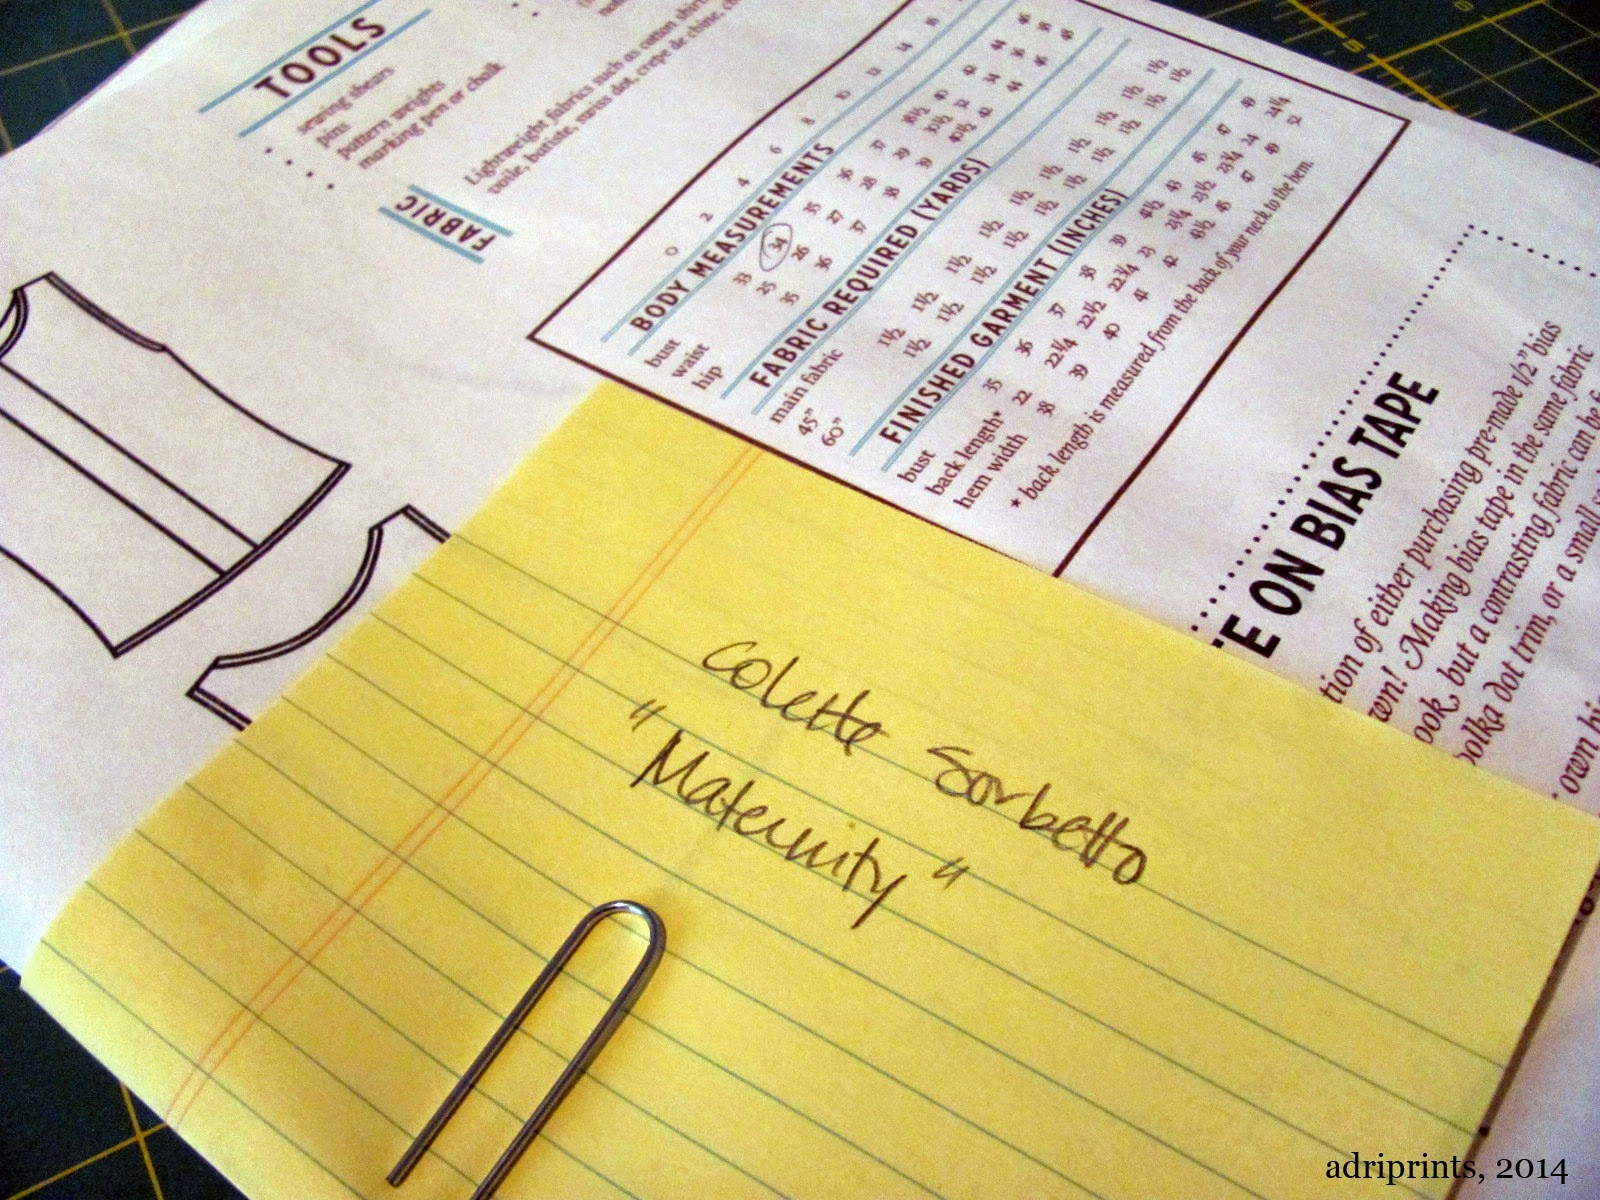
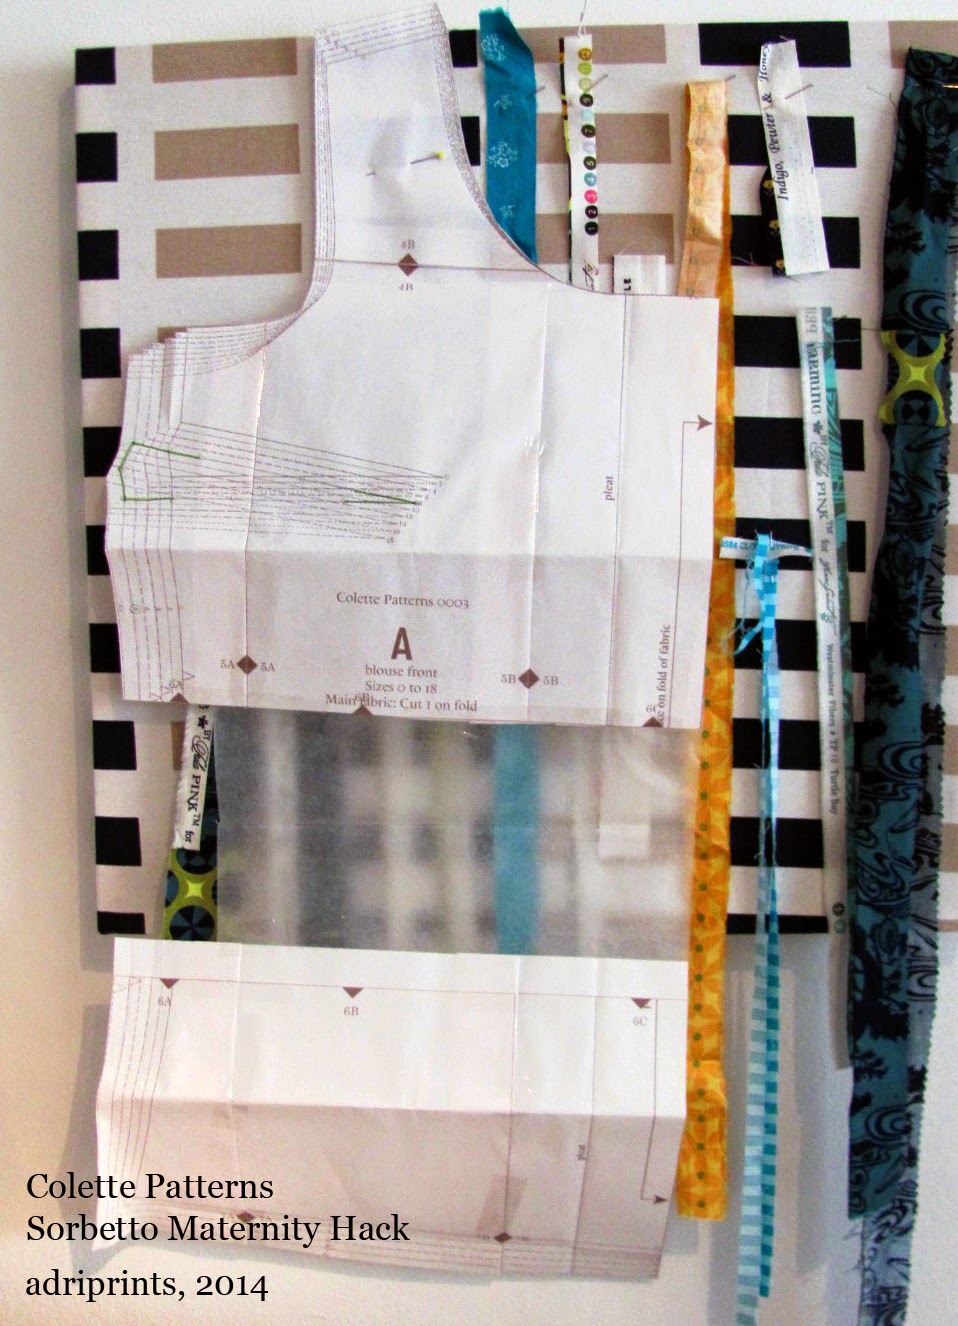
During Me-Made-May 2014 I'd like to share some of the me-mades I've made recently.  For week #1 of MMM14, I've been wearing this particular garment almost daily ((or rather, nightly))!  It's a maternity pajama based on Colette's free pattern, Sorbetto...


During this pregnancy, I've inherited so many things from friends.  One of my favorite items was a Sorbetto top I helped a friend make for her first pregnancy.  I took her measurements and devised a way to use the pattern to make her a top.  We learned that by leaving the bottom part of the pleat open, you get a lot of room for a belly.  We also added 5" of length at the waist for extra coverage.


One of the drawbacks of the first prototype, though, was that it was made out of plain cotton and so it did not allow for freedom of movement or stretch should you want to sleep in it.

So, when it was my turn, I thought about improvements that could be made to last year's prototype.  Firstly, I made the decision to try a single knit jersey.  I had a big chunk of single jersey fabric from my attempt at this "wrap dress pattern" from Burda... There was no way that dress was going to work for me, and so I was happy to chop it up for this Sorbetto Maternity PJ top.

Yes, that's my dressform with a bag of fabric scraps stuffed into a belly band
to simulate my enormous pregnant belly.  It's a little lumpy, but you get where I'm going.
I had to patch 2 pieces together for the front piece since I didn't have any pieces wide enough to trace the pleat at the front.  I once again added the 5" at the waist, and I only sewed the top 5" of the pleat down the front.

Secondly, all the edges were finished with self-fabric so they're stretchy.  This was done by cutting 1.5" strips and folding them in half, then using the serger to attach them to the edges before the shoulder and side seams were sewn.


So, if you're attempting this at home... 

Colette Patterns Sorbetto is your base pattern.
Drafting: Add 5" length to the waist of front and back piece (or more if desired).
Cut 4 strips of 1.25" self fabric or knit rib with max stretch going with the long edge: 1x strip @ 2" longer than the front neck circumference,  1x strip @ 2" longer than back neck, 2x @ 2" longer than the total armhole circumference.
  1. Make bust darts as written
  2. Sew only top 5" of pleat, stay stitch pleat at neck edge
  3. Attach edging to front and back neck edges (fold edging strip in half, 3 raw edges together, serge)
  4. Sew shoulders
  5. Attach edging to armholes
  6. Sew side seams
  7. Turn up hem, press
  8. Twin needle finish for neck edge and hem, single needle top stitch for armholes 

And that's pretty much it!  You can stabilize the shoulders if you want, but mine is a pajama so I don't really care, and it hasn't rippled even after washing.  The front neck edge could be tighter if I had used ribbed knit fabric.  And, that's it for now!

Zip Pouches and Boxed Corner Tutorial

Finished up two more zip pouches with the over-locker, and now feel like I've mastered boxed corners.


As you can see, the size of the boxed corner makes a difference in the depth of the box.  When I take out just 1.5" I end up with a shallower (3" high), longer box as you see on the left.  When each corner is 2", the height of the box is 4"; creating a taller, deeper box like the one on the right.

I was learning overlocker techniques from Amy Alan's Beginning Serging class over at Craftsy, and I wasn't finding too much success with the "pinch and sew" method of boxing corners.  I tried it several times, and the result was last week's slightly wonky zip pouch.  This time, I tried another technique - a cut-out method - and found success!

How did I do it, you ask?  I'll show you!

First, I measured and marked a square on each corner of the pre-prepped zip pouch.  The square you mark does not count the previously overlocked seam.  And, the sides of the square = half the eventual height of the zip pouch.


If you look closely at the above photo, I secure the layers of fabric so they don't shift when I cut through all the layers.  I use my tailor's shears to do the cutting since it grips while cutting, and doesn't over-cut at the corner like my roll-cutter sometimes does.


 Mark the edge.


Cut out the corner using your favorite grippy cutting tool.


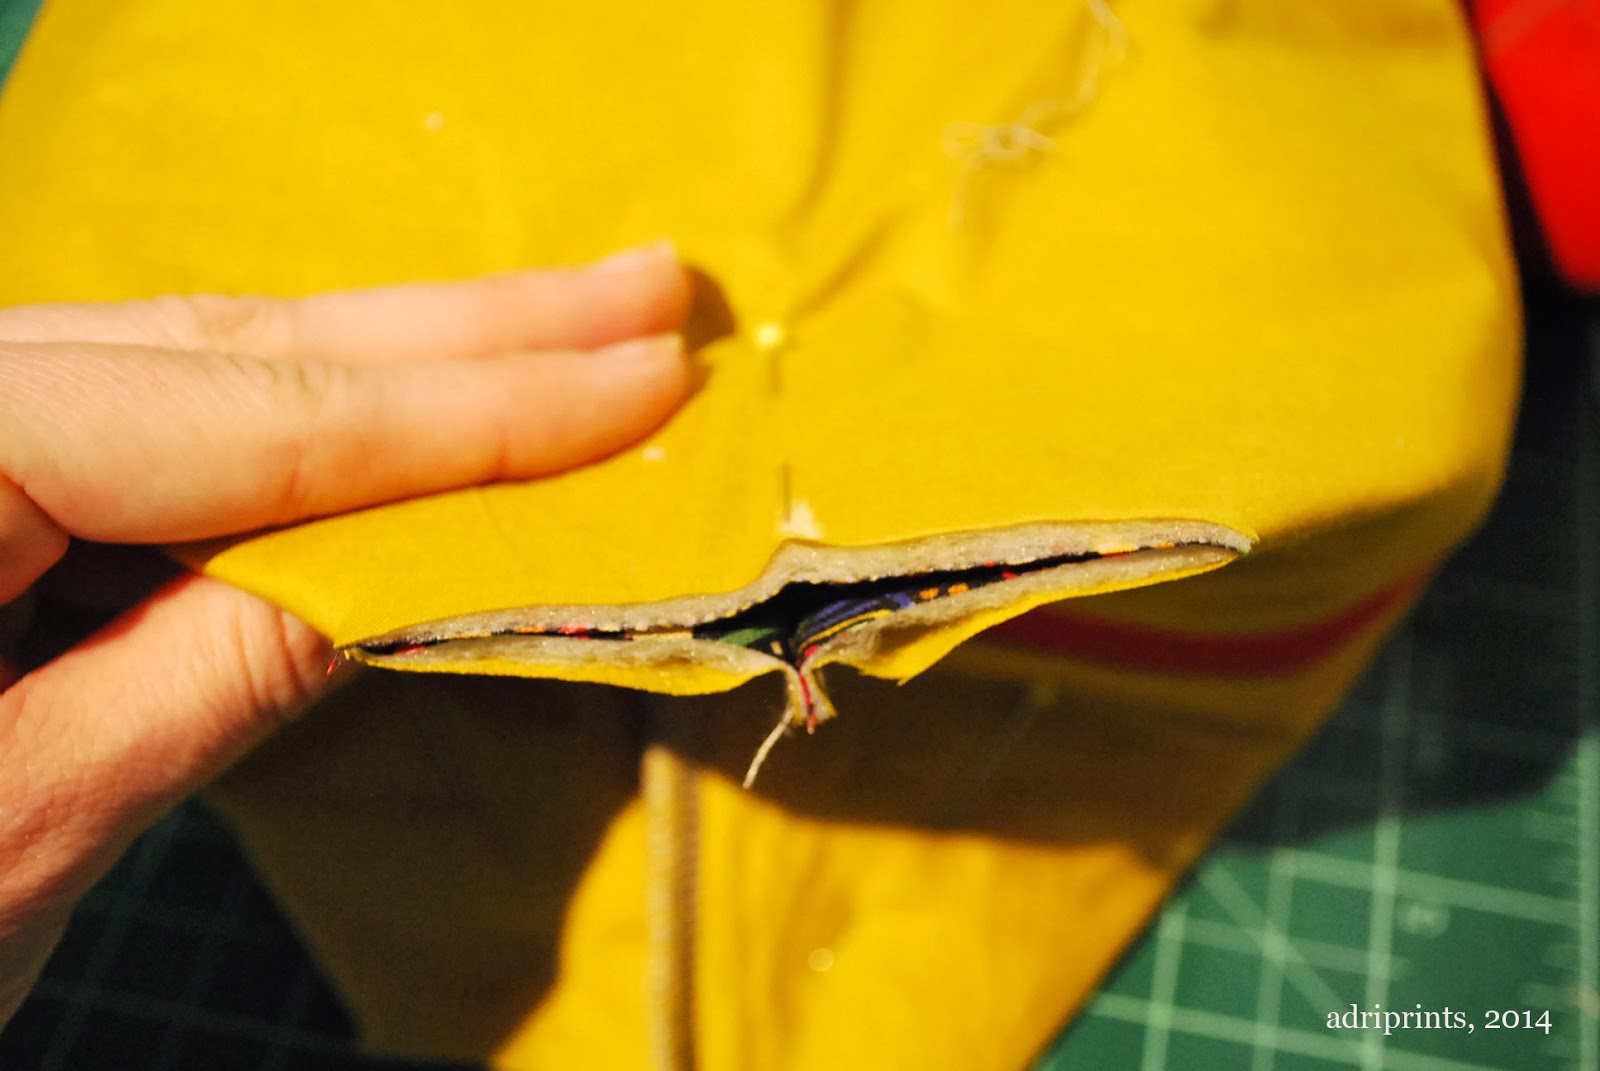
Use a pin to help secure the layers of fabric at the corner and mark the future center of the seam.  Pinch the fabric...


...and now you can line up your mark and pin with the center of the seam that goes across the zip.


Then, secure all the layers with pins, but remove that first pin that was marking the center so you don't run over it with your serger blade.  That would be chaos.  Those secondary pins should be far enough away that you avoid the blade of your serger, too.


Run the pinned seams through the serger and voila! Two boxed corners that are parallel, perpendicular, and totally symmetrical.


Whooo hooo!  A non-wonky zip pouch for your eyes to feast upon!

Tutorial: A Quick Dye Job


A couple of years ago, I asked a friend of mine who is a professional yarn-dyer how she dyed one of her colorways into a gradient.  I just couldn't imagine controlling the flow of color using the tradition ways of dyeing skeins.  So, she told me.  She doesn't dye the yarn in the skein, she dyes it while it's knitted up like a blanket.

((brainpop))

Materials:

  • 100g skein of yarn meant for dyeing (or natural fiber yarn that can be over-dyed) knitted into a blanket or scarf (a knitting machine makes this faster)
  • gloves
  • kettle to quickly boil water and mix colors
  • Kool-Aid packets (5 to 15 depending on color intensity - this tutorial used 5 plus a pinch of a 6th pack)
  • a microwave
  • plastic bag or surface protector
  • microwave-safe bowl big enough to hold knitted blank
  • jars to mix Kool-Aid (how many depends on how many colors you want to mix)
  • yarn swift

Using a vague version of her technique, I used the knitting machine to knit up one skein of yarn into a kind of blanket or wide scarf.

1 skein of Knit Picks Bare
Then, I soaked it in warm water while I mixed the Kool-Aid colors.  I used 6 small packets of Kool-Aid, and the yarn color is still quite light.


Kool-Aid "Recipes"

1) basic light blue = 1 pack of Ice Blue Raspberry Lemonade + 1 pack Berry Blue + a pinch of Cherry

2) darker green = three dips in the combo of 1 pack Ice Berry Blue Raspberry Lemonade + 1 pack Lemon Lime + a pinch of Cherry

3) yellow blending = 1 pack Lemonade

All colors used at least one full pack of Kool-Aid mixed in a small jar (about 1.5 Cups) of just-boiled water.


Dyeing Procedure

Once all my colors were mixed, I gently poured blue color onto blanket which was set atop a plastic bag big enough to cover my surface.  Note: I wish I’d rolled the wet blanket and dipped it into the bowl for more even coverage. Ah well!


Then, I poured some of the green dye into a bowl, and with a rolled blanketb I dipped the end of the blanket into the bowl with 1/3 green mix, then dipped again, but deeper, with 1/3 green mix, then even deeper with the last of the green mix to create a kind of gradient.

But, where there was a bit too much contrast, I added yellow, pouring directly from the jar and using my hands (in latex gloves) to kind of finger-paint the color.


Then, I cooked the blanket with enough water to slightly cover it in a Pyrex bowl in the microwave for about 3 minutes (checking on it and turning it every minute or so).

I rinsed the blanket in warm water, soaked in “Soak” then spun it dry in washing machine, and unwound gently to dry in hank-form.

after spinning it dry
winding slightly damp yarn is pretty easy

The colors came out much lighter than anticipated, but I'm still pleased with it.  If I want super-intense colors next time, then I could mix larger quantities of color (more Kool-Aid packs + more just boiled water).  But, this fairly non-toxic and relatively quick (with a knitting machine and microwave!) dyeing method appeals to me very much, and I think I will try it again in the future!


So... any ideas on what to make with the newly dyed yarn?