Tag Archives: Guest Blogger

A St. Patrick’s Day Tradition

Every year, on the Saturday closest to St. Patrick’s Day, my town hosts a party. No corned beef and cabbage or green beer is seen, though. Instead, there are a lot of bald heads. The men, boys and even a few women of this community raise money for St. Baldrick’s by shaving their heads in solidarity with kids with cancer.

St. Baldrick’s is an organization that funds pediatric cancer research. Cancer that affects infants, children, teens and young adults acts differently and needs to be treated differently that adult cancers. There are long term consequences to treatment that need to be studied and supportive care to be funded.

My family got involved with St. Baldrick’s when my son was in second grade. His elementary school fields a team of participants every year, and Alex decided he wanted to join. He had heard that a neighborhood girl was battling osteosarcoma and wanted to help.  After making sure he understood what it would be like to be bald, we signed him up.

Alex really hates clippers. He has never been a buzz cut kind of kid.
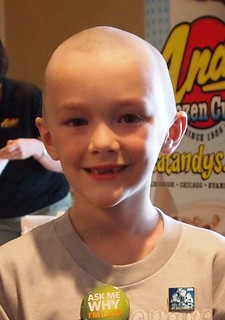
The next year, he was ready to do it again. This time, my daughter joined him. She donated ten inches of curly, red hair to Pantene’s Beautiful Lengths program. We also knew two more kids with cancer—a neighborhood boy and the little sister of one of Alex’s classmates.
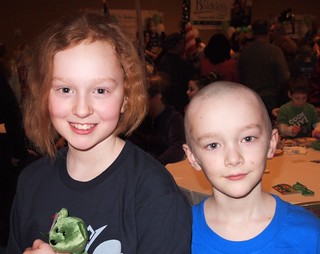
This year, Alex is getting ready to shave his head again. He hates the process of getting his head shaved. It hurts because he lets it get so long prior to the big day. He likes how it feels to help people, though, and he recognizes that he has the choice. Kids with cancer don’t.
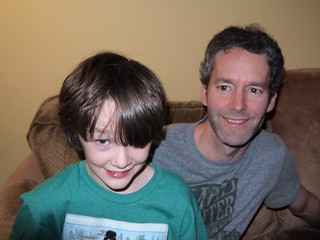
If you are interested in supporting Alex’s fundraising efforts, you can donate here. His dad will be sitting next to him on stage for the first time. We set a rather lofty goal of raising $1500, and with less than a week to go, we’ve only just passed the halfway point. Sadly, we’ve also added another warrior to our list—the granddaughter of a coworker.

From the bottom of my heart, I thank you for your contribution.

**Susan here. FYI for Mac/Safari users! I was trying to make a donation for a couple of days and kept getting a disconnect after I had filled out all the forms and entered my credit card number. It appears that this site doesn’t play well with Safari. I was able to make my donation using Firefox though. Save yourself some time and use a different browser to donate. Also, I have met Alex and I can tell you he is a truly fabulous kid with an enormous heart.

Hey Hey, It’s A Snow Day! (Photo Heavy!)

So far at the farm we’ve got 8 inches, and we’re expecting another one or two before it’s all over.  I took the break between snowfalls to take pictures of everyone outside.

There’s plenty of shelter, hay and fresh water for all of them, so we are all able to relax a bit and enjoy the snow.

02.13.14a

It’s especially nice when we start our day with a recipe from the always wonderful Smitten Kitchen.  This is baked eggs ranchero from her book.  The eggs came from our chickens, who have started laying again now that the days are getting longer.

02.13.14b

02.13.14c02.13.14d

02.13.14e

02.13.14f

Charley trudged through the snow to get food and snuggles.

02.13.14g

02.13.14h

02.13.14j

02.13.14k

02.13.14l

02.13.14m

I love how Francis is photobombing in the back.

02.13.14n

02.13.14o

02.13.14p

02.13.14q

02.13.14r

The dogs are taking it in stride.  Sabine’s been rolling all around in it, Orzo and Gnocchi have been playing in it.

02.13.14s

Cini has been ever vigilant against any interlopers, and hasn’t seemed to even notice it.

I hope you are all enjoying your snow day as much as we are!!!


Snow Comes to The Farm

A few days ago we got happy reports of potential snow for our area, and started making preparations in case we got hit.  Projections were for 6 inches or so, and though Paul was very unenthusiastic and grumbly about the idea of snow, he helped me get the farm in order so that we could actually enjoy it from indoors, unlike last year when we spent an entire storm outside trying to keep everyone dry.

But I digress.

The snow was not expected until late morning, so after we made sure all of the water troughs were full (and the tank heater working), we got busy delivering extra hay to both paddocks.

01.22.14g

Once that was complete I made sure the dogs were in where they could access the bigger shelters and Paul cleared space for the tractor in the garage.  Then we went inside and I got the kids working on their schoolwork while we waited for the snow (no sense cancelling school for home-schooled kids when there is no snow actually out there to play with!).

We waited.  And waited.  And waited some more.

Susan teased me with pictures of lovely white snowfall in northern Virginia, and we heard reports of plenty of the white stuff just to our west.

Some time after noon we started seeing some snow “drizzle” and then our weather reports changed.  We would now see around two inches total.

Needless to say, the kids and I were very, very disappointed.

Fortunately by around evening feeding time the snow began to pick up and we say some actual accumulation on the ground.

01.22.14h

Everyone was fairly unfazed by it, and focused more on FOOD!

01.22.14i

Though not much snow had fallen we double-checked on everyone’s hay and water levels and made sure the chickens were tucked away safely for the night.

Happily, we did get at least an inch, and the next morning dawned super bright and cold.

The water tank without the heater had to have the ice broken up.

01.22.14f

Aside from that, everyone was rather unfazed and unimpressed.

01.22.14a

01.22.14b

Orzo and Lucy played a bit after they’d had their breakfast.

01.22.14c

The pigs and the little ones were content to remain in their shelter with the hay until I brought their grain.

01.22.14d

01.22.14e

Only the ducks seemed confused; they’re the only animals here that hadn’t seen snow before.  They weren’t sure if they should eat it or nest in it.

Although we’re still disappointed we haven’t seen a really good snowstorm, I’m glad we at least got some taste of winter.  It’s such a lovely and welcome break from the rain and mud!


A Christmas Tradition: Nut Roll

Our friend Erin is pretty awesome at cooking and at life. At one point in time, she made hundreds of batches of caramel that made the rounds of our Ravelry group. Seriously, people would hide these caramels from their families, hoarding them carefully to ensure that they would last as long as possible or alternately eat as many as possible in one sitting. So when she said that she’d be willing to do a little food blogging, I jumped at the possibility. I love reading about people’s Holiday traditions, particularly if they involve food! – Lauria

Growing up, my family didn’t have a lot of hard and fast Christmas traditions. I can think of two–both food related. On Christmas Eve, Grandma W. would make this weird apple sauce pudding concoction that she would hide a nut in. Everyone would get a scoop and whoever found the nut would get an extra present. I thought it was foul and would just mush my serving around looking for the nut. On Christmas morning, we had Grandma P.’s nut roll for breakfast. This was the good stuff.

This nut roll, very similar to potica bread, was adapted from my great grandma’s recipe. Grandma had to play around with it a bit, because her mother in law didn’t measure anything. She made it every Christmas, letting my sister and me help when we were around. Grandma gave me the recipe several years ago, and asked that I take over. I happily obliged.

Here is what you will need for the dough:
1 1/2 c milk
1 c sugar
4 1/2 t yeast
1 c melted butter
6-6 1/2c flour
4 eggs beaten
3 t salt

and for the filling:
1 1/2# shelled walnuts
3/4 t cinnamon
1 1/2 c sugar

First, scald the milk by heating it on the stove just enough to form small bubbles around the edges. Pour the scalded milk over sugar in a large bowl (I use the bowl to my stand mixer), stir and let cool to lukewarm.  When the mixture reaches roughly 100 F, stir in the yeast and 3 cups of flour. Mix well, cover and let rise until full of bubbles.

Add the eggs, salt and melted butter, and blend well. Add an additional 3 cups of flour. Beat very well for 10 minutes or with dough hooks of mixer, adding more flour as needed to create a satiny, slightly tacky dough.

Cover, let rise 1.5 hours. At this point, the dough can be refrigerated overnight. Remove the dough from the refrigerator one hour before continuing. If you are making this all in one day, now is a good time to make the filling.
In a food processor fitted with the chopping blade, combine the walnuts, cinnamon and sugar. (I should note that I have decreased the filling amount from the original recipe. That’s all that will fit in my food processor, and my loaves are still bursting with goodness.) Pulse until the walnuts are coarsely chopped.

Divide your dough into four equal parts. Roll dough into a 1/4 inch thick rectangle. This can be done on a lightly floured towel, but I like to use my silicone baking mats. Spread on 1/4 of the filling, leaving a narrow border around the edge.


Roll up like a jelly roll, pinching closed the ends and seam. Transfer to a baking sheet. I don’t think it’s necessary to grease or line the sheets, but again, I use my silicone baking mats.


Repeat with the remaining portions of dough. Cover and let rise 45 minutes. Preheat your oven to 325 F. Brush top with beaten egg and bake for one hour.

Now that I look at it, this recipe could easily be cut in half if you don’t want four loaves of nut roll sitting around. It freezes well, though, and I usually end up doubling the recipe and passing them out to neighbors. Enjoy!

Amber’s Shepherd Hoodie — Getting Started

Before folks received their yarn, we all goaded Amber into sharing her The Shepherd progress on the blog. Fortunately she’s holding true to her our bullying and is sharing her journey with  is. After being sick to death of this yarn, I love being able to see it through fresh eyes. If you missed out on this opportunity, come back later this week for more info. And come back later today for more giveaways and some of the giveaway winners! — Lauria

The Shepherd and the Shearer yarnIt may come as a surprise to any of you who read my Tags post a while back that I have seen the error of my ways and am now knitting with the packing material (or “yarn,” as people keep calling it) rather than the tags themselves. Learn something new every day!

The Shepherd and the Shearer yarn

Seriously though? This stuff is the yarn of my dreams. Even before I (finally) successfully learned to knit a few years ago, I yearned for a yarn like this for my someday knitting hobby. I dreamed of creating hard-wearing garments, durable things I could treat with the usual tough love I subjected my clothing to, but things that would actually hold up under that duress. And therefore things I wouldn’t mind knitting in the first place, knowing they wouldn’t be falling apart a year or two after I put all that effort into them. If anything, this is even more important to me now that I do know how to knit, and I really understand what it takes to create a finished garment.

The Shepherd and the Shearer yarn

So for me, everything about it is perfect: the look, the feel, the smell. I mean, come on, in the sunlight, it actually glows!

The Shepherd and the Shearer yarn

As far as the patterns go, I will be knitting both The Shepherd and The Shearer; The Shepherd in the actual The Shepherd and the Shearer yarn, and The Shearer in 2013 Colored Flock share yarn.  Were I not already in possession of a cabled pullover in a natural off-white yarn, I very well may have waffled for quite some time on which one to do in which color, so I was rather lucky to have the color decision made for me.

After what amounted to an elaborate game of Eenie Meenie in my head, I started with The Shepherd. I knew I was head over heels in love the moment I swatched. Even in its unblocked state, the cable pattern was something very special, and the pattern was such a pleasure to knit.

The Shepherd swatch - unblocked

Blocking it only made me love it more.

half-heartedly blocked

I tried to finish up a few other projects, or at least get a little farther on some of them before I couldn’t stand it anymore and finally cast on, and it has been hard to put down since then.

quiet moment

Seriously, that GLOW!

seed stitch

The Shepherd progress

The Shepherd progress

I’ve heard people worrying that the cables look too complex for them, and truthfully? I was even a little intimidated at first glance, despite having cabled before. But once you get started, you will find it is actually a rather simple pattern, and one which is very easy to follow. Written with Kate Davies‘ usual flair for making even the most daunting knitting goal seem attainable (*cough* remember my steeking?), The Shepherd is sure to pleasantly surprise even the most trepidatious knitter with its simplicity and its fluid, rhythmic pattern.

This is how serious I am about this: I drink wine and watch All Creatures Great and Small while I knit it (by candlelight) and I have not made a mistake yet. (Well okay, not any that I didn’t catch a few stitches later, but I do those in broad daylight too.)

a little nighttime knitting

The Shepherd

I feel my Shepherd is growing a little more slowly than I would have liked, but it is growing nonetheless! It is so exciting seeing the cables unfurl as I go, and I really cannot stress enough what an enjoyable knit it is. The only thing better will be to wear it someday.

The Shepherd

—————————————————————————————————–

One other thing I will share that helped me immensely was the Shepherd KAL thread in the Juniper Moon Farm Ravelry group. A discussion on the tulip buttonholes proved to be a lifesaver to my number-addled brain, so if anyone is having trouble, I encourage you to check out that conversation for some great tips and suggestions.

Until next time, fellow Shepherd enthusiasts!

—————————————————————————————————–

meAmber resides in sporadically idyllic Berks County, PA with her husband and three children.

This time of year, she can most often be found knitting, baking, sewing, or DIYing her house to heck and back. She definitely should leave that house more often.

Amber’s Blaithin — The Big Steek

9-17 (3)

As I hoped would be the case, things really picked back up once I got to the excitement of the colorwork section.

9-17 (1)

9-17 (2)

And finally getting to the point where I could try it on was something I’d been waiting for the whole time.

9-18 -- colorwork done!

It fit! And almost perfectly at that! Looks like all my bothering to follow the directions careful measuring paid off.

After finishing the neck, I turned the whole thing inside out to weave in my few ends, graft my underarms, and sew the pocket flaps shut.

9-19 (2)

And while we’re inside out, here’s a look at the backside of the completed yoke. There might be a few tight-looking spots, but I am confident that they will be fine once the whole thing is washed and blocked.

9-19 (1)

Some of the natural yarn floats are looking a little sloppy from behind because they’re held up in the center of seven stitch stretches. I don’t know why I was compelled to secure them and leave that bottom row as is, except that maybe it seemed like a good idea as I went along. And possibly there were some terrible flashbacks of when I used to wear rings and constantly get them caught in the back of stranded colorwork sweaters of all kinds. I’m not sure why I felt the need to share all of that, except that I am embarrassed by my lack of neatness I suppose. BUT ANYWAY. Steeking time!

As I am A) a first time steeker and B) this is a Kate Davies pattern, it seemed like a no-brainer to go with her steeking tutorial. Not only does it get rave reviews, I also assumed it would speak to me in a way I would feel comfortable with, since I really like the way Davies’ patterns are written. (All four parts of her steeking tutorial can be found here on her tutorial page.)

For my crochet needs, I went with a wool yarn that felt good and snaggy and also brags of its felting prowess. If that wouldn’t lock my stitches in place, what would? It might be hard to see what I’ve done because unlike the examples which use contrasting yarns to illustrate each step, I needed to use a matching yarn that will not show through my finished edging.

As suggested, I marked off the body with pins down the middle of the stitch that will be cut to keep me in a straight line. (Oh boy, it’s getting real now!)

9-20 (1)

Getting started,

9-20 (2)

9-20 (3)

9-20 (4)

Looking good so far…

9-20 (5)

9-20 (6)

Eventually, I made it all the way down and back up again (crooked from a few areas where I seem to have accidentally added a few extra stitches, oops!), and my steek bridge was complete.

9-20 (7)

And then,

and then…

9-20 (8)

I will not lie to you, the first cut was wince-worthy. But when nothing horrible happened (as promised), it went very smoothly. The “Cut Me!” ladder up the middle shows itself readily as you go,

9-20 (9)

and unless you’re using a pair of gigantic garden shears and snipping all willy-nilly, while blindfolded, there is not much of a chance of you cutting any bits you shouldn’t. Really! I encourage you to try it sometime. I am officially a steeking convert now.

9-21 (2)

See? Nothing out of place, and the edges feel as strong as can be. Yay! The next step in securing the cut edges in this pattern is the “steek sandwich,” as seen in the many pictures to follow.

These are the very first stitches I picked up for my left side sandwich. I did a really crappy job on that side and had to redo it after I did the other side and saw them together, but it went pretty smoothly the second time around.

9-21

As explained in the tutorial, you pick up and knit stitches on the front of the garment, and pick up on the back and knit a flap there as well. You can see here how the two sides come up and will eventually enclose the crochet reinforced edge.

9-22 (1)

Looking good so far.

9-22 (2)

Close that puppy up!

9-29 (1)

9-29 (2)

9-29 (3)>

Mmmm, sandwich. Now on the other side, otherwise known as, “the one I did right the first time,” the next step after closing up my sandwich was marking off for buttonholes. Being who I am, I measured to keep it nice and even, and found that they could be spaced exactly four inches apart. How pleasing!

9-30 (1)

(And because Mr. Right Side is such a handsome fella, I’ll show you his backside too. Woo woo!)

9-30 (2)

(And up at the yoke section.)

9-30 (3)

The last steps in this Blaithin-y journey of mine are the i-cord bind offs and a little washing and blocking. I can’t wait until next time to show you my finished sweater, but I have to admit to feeling a little sad about what will be my final post in this series. I’ve enjoyed sharing my progress with you all so much! Until next time…
—————————————————————————————————–

Amber resides in sporadically idyllic Berks County, PA with her husband and three children.

She can most often be found knitting, making soap, sewing, or puttering around in her garden. She should probably leave her house more often.