Tag Archives: illustration

From Sketch to Final Art: ABUELITA AND I MAKE FLAN

page from ABUELITA AND I MAKE FLAN by Adriana Hernandez Bergstrom

The story of ABUELITA AND I MAKE FLAN is a combination of several real-life events. I was inspired to capture a moment in time where it felt like everything was going wrong as a kid, but still able to find safety and love from my grandparents who accepted me as an imperfect child deserving of love. Anita, the main character, is a blend of real life people in my own family including myself. The Abuelita character was drawn from a combination of several real-life people including my great aunt, both my grandmas and their friends. 

What’s real-life inspiration and what’s not? I really did break a wedding dish, but it belonged to my mother, not my abuelita. The truth is my family did not bring much more than their suitcases with them from Cuba. I really did - and still do! - make a LOT of flan, but I helped my great-aunt, Marta, who had severe arthritis doing all the things Anita does in the book. In real life, I did more crafts like sewing, crochet, and cake decorating with my grandma. I chose flan because it’s delicious and it reminds me of our big family get-togethers which I miss very much.

I started work on ABUELITA AND I MAKE FLAN back in 2017. It was in large part thanks to SCBWI which connected me to a critique group which then led to a mentorship program at WNDB, critiques at SCBWI conferences, Highlights Foundation courses, Storyteller Academy and other educational resources and eventually my agent! Community has been pivotal for growth and feedback in the publishing world, and the success of this title making it to bookshelves everywhere.

Tumbling into A New Year – 2022 Wrap Up


Happy New Year!


The last few weeks of any year for me are typically about reflecting, month by month on the year that just finished. I snatch any quiet moment I can during the holiday rush to write down my thoughts on what went well and what didn’t professionally and personally.


Then the first few weeks of the year are a mirror of those last two weeks, and I take time to think about what I want my year to look like. I ask myself questions like: How can I participate in successful, fulfilling activities that re-energize or inspire me? What are some activities that drain me?

What elements of my life need to be edited out? I make a deliberate effort to imagine where I want to be at the end of the year, to imagine what success feels like, and then I write it down. This is how I set my intentions for the year. 


So it’s gone for six years now. 2022 brought to fruition a lot of seeds planted years ago doing these kinds of reflection and intention exercises. The path of my life has finally brought me here, to reflect upon the publishing of my first book as an author and illustrator.


This is no accident! It’s the course I set for myself, and worked toward year after year. It’s the learning and revising, and reflection all adding up. You too can set the course of your creative year, and I encourage you to take the time to reflect and set intentions for 2023.


Wishing you a super 2023!


-Adriana


Some favorite success-building creative activities:

  • Reflection journaling or sketching like The Year Compass (https://yearcompass.com/en/ - it's a free journaling tool).

  • Setting intentions and creating a plan for success

  • Choosing a word of the year for motivation or focus

  • Idea generation community activities like Tara Lazar’s Storystorm (https://taralazar.com/)

  • Editing workshops or critique group meet-ups
  • Accountability communities like 12x12 or Storyteller Academy or your local SCBWI conferences

Adri Makes a Thing or Two 2020-11-23 15:14:00


This year is nothing if not unrelenting. I have had some great ups: Yay for book sale and art licenses! And my family and I have had some really difficult things to deal with. My uncle on my mom's side passed away very suddenly in July, and then my stepfather (my best father) died in September.

If you've been having a stressful year, you're not alone in your sorrows! Regardless of what this year brings to this last month and a half, I hope you are keeping hope alive. Perhaps this blog post brings a bit of light and warmth into your day.

Warm Holiday Wishes,


Adriana


Thanks to everyone for your feedback on my holiday cards (on Instagram, Twitter, and Facebook), I put the favorites on the shop for presale. 

According to the printers, they should be at my studio 12/4 or earlier. I'll fold the cards, pack and ship pre-orders and they should go out by 12/4.
This is set #2 for the Latinx market (my friends and family!). The final favorites are now available to pre-order!
 yes on top of everything I also had a kidney stone this month.

Happy Holidays!

Follow my work!

I'm @adriprints on most social media platforms.
Website
Twitter
Instagram
Email

Advent Calendar Fun!

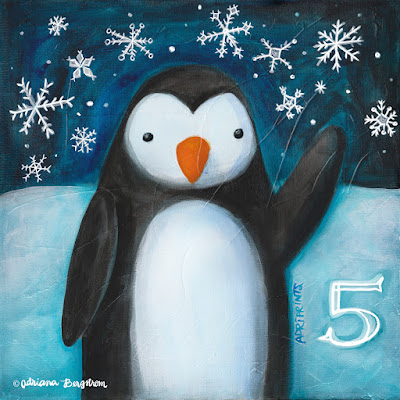
This is our third Finch & Foxglove collective advent calendar! I wanted to share with you the first of my illustrations which is this friendly penguin. This year I've decided to paint them directly on canvas and then upload them digitally! Here's the first one (above).

Our group calendar can be viewed here on our calendar page: http://www.finchandfoxglove.com/advent-calendar-2017/

Or alternately the beautiful images from my colleagues and I can be seen on our collective's Instagram account here:
https://www.instagram.com/finchandfoxglove/

My first online class!

About My First Class on Skillshare

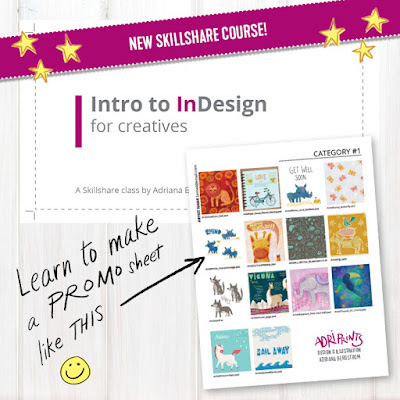
My first class is about learning to use Adobe InDesign (which already comes bundled with many Adobe CC accounts) to make beautiful, clean, perfectly aligned contact sheets that are easily edited, updated, and exported to help you sell your work.
I created this course to help de-mystify InDesign. A lot of creatives, artists, and photographers pay for Adobe CC, but are not sure how to take advantage of all the software it brings. So, this is my effort in making Adobe's publishing software work for you. InDesign is a really robust piece of software and the perfect companion for Illustrator and Photoshop when you're looking to put it all together and publish your work.

I created this course to help de-mystify InDesign.
I've used InDesign to produce all kinds of promotional and informational materials throughout the years: business cards, mailers, postcards, booklets, portfolios, and contact sheets.
I focused on contact sheets as a way to explore InDesign and learn concepts that will easily translate to a lot of other projects. If you'd like to learn more, you can check out the class here on Skillshare.
I'd love to hear what you think!! And, if you've never used Skillshare before, here's a link for a  free 2 month trial of their premium membership - the link's limited to the first 10 who use it though, but take advantage while you can!

New gallery, New exhibit!


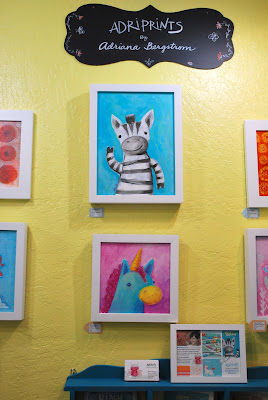
At the end of the summer, I secured a spot in a local co-op gallery, Carolyn Seiler & Friends in Cocoa Village.


So now some of my original paintings and giclee prints are available for sale, and you can come see my stuff in person if you're in the area! I also have an upcoming exhibition at the local library, the Merritt Island Library starting November 2nd! 


I'm very excited to show my latest paintings!


If you're further away, I'm currently working on an online shop so you can see my work and buy it if you would like a print! I'll post once it's open. In the meantime, though, if you'd like to buy my cards, I now have two retailers where you can always find them here: Blow! Birthday Cards (an online card shop that ships from the U.S.) 
CardIsle (various kiosk locations around the U.S.)

And lastly, I'll be moving my blog to my website just as soon as I figure out how! In the meantime, have a great week and Happy Halloween!

We moved, Irma came and went, we’re okay!

I need to catch you all up! I want to get the blog back up and running, and things are finally settling down enough to get back to it...


My little family moved back to Florida in May. When I say 'back', I must say that Florida is my home state. It's where I was born and my family has resided for the last 50 years. So, when husband got an offer, we packed up, left California, put an offer on a house from the 60's and moved to an island between two rivers near Florida's Atlantic coast.

Lots happened this summer between tradeshows and new-home tasks and starting a new school...

And then Irma.

I was beyond terrified by the size of the storm. I hadn't lived in hurricane country in over a decade, it's a new-to-us house and we have big trees all around the house. I evacuated us as fast and left as early as possible just in case. My art is now at a nearby co-op gallery, and after I checked on the art gallery, we shuttered the house, packed up supplies and drove north. And drove. And drove. And drove. We made it to Georgia in pretty good time, and the next morning I drove some more and we made it to a friend's house where we watched from afar the storms progress.

Every day, we were glued to the noaa.gov site watching the very slow progress of the storm as it headed toward Miami (where much of my family resides). The predictions of the storm's path kept shifting from east coast to west coast of Florida, but it didn't matter. Hurricane Irma was so huge, if you were in Florida, you were gonna feel it. In fact, even in north Georgia we felt Irma's winds. Even that far away from the center of the storm, we were out of electricity for a few hours. Once we knew the storm had passed, we made our way back.

As we drove back to Florida, we saw a lot of fallen trees and blocked state roads. When we got back home, it was dark, but we could tell some of the traffic lights were out. Electricity had just come back online, and we were a boil-water notice for a while BUT, there was water coming out of the tap. I'm counting our lucky stars there was no significant damage to our house (just a small leak in the front entryway)!

I've included photos so you can see the nearby boardwalk after the storm. As of this writing, a few weeks after, boats that lost their moorings are still tipped over the former boardwalk edge. Piles and piles of foliage and debris are still on people's curbs, but they are receding each week.

Cocoa Village Park, 9/2017

Boats that lost their moorings, 9/2017


Bright & Cheery Tea Set


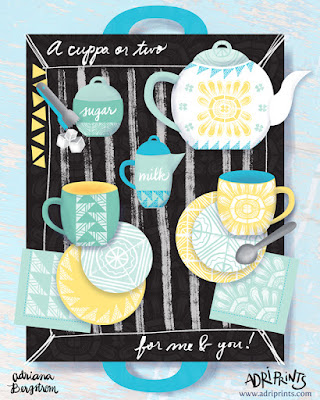
Project Brief: Design a cheery tea set for a Sunny client. 1x tea cup, 1x saucer, 1x napkin

The brief called for the design of a teacup, saucer, and napkin... but who could resist not designing the entire set?! Not I! I love tea!

What should it have on each piece? I'm not a big fan of the lacy, teensy, frilly flower on my tea sets as many traditional ones do.  And lately, I've been really enjoying working with traditional printmaking methods especially linocut. I made a bunch of patterns and arrangements using stamps I made on my own, and some I took into the digital realm and began testing repeats that way. I was really excited to use my recent patterns on something I'd love to own and see every day. I'm a big fan of tea and the paraphernalia that comes with drinking it.

So I set about sketching and came up with a concept that I'd love to have in my own home. The sketch gave me a general idea of how I'd present my work, and then I set about testing colors.
My first tests with pink...

Oh, I was so unhappy with this color combo! It's not me at all! I'd never buy it. After asking my fellow finches why I hated this so much, they reminded me I don't usually use pink in this way... and they're right, this is not really my shade of pink, nor do I own any pink tableware or pair it with sunshine yellow. Out went the pink!


Once the bright aqua and seafoam green went in, I was gelling. The work just came together so quickly. I knew I had to have sugar tongs and a sugar container, a little creamer, too! Finishing touches...


And lastly, I went to work balancing the tea-set. I wanted to have a nice mix and match tea set and napkins that could work in many different combinations. So the second saucer carried the more intense color, and the mugs match. The tea tray got a nice under-pattern and texture to match.

There you have it! Tea for two... a cuppa for me and one for you!

Bright & Cheery Tea Set


Project Brief: Design a cheery tea set for a Sunny client. 1x tea cup, 1x saucer, 1x napkin

The brief called for the design of a teacup, saucer, and napkin... but who could resist not designing the entire set?! Not I! I love tea!

What should it have on each piece? I'm not a big fan of the lacy, teensy, frilly flower on my tea sets as many traditional ones do.  And lately, I've been really enjoying working with traditional printmaking methods especially linocut. I made a bunch of patterns and arrangements using stamps I made on my own, and some I took into the digital realm and began testing repeats that way. I was really excited to use my recent patterns on something I'd love to own and see every day. I'm a big fan of tea and the paraphernalia that comes with drinking it.

So I set about sketching and came up with a concept that I'd love to have in my own home. The sketch gave me a general idea of how I'd present my work, and then I set about testing colors.
My first tests with pink...

Oh, I was so unhappy with this color combo! It's not me at all! I'd never buy it. After asking my fellow finches why I hated this so much, they reminded me I don't usually use pink in this way... and they're right, this is not really my shade of pink, nor do I own any pink tableware or pair it with sunshine yellow. Out went the pink!


Once the bright aqua and seafoam green went in, I was gelling. The work just came together so quickly. I knew I had to have sugar tongs and a sugar container, a little creamer, too! Finishing touches...


And lastly, I went to work balancing the tea-set. I wanted to have a nice mix and match tea set and napkins that could work in many different combinations. So the second saucer carried the more intense color, and the mugs match. The tea tray got a nice under-pattern and texture to match.

There you have it! Tea for two... a cuppa for me and one for you!

Simple Guacamole Recipe

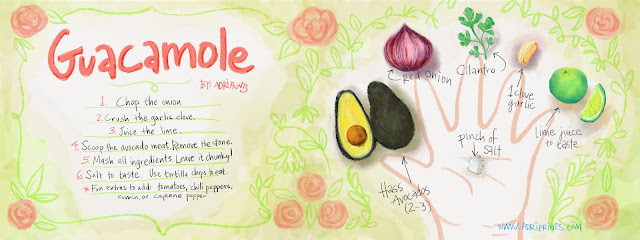
Looking for a simple, delicious guacamole base that your kids will eat? You can add spice to your own batch, but this one's plain delicious and even toddlers will eat it (at least mine does).


The most basic ingredients:
2-3 Hass avocados
1 small/medium red onion
1 handful cilantro
1 clove garlic
Lime juice to taste
Salt to taste

...
After that, add what you like! We usually add tomatoes if they're in season. My partner loves adding spice so he usually adds jalapeño pepper and some cayenne.

Also, for best results, don't eat it immediately. Let it sit in the fridge for an hour or so, to let the flavors blend together.

Enjoy!!

(You can see the large version of the illustration here on They Draw & Cook )