Tag Archives: review

Tumbling into A New Year – 2022 Wrap Up


Happy New Year!


The last few weeks of any year for me are typically about reflecting, month by month on the year that just finished. I snatch any quiet moment I can during the holiday rush to write down my thoughts on what went well and what didn’t professionally and personally.


Then the first few weeks of the year are a mirror of those last two weeks, and I take time to think about what I want my year to look like. I ask myself questions like: How can I participate in successful, fulfilling activities that re-energize or inspire me? What are some activities that drain me?

What elements of my life need to be edited out? I make a deliberate effort to imagine where I want to be at the end of the year, to imagine what success feels like, and then I write it down. This is how I set my intentions for the year. 


So it’s gone for six years now. 2022 brought to fruition a lot of seeds planted years ago doing these kinds of reflection and intention exercises. The path of my life has finally brought me here, to reflect upon the publishing of my first book as an author and illustrator.


This is no accident! It’s the course I set for myself, and worked toward year after year. It’s the learning and revising, and reflection all adding up. You too can set the course of your creative year, and I encourage you to take the time to reflect and set intentions for 2023.


Wishing you a super 2023!


-Adriana


Some favorite success-building creative activities:

  • Reflection journaling or sketching like The Year Compass (https://yearcompass.com/en/ - it's a free journaling tool).

  • Setting intentions and creating a plan for success

  • Choosing a word of the year for motivation or focus

  • Idea generation community activities like Tara Lazar’s Storystorm (https://taralazar.com/)

  • Editing workshops or critique group meet-ups
  • Accountability communities like 12x12 or Storyteller Academy or your local SCBWI conferences

Hello 2016!

Whoah!  Where did 2015 go?  It just flew by I tell you!
I can't believe it was already a year ago I was sitting at my studio in Munich getting ready to get my illustration career back on track, and here I am now in California ready to launch the sales portion of my career!


In 2016, I hope to make some sales of my artwork as greeting cards and prints, as licenses on products and fabric!  Lots of work to do!  I'll keep you posted... and don't forget, you can always see my most recent work on instagram here.


MATS Part A – Overview and Review

5 weeks of illustrating like crazy!
 The following is a two part review of the Make Art That Sells course Part A as it was presented this year (2015).

1) A Review of the Make Art That Sells Course, Part A (from the heart)

MATS is a meeting place for people all around the world who are looking for their "tribe."  I know that's a word that's flung around a lot these days, but I don't have a better word for it... I guess I could say like-minded or similar seekers.  The community that is created after sharing our work, well, it's kind of intimate.  When you're working so hard on a dream that you hold dear, and you share it with others who have a similar dream, it's not difficult to see why we come together and why the course begins to take on a deeper meaning. MATS has a following because we feel connected to one another.

What about the work?  I can only speak for myself.  I have grown a lot and I think you can see it most in my final two assignments.  I used the five weeks of the course to try and discover a style within my work.  I wrote in my pre-course planner, "I have invested in this course because I want to make marketable art that feels true to me in a style that rocks!" So, I experimented with various mediums and line and hoped a style would jump out at me.  I can see a common thread running through all five pieces, mostly it's a color-based thread, but no obvious style jumped out at me.  The biggest thing I learned is to stop being slap-dash about my work.  I can see in my final piece a deliberateness that wasn't there before.  I am taking the lesson of deliberate mark-making as my biggest achievement in these past 5 weeks.  Did I achieve my original goal?  I think I kind of did.  I think all of my work feels true to me, but I don't think I'm far enough along in my illustration journey to say, "Yes! I love this style!  You, oh thick line and wavy brush, you will be my style from this time henceforward!" or whatever.  Not there yet...


2) A Review of the MATS Course, Part A by the numbers

Let me give you an idea of how dense this course is.  I created an outline in order to keep track of all the materials after the final wrap-up post, and it took me 12 hours to do a cursory review and download the course materials.  TWELVE HOURS!!  If I were to collate all the pages and content of this course, it would amount to a very, very thick 3 ring binder.  It would be somewhere between 200 and 300 pages of material.  The first photo in this post is just a fraction of the content.  I printed out only what I intended to fill out or jot notes on.  And this is just Part A! There are several hours of videos including interviews with successful working illustrators and artists.  There are written interviews with experts in the business.  The course includes so many helpful tips, tricks, lists of possible clients, and a very large, supportive community (see part 1 of this review).

It is an intense course requiring the quick turnaround of 5 briefs from concept to layout/mock-up in five weeks.  Each project is broken up into a mini assignment at the start of each week, and then the fleshed out brief is given mid-week with the deadline of Sunday.  I loved the deadlines, and I happily met each one.  I loved being given the assignments, too.  It was nice having direction given to me. :)

And finally, many people who are reading this review are wondering about the reviews.  I will be straight with you.  My work never made it to the reviews.  Each week, Lilla Rogers chose 9 to 13 pieces to talk about.  There were over 150 people signed up for the course.  Many of these people, I'll say 20% are professionals.  Remember people take the course for all kinds of reasons including re-booting a career or refreshing a portfolio.  Some of my peers taking the course had already done editorial work with big name magazines and others had illustrated entire children's books, others were total beginners.  I was... in the middle.  So, I wasn't surprised that my work was not chosen for review.

On one level, of course I was disappointed!  I want to feel validated just as much as the next artist.  But, after every single review without fail, I looked at the checklist Lilla used to discuss the merits and drawbacks of each piece and I saw that even though my work had some of the elements listed, there were always a few missing.  The work reviewed often had a little something extra or something special about them that my work just didn't have (or doesn't have YET!).

It's also a matter of taste!  I know my work runs a bit dark (see troll and mash-up creatures), and Lilla represents some really joyful and happy art.  I'd like to make art that makes people feel joy, and I need to get back to that place.  I was there once.  Here's a throwback photo for you all.  This photo is from the RISD Graduate Student Publication "Making Something with Some Things" from 2008...

It's my entry into our class book.  I still haven't given up on that dream, I just got a little sidetracked is all.

So was it worth it?  Hell, yeah!


If you have any questions about the course or are considering it, but aren't sure, just send me an e-mail and I'll answer the best I can.  You can also write to the school itself, they're super helpful and friendly.

Sewing Knits: Vogue V9056

I always knew the three-quarter view was the most flattering!  Hah!

deep INHALE!
This was my first knit top of the year, and I think of it as a "lukewarm" project.  The cut of the pattern is not too friendly for those with poochy bottom-belly pouches like myself.  It makes the wearer look a bit "full" in the belly with just the slightest exhalation.  I'm still going to wear it, but possibly with shapewear underneath. It's not my favorite top, but I'll be wearing it anyway because I love the fabric.

EXHALE!
And somehow I managed to mistakenly align the stripes along the sleeve and create a mobius!  That made for a heck of a time when I was doing the twin-needle top-stitching.  I had a big laugh when I realized what happened.  I could've sewn a spiral up the sleeve! HAH!
EXHALE again...
My biggest frustration with Very Easy Vogue's V9056, though, is the sizing.  Its sizing is so off!  I even checked with the finished measurements, and made the size 12 with 14 sleeves.  I made an adjustment to the torso and lengthened it to make sure waistline really hit where it said.  I've never had to do that.  I'm short-waisted usually.  After trying it on, I was swimming in it!  I had to take it to the serger and lop off 3/4" on each side seam.  Yes, 1 1/2" total of fabric removed which in woven fabric patterns is ridiculous, but in a knit it's upsetting.  Negative ease, people! Cutting off the fabric, in turn, affected the drape of the peplum, but I can deal with that.  Just argh.


And the pattern illustration looked so promising, too!  One of my friends made it, and she looks awesome in it!  I asked her about the fitting, and she admitted to ignoring the measurements and just making the smallest size regardless.  So much for following instructions!  Hah!


Well, it's a non-maternity, non-nursing top and I need those so I'll keep making them!  Next on my list is Colette Pattern's Moneta.  We'll see how that one goes.  They're a bit more conscientious about modern fit, so hopefully I won't have to make too many changes to the pattern.

⁃ Fabric: grey and cream stripe knit
⁃ Pattern: Vogue V9056
⁃ Year: contemporary
⁃ Notions: twin-needle
 Time to complete: 4 hours
⁃ First worn: this week
⁃ Wear again? Yes, but with reservations.
⁃ Modifications:  bodice dropped, side-seams taken in

UPDATE
March 19: I made a rookie mistake.  I forgot to wash the fabric before sewing, but in this case it's worked in the favor of this piece and it fits really well now!

A New Year’s Post

Each year, I start by looking back at the previous year and making goals for the year ahead.  This year is no different in that sense. I started by reviewing the work I had made, etc. but, I feel like I am in such a different head-space than I was a year ago.  Everything has changed.  My eyes have a razor-sharp focus on the prize, and the stakes feel so much higher now that I have a baby.

Last January, when I made my list for 2014 I was well into my pregnancy, but I could only imagine my future as a mom in a really vague way.  Here were last year's goals:
1) make some art:  get back into pen and ink, finish digital illustration commissions
2) make some things with yarn: finish hand-knit projects, use machine to stash bust
3) make some things with fabric: continue on the quilting and sewing goodness track
4) blog more efficiently and step away from the internet traps (facebook and cheesy news sites) 
With that nesting energy, I made things like there was no tomorrow.  I hit all of my goals - made some art, knit by hand and by machine, quilted baby F's zig-zag quilt, and blogged more efficiently.  I think I was kind of scared that there wouldn't be time after the baby came.  My fear of having no time to do anything was somewhat justified.  Luckily, I think F is very healthy and pretty independent, so that affords me snippets of time to work here and there when he's playing or napping.

Clockwise from top left: Mitered Detail Cardigan, Ottobre Nursing Top,
Wind & Storm Pullover (now lost at sea!!), Ottobre Kids, Laren Mitts, and the cover of Knit Now

Clockwise from top left: my entry for an artist's book collaboration, Ottobre kids, "playful" hand lettering, quilted zip bags, steeked fairisle vest, knit baby romper from Deramores, and Oktoberfest dirndl skirt & apron
Now I'm looking forward to 2015, and that same innate sense of urgency that came with pregnancy remains in my system.  Maybe it's the hormones? Whatever it is, I feel like I must create right now -- now or never!!  Yes, it's that dramatic a feeling.

Anyway, without further ado... my goals for the coming year:
  • Find my personal illustrative style, and figure out how/where to sell my art work.
  • Sew a few new non-maternity knit tops for myself.
  • Make another quilt.
  • Create another font.
  • Knit a bit.
  • Be a good mom.  (!!!)
Kind of a mixed bag of goals, right?
That last goal is so huge, it threatens to take over my brain. So, in the spirit of getting things done, I break down each goal into action-oriented tasks.  In terms of motherhood, what that means for me, is that I just take it one day at a time.

Happy 2015, everyone!  May it be a great year.

A New Year’s Post

Each year, I start by looking back at the previous year and making goals for the year ahead.  This year is no different in that sense. I started by reviewing the work I had made, etc. but, I feel like I am in such a different head-space than I was a year ago.  Everything has changed.  My eyes have a razor-sharp focus on the prize, and the stakes feel so much higher now that I have a baby.

Last January, when I made my list for 2014 I was well into my pregnancy, but I could only imagine my future as a mom in a really vague way.  Here were last year's goals:
1) make some art:  get back into pen and ink, finish digital illustration commissions
2) make some things with yarn: finish hand-knit projects, use machine to stash bust
3) make some things with fabric: continue on the quilting and sewing goodness track
4) blog more efficiently and step away from the internet traps (facebook and cheesy news sites) 
With that nesting energy, I made things like there was no tomorrow.  I hit all of my goals - made some art, knit by hand and by machine, quilted baby F's zig-zag quilt, and blogged more efficiently.  I think I was kind of scared that there wouldn't be time after the baby came.  My fear of having no time to do anything was somewhat justified.  Luckily, I think F is very healthy and pretty independent, so that affords me snippets of time to work here and there when he's playing or napping.

Clockwise from top left: Mitered Detail Cardigan, Ottobre Nursing Top,
Wind & Storm Pullover (now lost at sea!!), Ottobre Kids, Laren Mitts, and the cover of Knit Now

Clockwise from top left: my entry for an artist's book collaboration, Ottobre kids, "playful" hand lettering, quilted zip bags, steeked fairisle vest, knit baby romper from Deramores, and Oktoberfest dirndl skirt & apron
Now I'm looking forward to 2015, and that same innate sense of urgency that came with pregnancy remains in my system.  Maybe. Whatever it is, I feel like I must create right now -- now or never!!  Yes, it's that dramatic a feeling.

Anyway, without further ado... my goals for the coming year:
  • Find my personal illustrative style, and figure out how/where to sell my art work.
  • Sew a few new non-maternity knit tops for myself.
  • Make another quilt.
  • Create another font.
  • Knit a bit.
  • Be a good mom.  (!!!)
Kind of a mixed bag of goals, right?
That last goal is so huge, it threatens to take over my brain. So, in the spirit of getting things done, I break down each goal into action-oriented tasks.  In terms of motherhood, what that means for me, is that I just take it one day at a time.

Happy 2015, everyone!  May it be a great year.

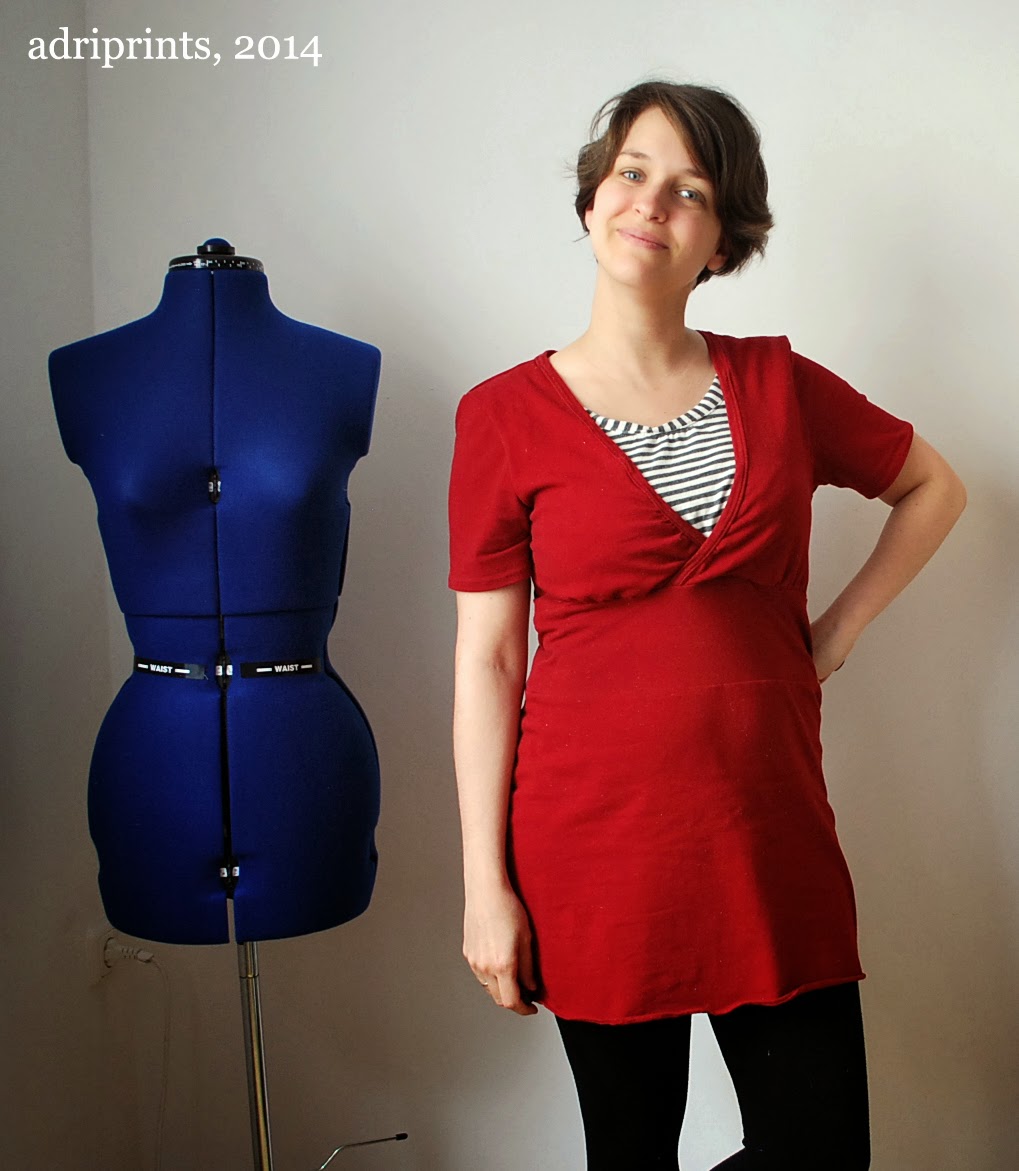
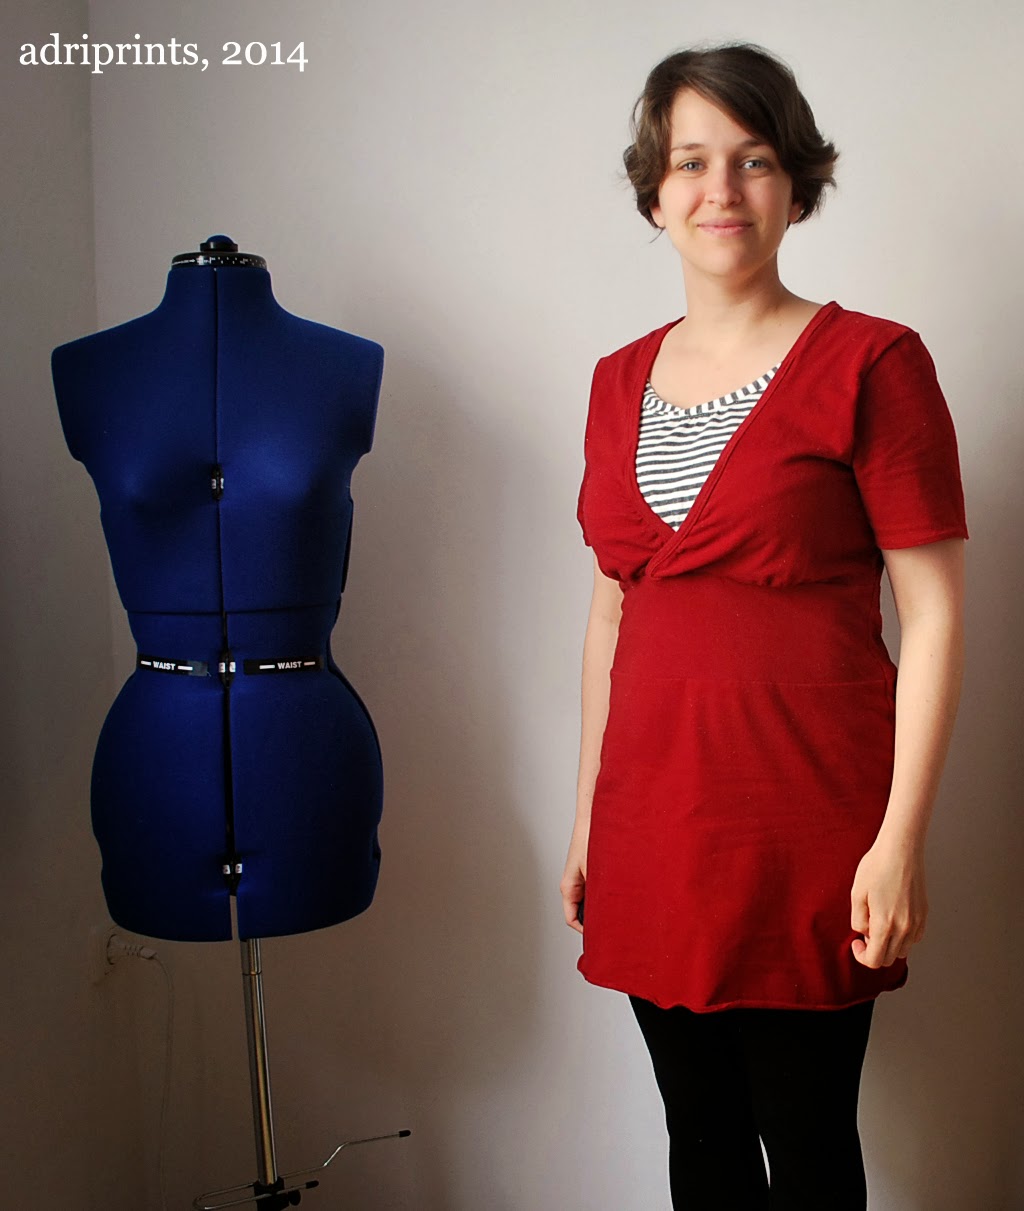
Nursing Top from Ottobre 2009


With my post-partum body changing so quickly, and the baby growing so quickly, I debated whether to sew anything for me for a while.  I started eyeing that red maternity/nursing top I made in the spring which was too big for me now.  I stared at it for weeks.  Then, a sewing buddy of mine offered to lend me a nursing top pattern she had in one of her older Ottobre magazines, and that was the clincher.  Chop-chop went the too-big nursing top!

I'm glad I decided to cut it up... I used up every bit of that tee, and finished off the rest of that thick red jersey fabric.  I didn't have enough for the inner panel, so I used a bit of this lovely stripe jersey I bought from a fabric store closing sale.  Glad I bought 2.5 m of it!  It's so soft!


Do I look maybe a bit tired in these pics? That would be because I am.  Hee hee. Somehow, the LD (little dude) started teething at 12 weeks and I've been coping with all that entails.  He's generally the sweetest little sweety, but when he's teething he turns into a puddle of moaning sadness.  It's heartbreaking and so I can't help but comfort him... at 2am... at 3am... at 3:30am.. etc...

So yeah, a bit tired, but it's getting better, and LD is learning to cope better.  I also have many more tricks up my sleeve now that it's been a few weeks!

---
Anyway, about the project:
PatternOttobre 2009, #6 "Loving" Nursing Top
Fabric: recycled red jersey from maternity/nursing tee made in May 2014
Modifications: shortened the sleeves 1", but I think I just need a smaller size on top
Recommendations: instructions for the innermost panel say to turn over the nursing edges and stitch, but I think this reduces the stretch of the fabric.  I'd overlock this edge instead.  I turned over the bottom edges and used a rolled hem foot... this is not a good application for it.  The jersey loves to roll, and it made for a curly half-lettuce bottom hem.

The pattern is a very straightforward 7 piece pattern (you cut the binding, elastic, etc. based on given measurements).  I made an EU size 40 using my full bust measurement.  Next time, I'll cut a 38 top, maybe even a 36 for the shoulders and sleeves, and keep the bottom 40.  It's easy to adjust since there's a separate waist section.  On me, though, this is more of a nursing tunic dress. I'll be making some adjustments, but I like the dress aspect of it.


The trickiest part of this pattern was the clear elastic!  My machine loves it to the point of squishing it all together and creating these teensy, tight gathers which I did not need for this particular pattern.  In the end, I found the solution to be paper!  Once I put the thin pattern paper between the foot and the elastic, everything went swimmingly... okay, not quite - that binding went a bit wonky, but I can live with it. 


This went so quickly after figuring out the best way to sew with clear elastic!

Overall, I'm happy with it - it's wearable, but the shoulders/neck are wide for me... it's tough to choose a size with such a variable bust measurement, but the jersey should be forgiving enough to allow me to make a smaller size top.  I will definitely make another!

Recipe for a Snowy Weekend: Cinnamon Shortbread

I love to bake, but don’t do it often enough. So, when Susan asked me if I would like to try out some recipes using King Arthur Flour Flav-R-Bites, I don’t think she had even finished her question before I said yes.

The first question was what to test them in, and I decided that I should keep it simple, so that the bites would stand out and I could see what they added to the recipe. One of my favorite basic cookies is shortbread, which I have found is a great base for adding flavors.

When I was younger, my dad and I would make shortbread around the holidays for when friends would come by. Then, as time past, we started giving it as gifts. Eventually, my dad and I became shortbread slaves between Thanksgiving and New Years. Every day brought a fresh list of people we simply had to give shortbread to! My mother is a very generous person. After a while I got sick of the sight and smell of my once favorite cookie. At some point the Shortbread Sweat Shop closed. For years I couldn’t look at shortbread in any form. Then one day someone gave me a piece of packaged shortbread, Walkers if you must know, and I ate it to be polite. My love was instantly rekindled! I called my father and got the recipe that we had made thousands of times and began making that classic, dense shortbread again.

The shortbread that I made when I was younger was the hearty shortbread that comes in thick squares made by pressing the dough into a baking pan. I hadn’t really every seen a dainty shortbread cookie until I worked at the restaurant at the Takishamya department store where I made their green tea shortbread cookies. This was the first time I had made shortbread that was flaky, from the powdered sugar, and added flavor, the green tea. Honestly, I didn’t much care for the green tea, but I did experiment with other flavors, which was fun, and a really nice variation for the return of the holiday shortbread baking.

Before I picked up the Flav-R-Bites I wanted to make sure that I had a really good shortbread, a combination of the flaky and the dense. After several test batches, I found the combination of granulated and confectioners’ sugars that gave me the texture I wanted. Then, I added the Flav-R-Bites and wow! These things are great.

Cinnamon Chip Shortbread
2 sticks sweet, unsalted butter at room temperature
¼ cup granulated sugar
½ cup confectioners’ sugar
2 cups all purpose flour
1 tsp salt
1/3 cup King Arthur Flour Cinnamon Flav-R-Bites* ($7.95/16 ounces)

Butter an 8”x8” square tart pan or baking dish.

Beat the butter and sugars together in a mixer with the paddle attachment until they are fluffy and light in color.


Meanwhile, mix the flour, salt and flav-r-bites together in a bowl. I like to use a whisk for this as I find that it mixes well and fluffs up the flour.

Add flour mixture to butter mixture and starting on slow speed so that the flour doesn’t fly into the air, combine until the dough is just uniform. Do not over mix or your shortbread may lose some of its eventual flakiness.

Press dough into prepared pan or dish and score into squares or rectangles with a butter knife. If you forget to score the dough at this point, it’s really not a problem.

Chill for 1 hour, then place in a preheated 300 degree oven for 1 hour until just golden brown.

Allow to cool a bit before slicing along scored lines. Once the shortbread is out of the pan, continue to cool as long as you can resist eating it.

This shortbread is wonderful warm or completely cooled. If it lasts overnight, the texture changes and becomes a little crumblier, but they are still just as amazing as warm out of the oven.

*We also tried this same recipe with the maple Flav-R-Bites and we love it just as much.