Tag Archives: WIP

The DIY Mojo is Back!


Watch out! I'm getting that itch to make clothes again! Bought a sewing pattern after receiving some lovely new fabric from a friend. Bought yarn for the first time in over a year, and am now putting together some new DIY projects. 

Knitting:
Sadly our local LYS, the Loop & Leaf is closing, and Celeste the lovely owner of the shop had to sell all her yarn stock to prepare for the sale of the building. This meant steep cuts in price to the yarn and so I bought two small lots of yarn: 5 skeins of Juniper Moon Farm's Zooey and 7 skeins of Berroco Maya. We didn't have any stockists in Germany who carried Juniper Moon Farm or Berroco yarn so I was happy to finally get to try some of the more American brand yarns in warm-weather varieties. The Zooey is a cotton/linen blend and the Maya is a cotton/alpaca blend (chain structure).  I don't have too many warm weather yarns so it was perfect.

My first swatch in over a year! (Juniper Moon Farms Zooey)

Berroco's Maya yarn

Sewing:
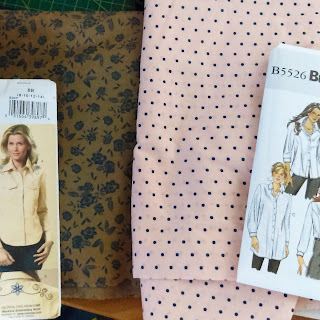
We took a short trip to Germany, and I was able to catch up with friends. One of my friends is going super-minimal-no-waste in her household so she foisted some beautiful fabric on me (see the first pic). It didn't take much to convince me to take it! I want to make a blouse and a skirt for work.

Quilting:
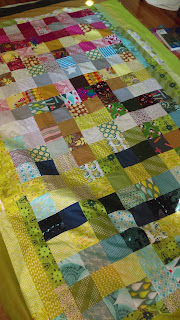
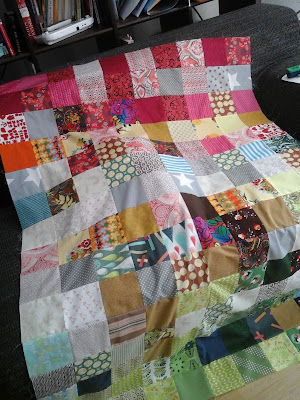
Finally, I finished both sides of the fun "blue-green" patchwork quilt I started last year. So now all that's left is the actual quilting!


And that's what's happening in my craft-room (which is also the living room and art studio and general multi-purpose room)!

Super Simple Patchwork Quilt WIP

How do I deal with the stress of moving internationally?  I multitask like crazy, make lists, post stuff for sale... and do a simple patchwork quilt to deal with the need to do machine-like sewing and stash-busting.

Saturday...

4.5" scrap squares that have been hanging around for a while

later that day...

sewn into strips

and today!
nearly done with the quilted top

I still have five more rows to add, then sashing, then quilting!
Lots of progress!  Hurrah for the feeling of pseudo-accomplishment!

Floridiana: Behind the Scenes Part 2


I first signed up for Bonnie Christine's Surface Pattern Design 2.0: Start a Career Skillshare Class in April, but I kept a diary of my process, and thought it would be nice to share with you all, my readers.  This is Part 2 of 2 explaining my process behind the Floridiana surface patterns.

May 4, 2015

My first go-around at putting the patterns together with Palette #1(warmer colors)... I think I need some with more patterns with open space.  I see now that I tend to make very "busy" patterns.


 May 6, 2015
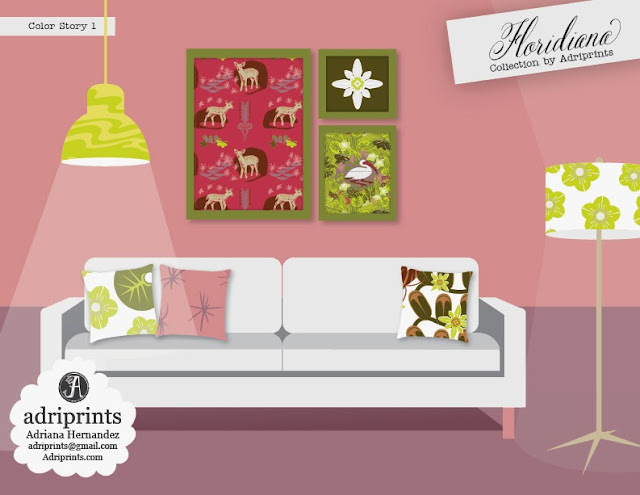
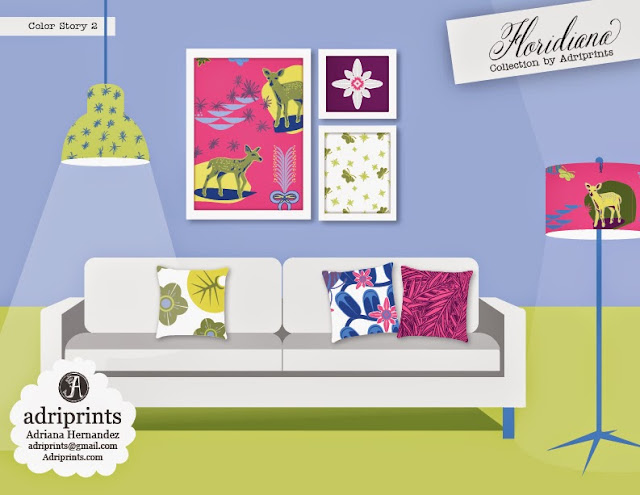
I tried my hand at doing  a room mock-up, and yes, confirmed that I need some patterns with less "stuff."  Okay!  Will do!


May 6, 2015: Finals Uploaded
May 7, 2015 - Edited Images for naming consistency
With so many patterns in the collection, I found that I had to go back and re-check to see if they were all exactly the same in all the final documents.  Maybe next time I will choose simpler names!

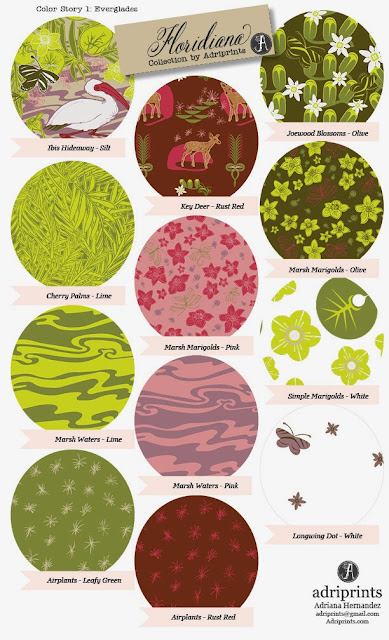
Color Palette 1: the Everglades (warm colors)


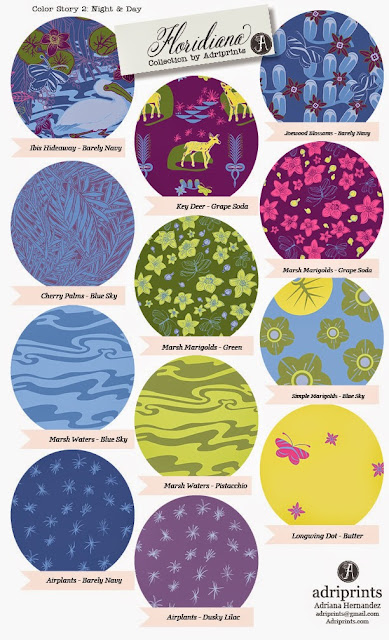
Color Palette 2:  Night & Day (Cooler Colors)


Mock-Ups
Some are better than others, that's for sure!  Here are my attempts at trying to pull a room together and  mocking up products using the patterns in the Floridiana collection. This is an area where I absolutely have room for improvement!


Phone Cover
Are custom i-phone covers really a thing?  I'm a bit behind in this trend.


Stationary
This mock-up excited me the most! I love paper and stationary!


Clothing
I think the KeyDeer print would make a lovely t-shirt... and dress, and skirt, and lots of other stuff too, but this post is waaaay long as it is.


Thanks for stopping by and making it through the entire project!

-Adriana


Floridiana: Behind the Scenes Part 1

I first signed up for Bonnie Christine's Surface Pattern Design 2.0: Start a Career Skillshare Class in April, but I kept a diary of my process, and thought it would be nice to share with you all, my readers.  This is Part 1 of 2 explaining my process behind the Floridiana surface patterns.

April 10, 2015
My hometown is a place full of contradictions.  I grew up in South Florida mostly in Miami, and being far away from it gives me some perspective on what a beautiful place it can be.  Lush, tropical plants grow everywhere: palms, hibiscuses, bougainvilleas, banyan trees, vines, orchids, and old oaks with Spanish moss hanging from them.  Wild parrots, ibises, and all kinds of birds made it their home along with the tiny, adorable key deer. It's not completely unheard of to find a gator in your yard, and/or see celebrities with their tiny dogs in their handbags.  Summer in Miami usually meant a long stay at the beach with your family... sardines on crackers, collecting seashells, water out of the cooler, running to the shade to avoid burning your feet, and do NOT feed the seagulls...
I'll see what kind of journey this reminiscing takes me...

April 15, 2015
First, a snapshot of our family.


All of these photos are from my family's albums.  Unfortunately, my grandma is not in any of these since she was usually behind the camera.   See what I mean about the palm trees?  Our backyard faced a canal that frequently had gators floating by.  We always had family over the house, and there was never a dull moment growing up.
If anyone else is working with family photos, isn't it hard to stop looking through all the photos?  I had to stop myself before I got too emotional.  I just wanna reminisce!  I miss my grandparents very much (they've all passed).   But, after mulling it over, I think I know what I'm going to draw now.

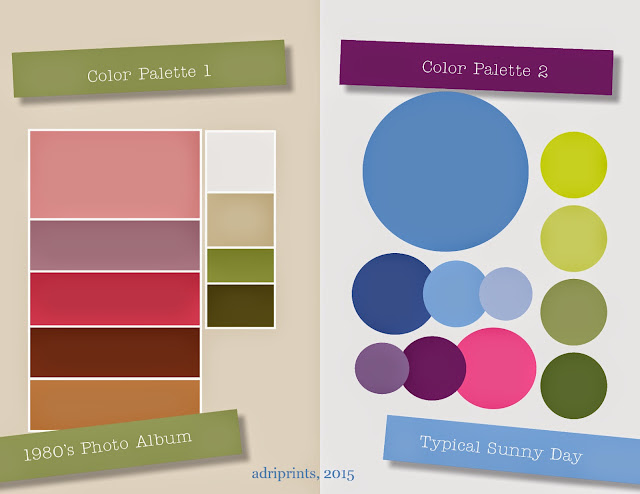
But first, an exploration in color.  My 2 (preliminary) palettes with colors directly from my family photos...
I've divided my colors between past and present which, in turn, created a warm and cool palette.  Handy!


Next, it's sketch time!

April 25, 2015
So I've been researching local Florida wildlife, flora, and fauna and started to sketch!  


I think I'm going to need to make a moodboard to help guide the style before I go digital.


April 29, 2015
I most definitely needed a style guide!  So I made one using my favorite print heroes.


April 30, 2015
And then I digitized and refined a lot of icons including lettering...


May 1, 2015
Working on the "hero" or main pattern, I chose to work with the ibis (instead of the key deer).  I may still do a repeat with the deer, though, since it's so cute.  But, here's what I did so far with the main one.  It really helped to have my style guides to help me figure out how I should lay out the ibis.


On the Sewing Table and Post-Pregnancy Body Reckoning

Do not fear, my fellow sewing enthusiasts, my sewing table has not gone unemployed these last few months; not entirely unemployed at least.  I signed up for Kid's Clothing Week which was two weeks ago and also Me-Made May as inspiration to get my sewing-mojo back and... wait, let me backtrack here... What happened to my sewing mojo? SEWING mojo, where are you?!  I don't yet have an answer for that.

I have been tracing patterns and cutting fabric, but haven't really finished anything!  I start a project, and then migrate back into illustration and leave these projects all folded in their little plastic tubs for days, and then weeks, and now months.  (sigh)

I have taken the first step, though, toward welcoming new projects and completing them.  I went through my closet and started the daunting, and somewhat sad task of separating clothes that will never fit me ever again. And, this (really sadly) included a lot of my homemade clothing.  It was pretty depressing to see the Bombshell Dress in the pile of clothes going to charity alongside all of my homemade jeans and trousers, and several dresses.  You see, my 3 main measurements (bust, waist, hips) are no longer the same as before pregnancy (no surprise to many of you), but I was totally in denial.  I thought that things would at least get pretty close to what they were, but there's no way that my waist or hips are gonna shrink in that way ever again, and it's been almost a year since the little guy was born.  So, it's time.

Oh, I want to tell you it's been so positive for me, and that I can easily see the silver lining -- that it's a way to start fresh and make space for projects and clothes I love -- but it's been hard.  It's been really hard actually, and if you follow my blog, you know that I'm a pretty positive person.  And well, my self-esteem has taken a pretty big hit.  I finally broke down this past week and bought new bras.  Not a single one of my old bras fit anymore, and it was a big first step toward acceptance of the new me.  Okay, I do have a silver lining, and it's that I'm now a pretty standard bra size which means I can find them in my size in pretty much any brand!  Yippee!

And, here's where I end my own pity party... right here! Done!

So, what am I working on?


Pattern: Streaky Legs, Ottobre 1/2015
Fabric: in sweatshirt, single jersey, and microfleece


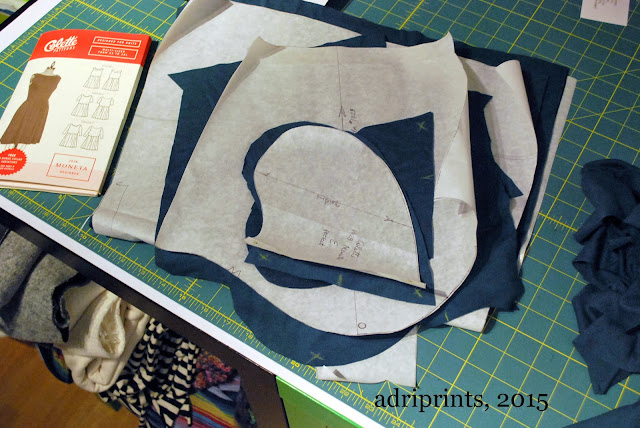
Pattern: Moneta, Colette Pattern 1028
Fabric: Dark Turquoise knit


Pattern: ??
Fabric: all kinds of quilting cotton already cut into squares

Remember these?  These were the remnants of the zig-zag quilt I made almost exactly a year ago!  I cut waaay too many squares thinking I was doing a rainbow HST quilt, but instead went with a zig-zag.  I have no idea what to do with them.  I've got colors ranging from brown/tan to bright yellow-green.  Do you have any favorite quilt patterns to suggest?  Let me know. :)

MATS A, Week 3 Picture Books

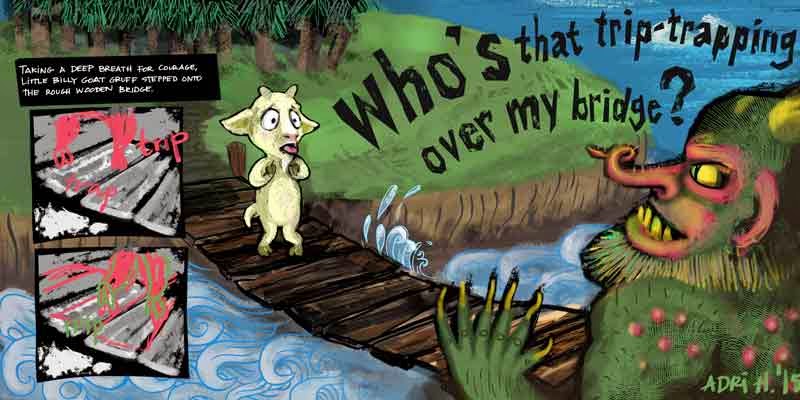
This week was a real eye-opener.  I've illustrated for books before, but never children's books, and that was the big theme this week.  It was exhilarating.  I had so much fun illustrating the goats and then the trolls, but I was left a bit sad afterward.  I want to keep going... I had so many ideas that I didn't get to illustrate for this one!!

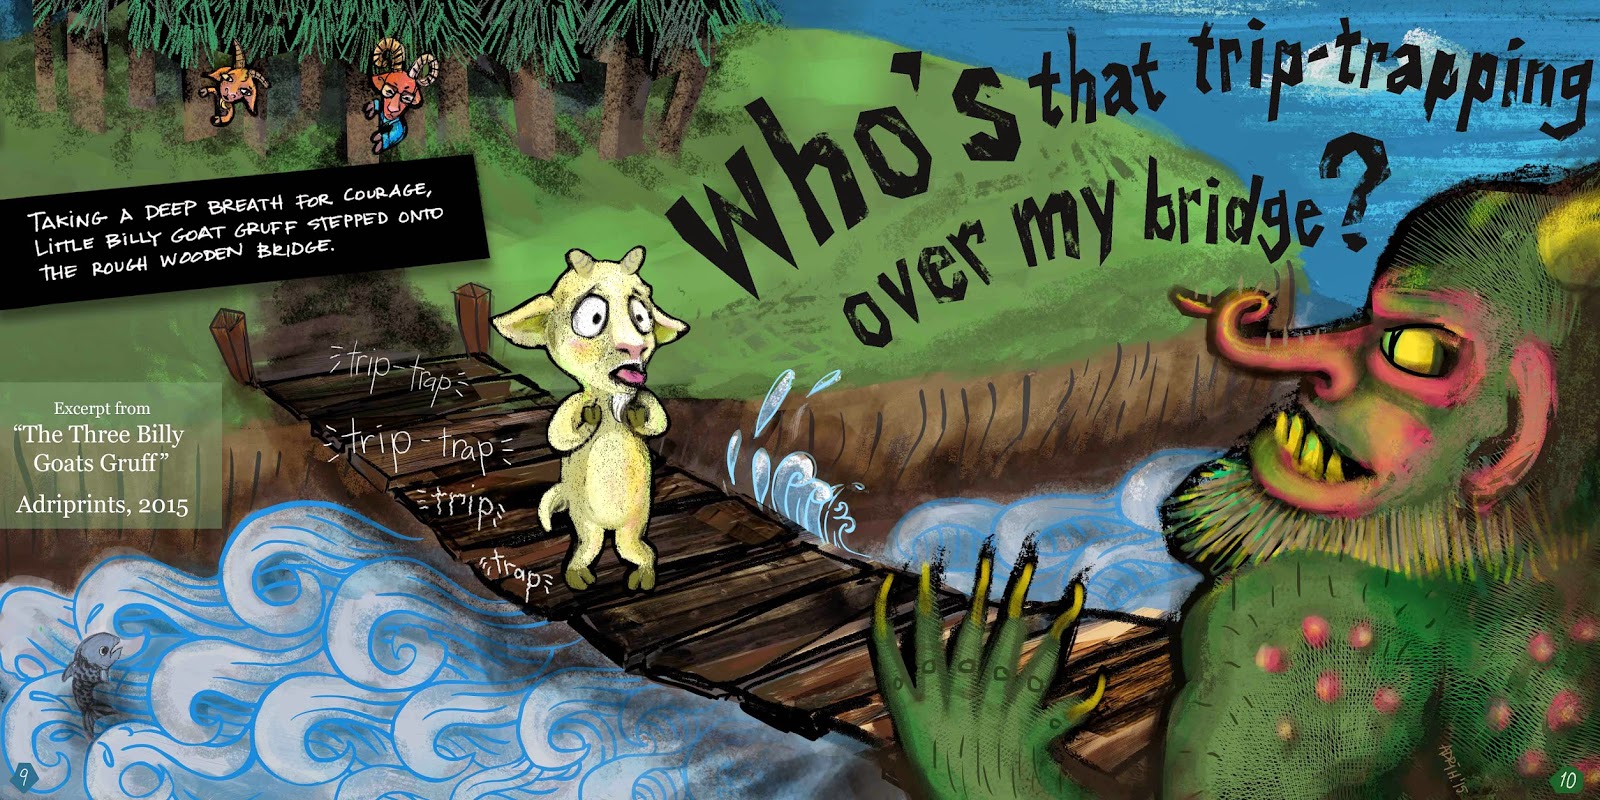
Let's get to the meat here... Here's my image.  I think it's fairly easy to figure out which fairytale this particular scene represents, but just in case... it's from "The Three Billy Goats Gruff".  It's when the littlest goat first meets the troll.


During my research phase (all of 30 minutes), I found out that goat farmers don't like calling male goats "billies" and they prefer the intact male goats be called "bucks" or "rams."  There you have it!  And, this story is really, really violent!  I cannot imagine illustrating the traditional story for super young kids.  I left that to my peers and they did some lovely innocent twists on the story.  I took the assignment as-is, and my direction aimed toward a bit older audience (kids maybe 8+ years old).

I thought it would be really cool to do a comic/graphic novel-type hybrid with the picture book and proposed inserting two panels to illustrate the fear and panic of the littlest goat, but my peers thought it took away from my illustration. The leftmost inserts would have been black and white and shown the hooves of the little guy as he first steps onto the bridge. Dramatic!!  I'd love to hear what you think!


I found that my scenic art background came in really handy in this assignment.  It's what I enjoyed the most.  I loved painting the background and creating the forest and the waves.  AAND, I especially loved doing the troll.  So much fun!  His back absesses and hair and six fingers, yellow teeth, etc. etc.  Had I more time to develop my characters I wanted to add a bat and mushrooms, dead animals, etc. to his fur.  So many ideas!

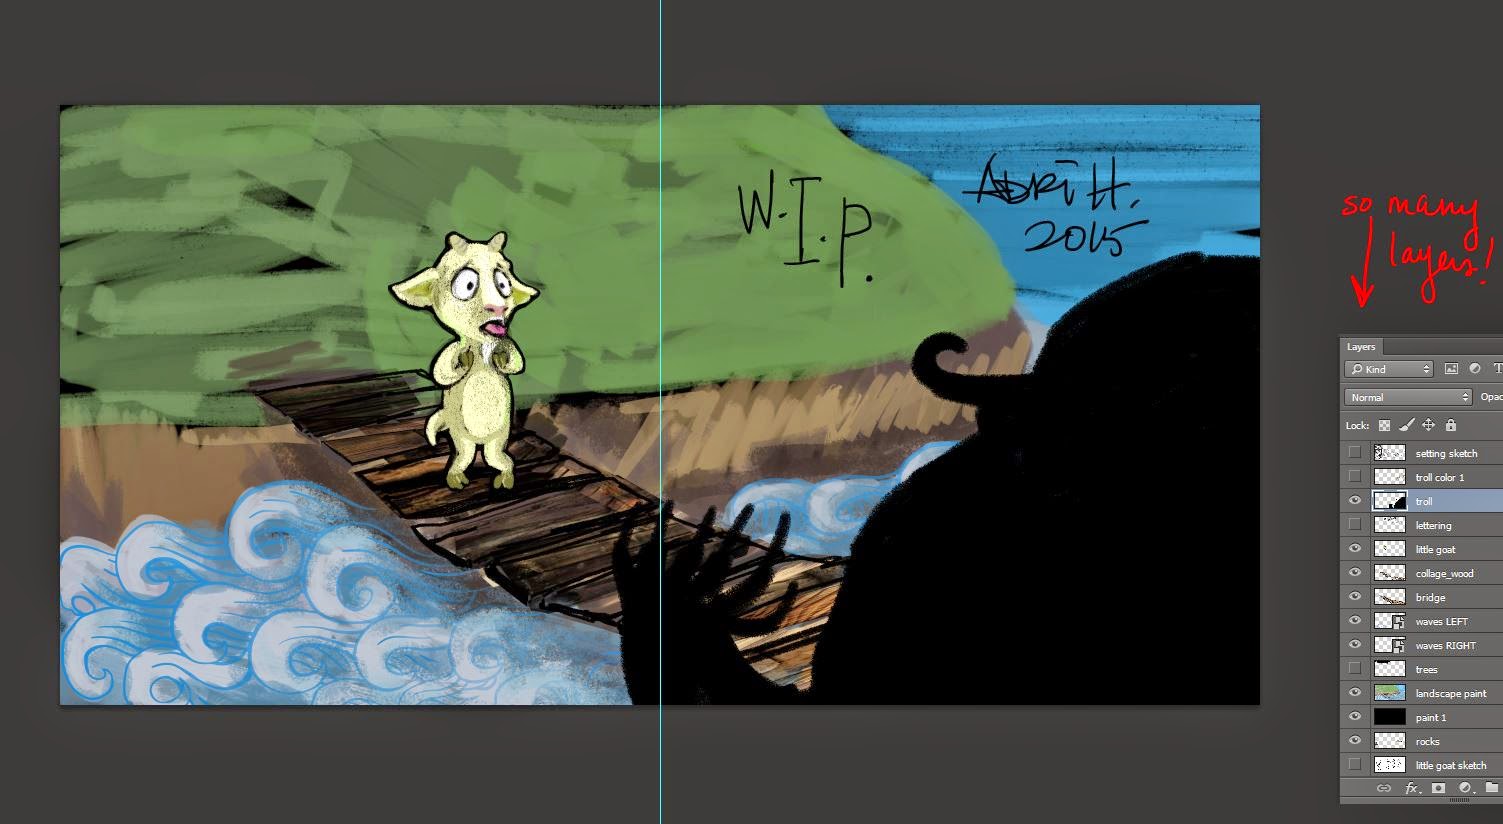
And, for my fellow artist and illustrator friends who are curious about my process...

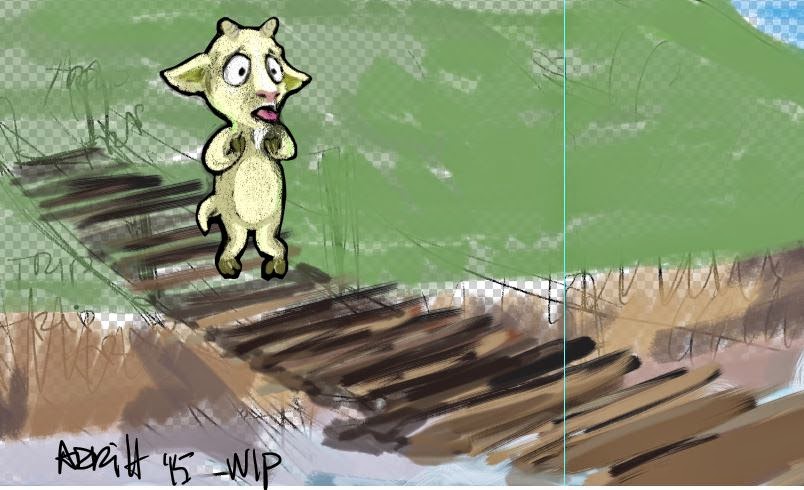
Here's are a few WIP screenshots...


And the character development phase...

These are the two fave pages of goats.  There were maybe 10 or 12 sheets full of goats. :D

"Friends" or maybe "Three's Company" meets "3 Billy Goats Gruff":

Baby Goats!!

This week's course materials were really great. The interview with Mike Lowery reminded me that illustrators are people.  Yes, I know, I'm an illustrator and also qualify as a person.  But, sometimes we make such a pedestal out of our dreams that we forget the daily steps it took for regular people to get there!  There was also an interview with a Hatchett Book art director which was really great for learning the process by which picture books become a reality.  It sounds lengthy, but I know a thing or two about that (see my knitting designs)!

Aaaand, this week's favorite for me was actually a bonus by Lilla.  She included this really great worksheet about dealing with self-critique and envy.  I'm constantly at odds with myself.  "Is my style good enough? Marketable enough?  Is it even a style?" All these doubts!  It's great to hear I'm not alone.  Although, it would also be great to have actual answers to these questions. HAH!  Whatever the case may be, I look forward to "Wall Art" which is next week's assignment.

MATS A, Week 2: Home Decor

Review of Week 2, MATS Part A which focused on Home Decor.


We started the week with Monday's Mini Assignment which was "go crazy with paisley!"  And I did!
I went ahead and went crazy doing different graphite illustrations on wacky paisley motifs thinking we were going to do bedding or bathroom textiles, maybe even upholstery or a room.  I imagined paisley swamps and bogs and that's where my head was when I started illustrating for this project... some kind of paisley pond world.

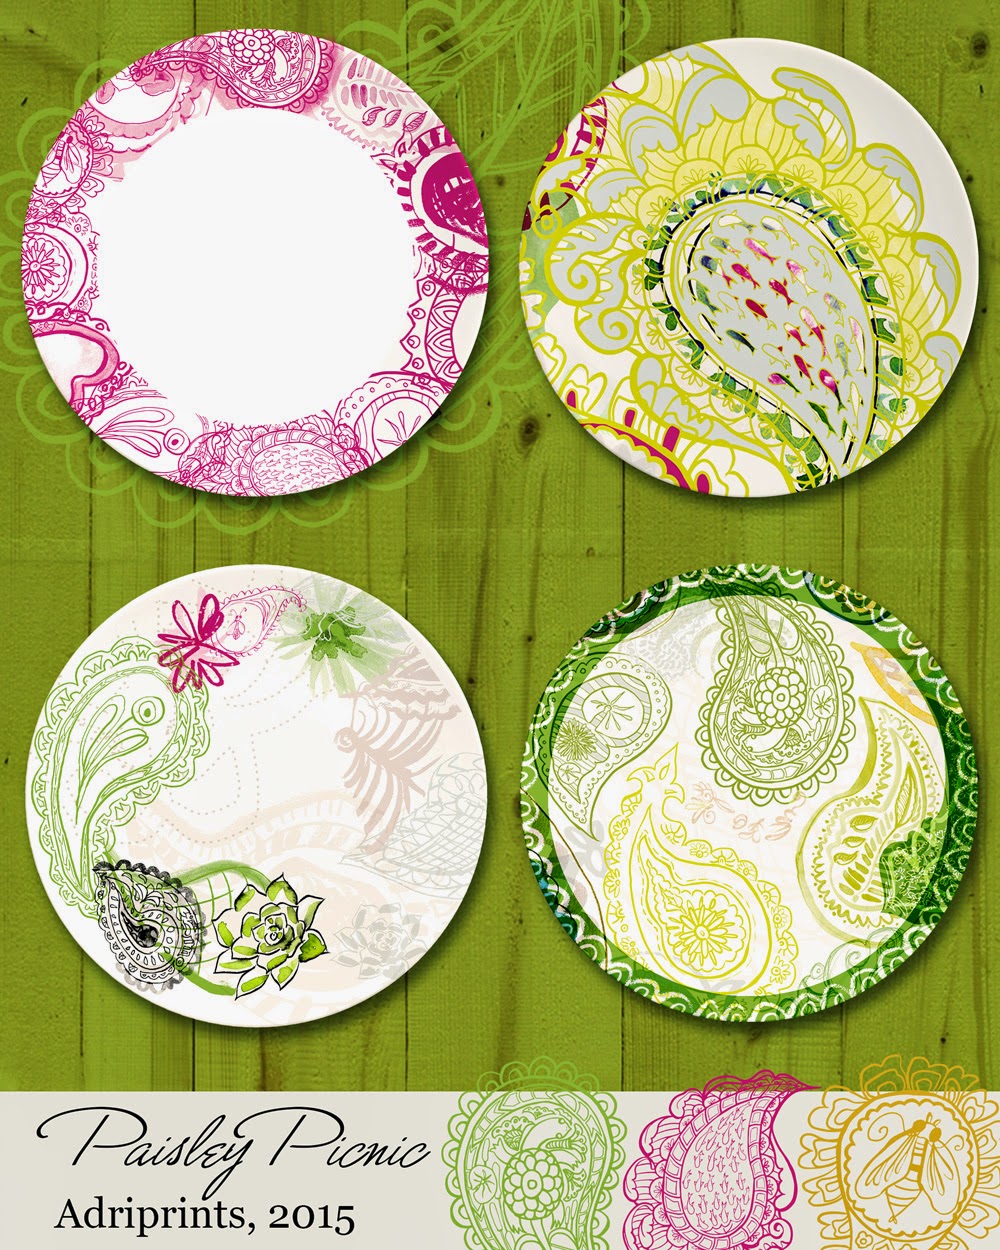
And then we got the main assignment: plates.  One of the worksheets that came with this week's assignment had this very important question when thinking about plates: Would you eat off of it?  My stomach had a sinking feeling when I came to that question.  It had never crossed my mind that we'd end up focusing on plates!  Some of my illustrations were not really food friendly... frogs eating flies, hungry anyone?!


It is a tough question, isn't it?  If it's a decorative plate, then no, I wouldn't eat off of it.  But, my utilitarian tendencies wouldn't let it go at that simple solution.  I couldn't just design decorative plates.  I don't own any purely decorative plates, and it was an important aspect of this week's project to be your own customer.  I worked through the designs until I felt that these were a series of plates I could see myself picking up and serving desserts or summer drinks or a festive picnic meal.  I learned this about myself - I am picky.

Here's the progression of one of the plates, the upper right one in the layout.

And then of course, there's the real-life stuff that kind of stressed me out.  We were traveling and we had no internet access, and I bought a hot-spot card to use the city's wi-fi, but it was spotty at best. Little dude was finding everything exciting and did not want to sleep or nap, which made it a bit of a a time crunch. We were at this ridiculous cloister atop a giant hill in a tiny town in Germany, and it was beautiful... but technologically desolate.

Thoughts on Week 2 Course Materials

With this week came a wonderful set of worksheets that had some great questions about this market and specifically plates.  These are the kind of questions that get you un-stuck when you've made progress, but aren't "finished".  I am treasuring them.  They're the "Hey did you think about this or that?" aspect of illustration.  I tend to sketch quickly and get things into the computer and then find myself all self-doubty at some point.  Those questions are invaluable!

The interview this week was with a Crate + Barrel art director and it was interesting to read how she makes decisions on artwork.

So, is the Home Decor market for me?  I think it could be, but I still like the puzzle aspect of bolt fabric better.  Home Decor felt like the ocean to me, and I like knowing where the edges of the pool are when I'm illustrating.  Maybe I'll feel differently depending on the item.

Also, a special shout-out to my fellow MATS-ians.  Thanks for your help pushing me forward this week!  I needed it.

Fairisle February 2015, Week 2

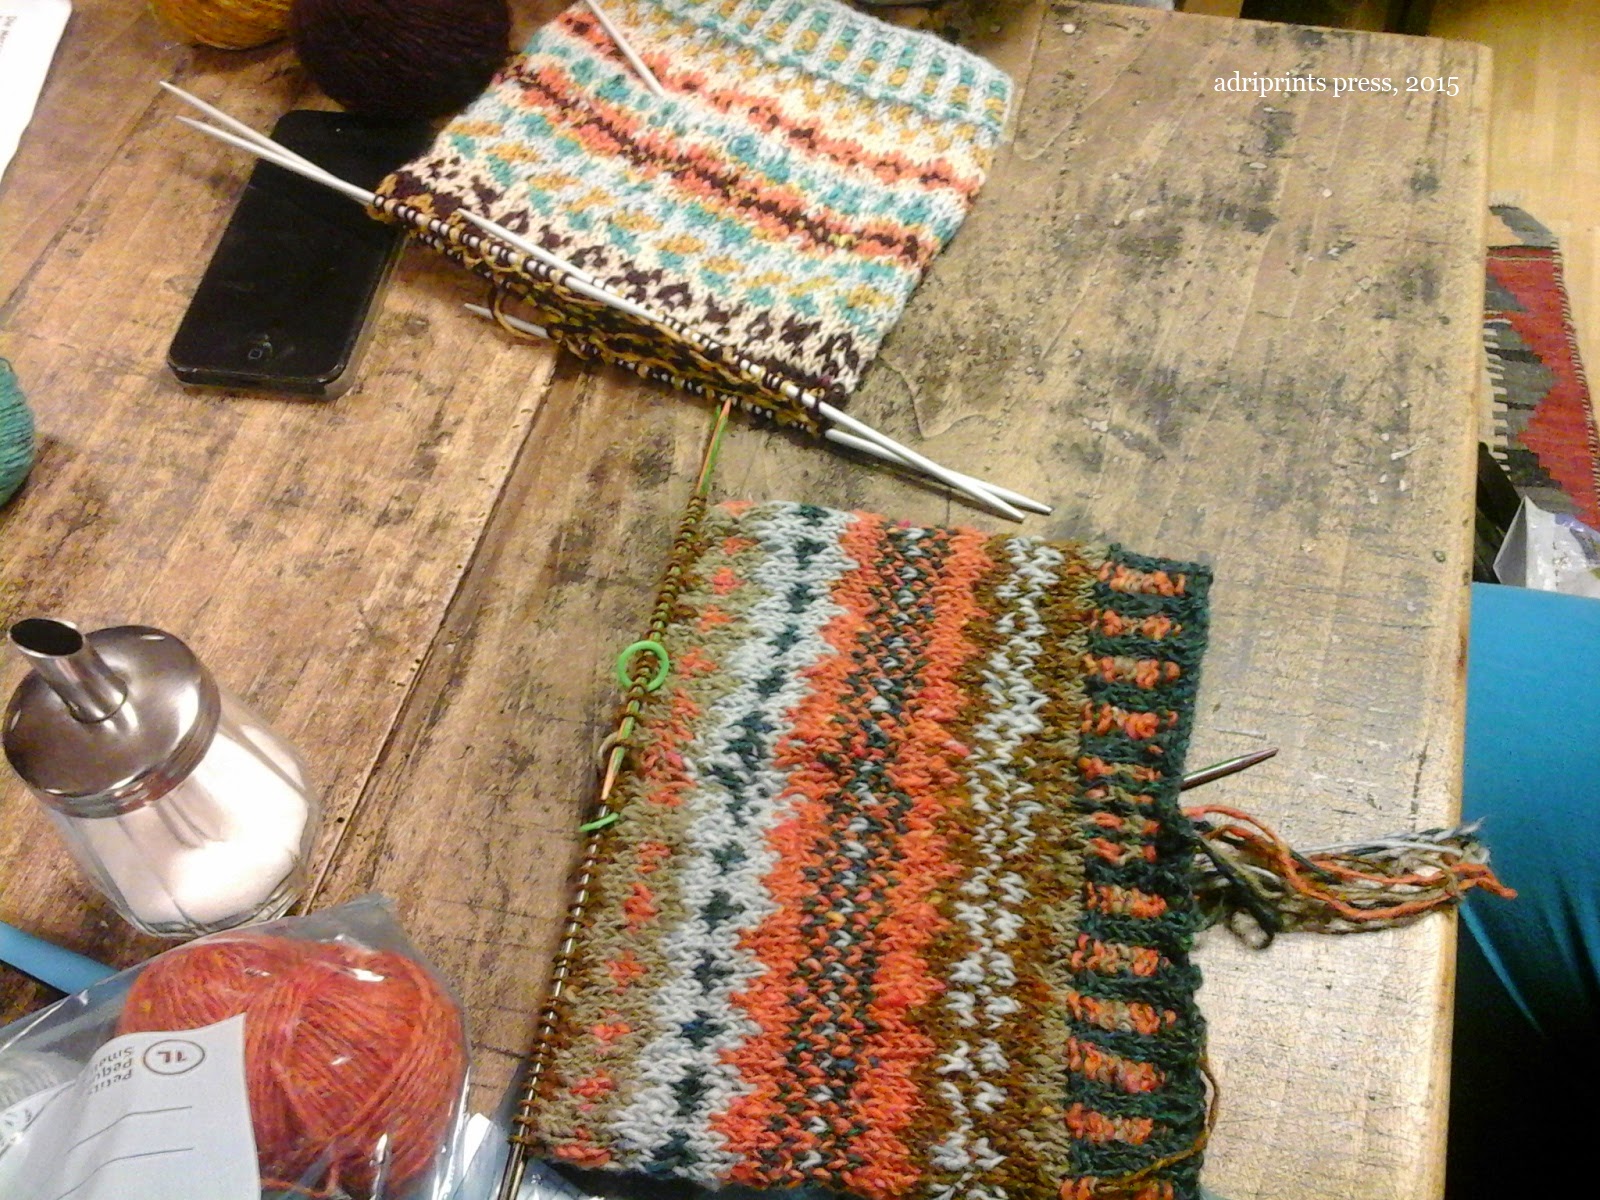
This week, members of the fairisle course had their first chance to STEEK!  Yes, we did.  We cut through our knitting.  And, we did it with impunity!  Hahah! (snip, snip, snip!)

Here are some photos from class...


I love their color choices!  Check out those beautiful palettes!


I was able to make some fairisle swatches using the knitting machine, and I am fairly certain it's what helped many overcome their fear of cutting through their knitting.  Amanda might recognize this yarn if she looks closely... thanks, Amanda!


Lots of students even decided to go the traditional route instead of doing the crochet support.  I think this group was especially motivated to cut their knitting.


Onesies! It’s a wrap!

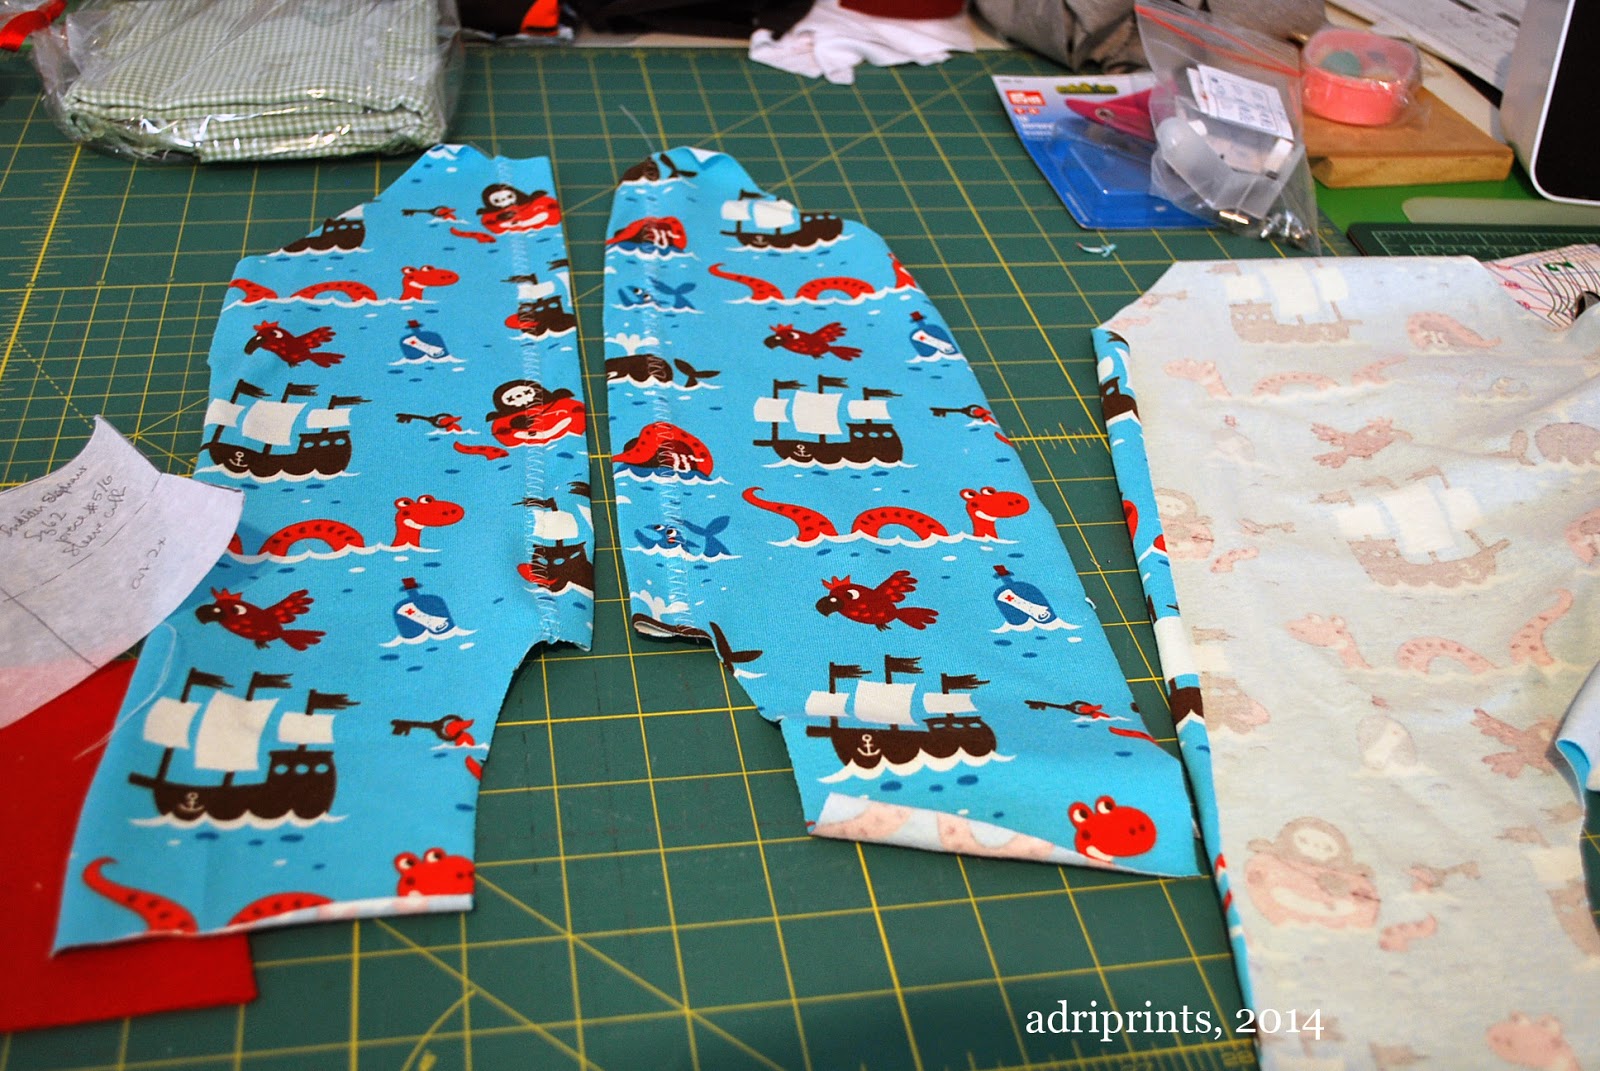
After two months with a baby, you start to prefer some types of clothing over others.  At this point, I prefer the kimono wrap-type onesies because they fit over the baby's head a lot easier.  In fact, you avoid pulling something over the baby's head altogether! Hee hee.  Inspired by this preference, I thought to make several onesies and an all-in-one in 2 sizes bigger than my baby's then-current size.  But, after lots of starts and stops, and a baby-growth spurt in between, I finally finished the sewing of the onesies, and they are actually his current size, and just slightly larger.  ((Insert "they grow up so fast" sentiments here))  I still have yet to install all the snaps, but alas, I've run out of them and am on the look-out for 8mm ring snap variety.  What's with me and the snaps, eh?

That one with the pirate fabric and red ribbing is my favorite so far!
Pattern: Warmly Wrapped from Ottobre 6/2014
Fabric: Organic Cotton jersey from Lillestoff in "Pirates" print
Notions: fine ribbing in red, a gazillion snaps, and stretchy interfacing G785 from Vlieseline/Vilene

Here's the all-in-one in progress...

\


WIP: Zig Zag Quilt & Mitered Cardi

This past weekend, I made so much progress, but alas, I did not finish the quilt.

I do have the quilt sandwich ready to go, and am strongly considering a straightforward quilt-job instead of FMQ'ing.  See, the sewing machine shop sold me a FMQ'ing foot for my new machine (more on that later), but I could not for the life of me figure out how to install it.  I don't think it actually fits my machine.  So, I'll go check on that sometime this week.  In the meantime, here's my progress!

I finished piecing the top...


Added a border and pin-basted it to the batting and back...


All I need to do now is quilt!

As for the second Mitered Detail Cardi, here's where I'm at...


I've got to sew the side seams, knit one more sleeve, and add the edging!  So close!

P.S. If you haven't already entered, there's a giveaway in the previous post!  Feel free to enter and win a quilted fabric pouch.